Having built the composting toilet, and are now presumably getting ready to use it, we need to work out what to do when the bucket is full. As I see it, there are three options –
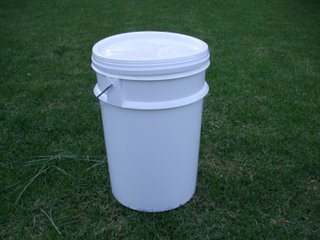
Option one is to have loooooots of buckets! Once a bucket is full, remove it from the toilet and stand it somewhere to compost, for 18 months to 2 years, after which it can be used on non-edibles or buried under trees etc or put into the centre of your banana circle and covered with more organic material. This presupposes lots of buckets and plenty of room. I must admit that when I was considering this option I was going to use the greenhouse to store the full buckets in, it can get above 50°C in summer!
Option two is the one in the Humanure system – enclose the output of the bucket in a functioning (and hot) compost pile. A hot composting process will kill off the pathogens so that you can use the compost in the normal way. At least that is the opinion of Joseph Jenkins who started the Humanure process.
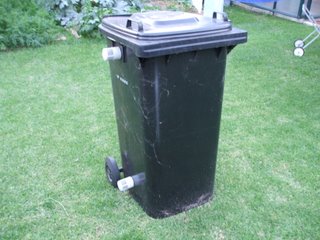
Option 3 is the one that I would explore. It involves a number of ventilated wheelie bins, black or dark in colour to absorb solar heat, that you put the output of the buckets into. To put together and install the ventilation to need to do as follows –
1.Get hold of 1340mm of nominal 50mm diameter PVC pipe; 4 x 50mm x 85 degree PVC right angle bends; 4 additional lengths of 70mm long x 50mm PVC pipe and 4 x 50mm vent cowls (with stainless steel gauze) for each wheelie bin you want to convert.
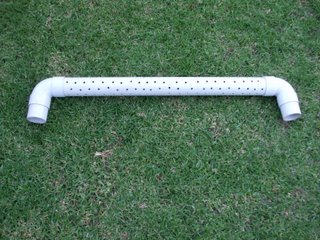
2. Cut the 50mm PVC pipe in half (ie getting 2 x 670mm PVC pipes) and then drill 6mm holes (lot’s of ‘em!) about 25mm apart to allow airflow into the ventilation tubes. I found it easiest to clamp the pipe in a vice then drill a couple of lines along the pipe, then turn the pipe through 90 degrees and do the same again until there are holes all the way round the pipe.
3. Install an 85 degree right angle bend onto each end of the pipe is the ends are facing the same way and install the 70mm long pipe into the other end of the right angle bend. Just pushing them in should hold them while you are setting things up, the gluing comes later.
4. Place the pipe with both right angle bends against the outside of the wheelie bin and mark where you want the holes to be, remembering that the pipe will be mounted inside the bin.
5. When you have marked where the Pipe is to go in, a 50mm hole saw and power drill makes short work of the side of a wheelie bin. If your anything like me (you poor thing if you are!) the holes won’t exactly line up with the ends of the tube and a wood rasp is very handy to remove a bit of plastic to get a good fit.
6. Glue the pipe assembly together (pipe; 2 x right angles and 2 x 70mm lengths in place using PVC pipe glue and let is set, it doesn’t take long.
7. Now it is simply a matter of putting the pipe assembly on the inside of the bin so that the end of the 70mm length protrudes from the side of the bin – affix the vent cowl with a screw rather than gluing it so that you can take it off later, allowing you to remove the pipe assembly cleaning. 
Find a place to keep your bin or bins (we have 3) out of the way but in the sun and dump in your unmentionable materials as soon as you create them. Once full leave each bin for 12 months to compost then transfer the much reduced contents – into the centre of your banana circle!
Happy Composting!


