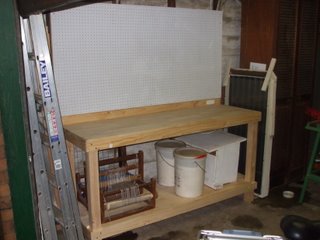
A sustainable lifestyle can be very interesting, rather than hiring people to do things for us we do them ourselves. There are many fun things to build like solar cookers, hay box cookers as well as garden activities like sowing seeds and potting on, and the inevitable maintenance on out homes and the stuff we build. All of this activity is made considerably simpler and easier if we have a flat working surface about waist height, that is to say, a bench! And I know what you are thinking – “If only I had a bench to build a workbench on!” Sorry, I know that is an old joke!
I have a number of benches in my garage two were bought and constructed by me, the other on was built from scratch by me. Building from scratch has a number of advantages –
• You can make it to your own specifications, designed to fulfil the tasks you want it to and to fit in the space you have allocated to it.
• Pre-fab benches are expensive and you can save some cash making your own.
• You can use what you have lying around, or at least you can use second hand or recovered materials, it’s your bench so you decide.
But now my lovely partner in the sustainable lifestyle has picked up an interest in woodwork and needed a place of her own in the garage to work. Consequently I cleared an area that was used for storing stuff, like my scrap steel collection I use for blacksmithing, relegating it to the back shed and measured the area to see what I could fit in.
I could fit in a bench 1800mm long and that is long enough to do some serious work on. Unfortunately my timber stocks were a bit low so I had to buy the top and the four legs, these were plantation sustainably grown pine, the rest was stuff I had left over from other projects. I had some 70mm x 19mm thick pine that I could use for the top and bottom rails.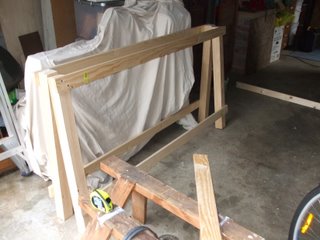
The legs were two 70mm x 70mm x 1800mm long timbers so the first job was to cut them exactly in half using my
circular saw. It didn’t work to badly but they were not exactly the same length (I’m just a wood butcher at heart I suppose) so I used my wood rasp and a 12 volt Dremel tool with a little sanding attachment to remove the excess and make them the same length.
I drilled countersunk and then attached the top and bottom rail to the legs with 25mm wood screws with the top and bottom rail overhanging the leg by 19mm so that when I put on the end rails, they would not show from the front and back. So this gave be two squares, the front and back of the bench, composed of two 70mm x 70mm legs and the 70mm x 19mm x 1800mm top and bottom rails. I then cut the top and bottom end rails to 562mm so that the finished top of the bench would be a nice and even 1800 x 600mm.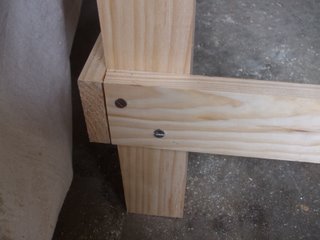
Once that was in place and screwed the same way as the top rails I put the top surface of the bench which was, as luck would have it, a piece of 19mm pine composite 1800mm x 600mm. You could use ply, or timber boards or just about anything else that will stand up to the years of abuse that a bench will cop. The top was drilled, countersunk and wood screwed down to the top of the legs and into the side of the top rails right around to ensure it was firmly attached. 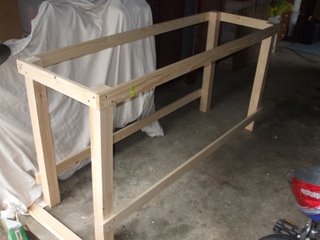
I was going to use two thicknesses of the pine for the top but in the end I cut out spaces for the legs from the second piece and used it as a shelf to sit on the bottom rails. After I had used the jig saw to make the cut outs I found out that it was too long to go in sideways and slip down into place.....bugger! It was at this point i was grateful to have screwed the top down so I unscrewed it and slid the bottom shelf in and down – it fitted first time, woo hoo! My measurements were a bit rough so I expected to have to play with it a bit but fitting first time was a bonus.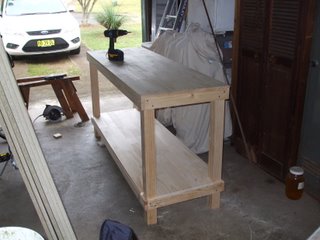
To give the bench stability I drilled and screwed it into the hardwood studs that make up the wall of the garage. I then fitted a 70mm high back board to the rear of the bench to stop tools or small parts being lost over the back.
So that she would have a place to hang “her” tools I got hold of 1800mm x 90mm x 3mm peg board, screwed a frame of 70mm x 19mm pine around the outside and then sat it one the top of the back board and screwed the whole assembly to the wall studs. She seems pretty pleased with the bench set up and you know what they say, happy wife = happy life.