


After some work and much discussion my son-in-law has built his own smaller and more portable rocket stove out of coffee cans and other types of tins. Below is his experience of rocket stove building!
Nev
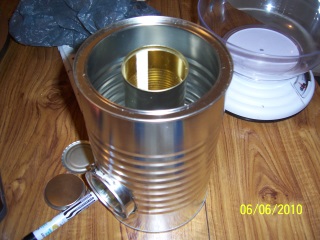
Make a list of materials you think you’ll need to make the rocket stove and then collect them. I initially intended to use two Alpen blend drinking chocolate tins and a 1kg coffee tin (free from work) but ended up substituting one of the chocolate tins for a longer asparagus can as the chocolate tin did not have the height.

I drew up circles on the 1kg tin and the chocolate tin which will serve as my combustion chamber. I removed the bottom of the asparagus tin with a can opener.
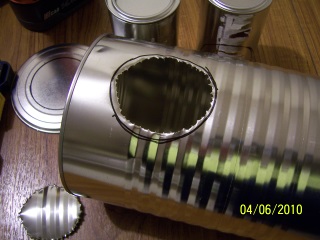
I then drilled 3.5 mm holes just inside the line marked on both tins and then cut out the circle with side cutters. After removing the cut-out I made small cuts every 2-3 holes to make the metal more pliable and pushed down the sharp ends into the tin.
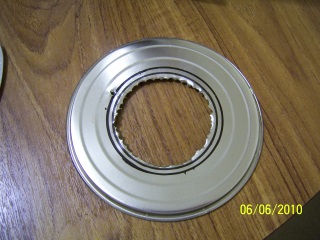
Draw up a circle using the asparagus can as a mould on the lid of the coffee tin. Then drill and cut out the mould as previously done.
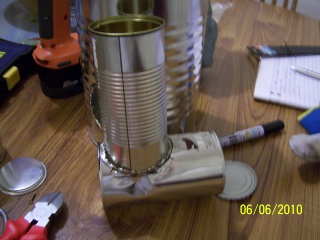
I then pushed the chimney (asparagus can) into the combustion chamber (chocolate tin) and fixed them together with two small screws.
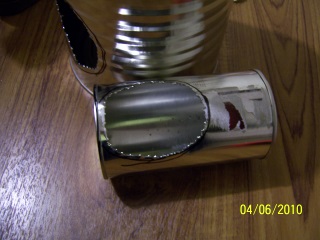
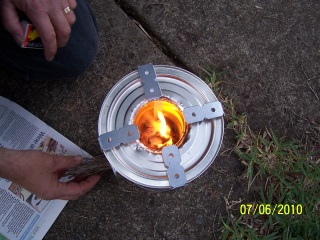
I took the cut-outs and fixed them together as shown to serve as a base for the combustion chamber and chimney until the perlite went in.
I glued the combustion chamber in place with a glue-gun (I know it wouldn’t last once the stove got going but I needed the extra support until the perlite and lid where in place). At least it was designed to be heated up and release a minimum of toxic fumes (Nev’s still alive).
I still needed to divide the fuel and the airflow so I made some cut-outs from a drink can, I know what you’re thinking the combustion chamber will reach up to 1000 deg C and more and aluminium will melt at around 660 deg C, but it was all I had on hand. Did some consulting with Nev on the firing day and going to make some modifications to the combustion chamber so I can fit a steel plate in there and still fit the lid on.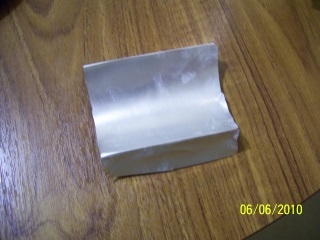
I made some pot stands out of a spaghetti tin but they proved to be too flimsy to hold a 2litre pot of water so a trip to Bunnings
was needed where I picked up the perlite and 2 pieces of metal with holes every 5mm which I cut in two to produce 4 brackets.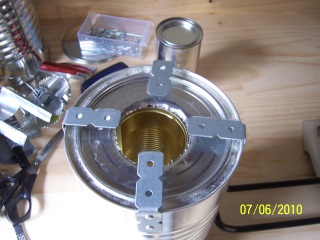
I marked up where I wanted to put the brackets ensuring I have enough clearance to allow for airflow I then drilled the holes in the stove and used pop rivets to hold them in place and then bend them down to the required height.
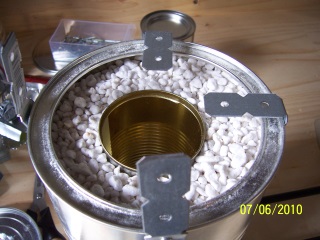
Tip: add in the perlite before you put on the brackets, luckily the brackets are pliable so I could still get the lid off.
With the perlite added it was time to find some fuel and fire up the stove!
Tip: use a pot/kettle that either your missus or the mother in law does not mind getting black.
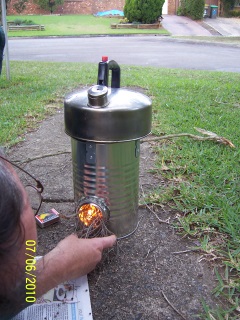
As Nev provided the kettle, fuel, some tools and some good advice he was the one to fire up the stove.
We used a whistling kettle with approx 1.5 - 2litres of water. It took around 15mins to boil the water. There was a fair amount of smoke, but that could have been due to the glue and fuel holder (aluminium drink can) melting.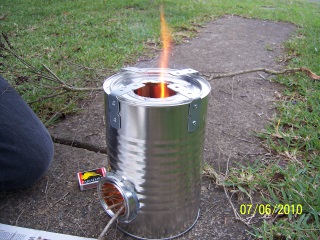
All in all it was a fun and productive project that used the minimum of bought materials that in my opinion worked out pretty well.
Also in the end I made Linda a cup of coffee with the boiled water (it had the old campfire taste to it) and cleaned the kettle after letting it cool a bit to hoping to ensure I stayed in her good books.
I am already drawing up plans for my 2nd and 3rd and 4th stoves. I have two more 1kg coffee tins and one 500gr coffee tin, might do the 500gr one first, would like to use 2 chocolate tins as initially intended.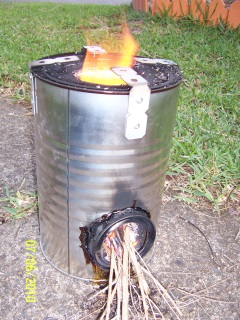
Kevin Mechelmans
