Introduction
We all know that we are supposed to have at least five serves of veggies a day and that the fresher the veggie the more vitamins their contain. There is always a “but” though. But what if you don’t have time, space or inclination to grow veggies? The obvious answer – get the hell off my website! Oops, sorry, forgot to take my medication today. The answer is sprouting seeds, beans and grains!
Sprouting seeds is one of those hugely good ideas that everyone should know about , it can provide lots of fresh, nutrient packed veggies in about 5 minutes per day once you are set up and the set up is so easy and simple even I can do it. If you have kids you can them involved in sprouting, if they are part of the process they will enjoy consuming the output even more. 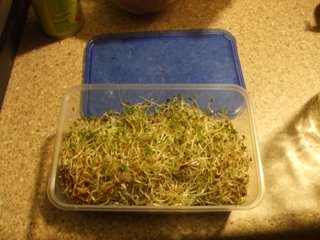
The basic process is to get hold of some seed and then keep them moist, but not wet so that they germinate and put on some growth, during which increase their content of vitamins by as much as five fold, then we eat them. Mung bean sprouts and alfalfa sprouts are the most commonly available sprouts commercially, mung bean in Chinese food and alfalfa (also called lucerne, as in the hay!) from the sandwich shop. But all sorts of seeds, beans and grains can be sprouted –
• Adzuki beans
• Barley
• Chick peas
• Wheat
• Millet
• Buckwheat
• Lentils
• Alfalfa
• Sunflower
• Fenugreek
• Sesame
• Cannellini beans
• Kidney beans
• Soy beans
• Most brassica seeds (cabbage; kale; broccoli etc.)
There is really only one absolute regarding sprouting – you must be absolutely sure that the seeds are not treated with a chemical such as a fungicide (added to stop damping off killing the seedlings) which will poison you. So either sprout your own seeds that you have saved or buy seeds from a reputable merchant who sell seeds that are OK for sprouting and direct consumption. I get mine from Eden Seeds (see the links section). The rest is easy.
If you are a gardener, you know it is good to let the brassicas sprout and flower once you have harvested them or if they get away and run up to seed, they attract beneficial insects. If you have a number of varieties flowering at the same time, however, you might not have the confidence in using the seeds to replant your veggies, they may have crossed and so not breed true. Even if this is the case you can still sprout them and eat the sprouts, it won’t make any difference to the flavour or nutrient levels.
One more sprouted product you may have come across is wheat grass ala Anne Wigmore. Wheat is sprouted until it has grown 10cm or so it is then cut and juiced to make an evil looking and disgusting tasting drink which is reputed to be very healthy for you. If you want to try it go ahead but I won’t be covering it in this article, you may have guessed it’s not my favourite thing.
Sprouting using a glass jar
There are a number of ways that sprouts can be grown but probably the simplest and easiest is to use a glass jar, other methods will be covered in later articles. To do this you will need –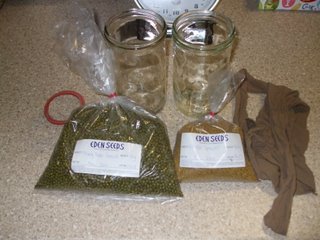
A glass jar (strangely enough) – I use an old fowlers Vacola bottling jar but any jar such as coffee, peanut butter or pickles (well decontaminated!) will do.
Some material to act as a filter – I use pantyhose liberated from the wife’s stock of holey ones (they were too small to fit me anyway)
A rubber band – I had some old Vacola preserving rings but a normal rubber band the right size will do. To grow your sprouts -
1. Check over your seeds and remove any broken or damaged ones.
2. Put a table spoon’s worth of the good seed that you want to sprout into your glass jar, pull a piece of pantyhose across the mouth of the jar so it is fully covered by the material and secure it with a rubber band.
3. Half fill the jar with water and allow it to stand overnight so that the seeds take up the water and swell, starting the germination process.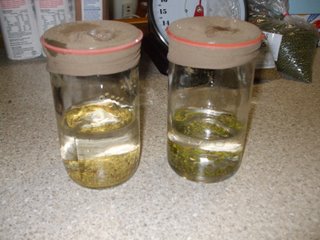
4. The next morning pour out the water (onto your pot plants, no sense wasting it!) and then leave the jar on its side with the rear elevated so the remaining water can drain out.
5. Leave the jar out of direct sunlight but in a warm area to promote germination. Check and rinse again after 12 hours.
6. Continue to rinse the sprouts twice or three times a day. As well as providing water to keep the sprouts germinating, the regular rinsing removes waste products and any stops the sprouts overheating.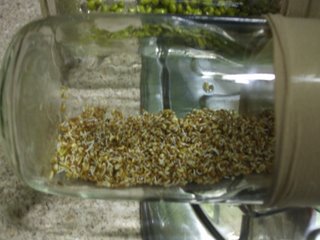
7. After a few days or when the sprouts have reached the length you like, rinse them one last time and remove them from the jar. Pick over the sprouts and remove any seed skins, any seeds that haven’t germinated and any sprouts that look a bit dodgy.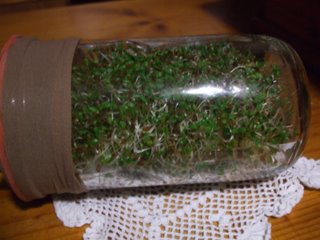
8. Transfer the sprouts to a container and keep them in the fridge, they are ready to eat!
Sprouts are great in sandwiches or wraps, to hold an omelette together or in stir fries or on top of your favourite soup. Sprouts are cheap and easy to grow, nutritious and you don’t need 5 acres to grow fresh veggies. Why not give them a go today?
There are other ways to grow sprouts and these will be explored in other articles.


