Alright ladies, feel free to turn to the other crafty bits of the website, this for the gentlemen only! OK men, what if I told you about a craft that –
1. involved some woodwork,
2. gave you an opportunity to play with dangerous chemicals,
3. saved you money by doing away with all those girlie smelling shampoos and girlie smelling conditioners,
4. Got you out of the clutches of the soulless corporations peddling you evil cleaning products,
5. was good for the environment,
6. was FUN!
I thought so!
Read on, and we will go on a journey together into the realms of D-I-Y soap.
The Soap Mould
This is where we get to the woodworking bit!
I made my soap mould out of 17mm formply, mainly because that was what I had hanging around but also because I figured that the smooth shiny surface would make for an easier release form the soap. Boy was I wrong! The soap stuck like the proverbial (excreta to a woollen bed covering) to the smooth shiny surface and had to be removed with a paint scraper, which didn’t do much for the appearance of the soap. We will talk about getting the soap to release later but for the time being I suggest that whatever timber you have of the required size will do.
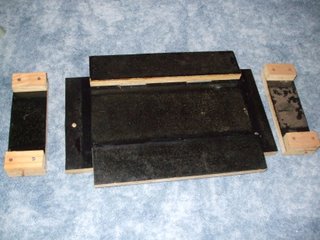
If you make a soap mould of the dimensions I specify it will fit exactly the batch size of the soap that appears later in this article. To make the soap mould you will need –
1 x base piece approximately 200mm x 400mm
2 x side pieces 300mm x 65mm
2 x end pieces 200mm x 65mm
4 x braces 19mm x 30mm x 65mm long and attachment screws
4 x hinges and attachment screws
4 x 40mm long flat head nails
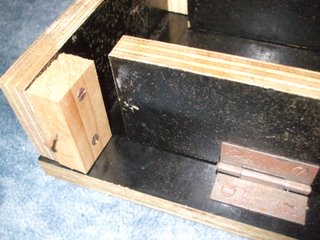
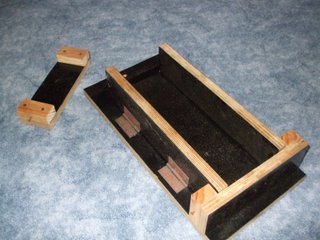
Place the sides of the soap mould onto the base so that they are parallel and the inside surfaces of the sides are 100mm apart. Set out the hinges on the outside of the sides and affix using screws that fit the hinges and don’t penetrate right through the sides or base of the mould. When you have it together the sides should fold outwards and lay flat on the base.
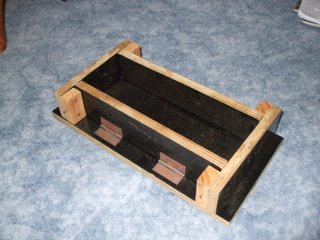
Place the end pieces at the end of the side pieces (this may sound confusing but I know what I am on about, ……..sometimes!) and then place the braces so that they sit each side of the side pieces, then drill and screw them into place. The mould now looks like an open topped box but the ends will fall off because there is nothing to hold them on yet. The ends need to be removable so that they can be taken off and the sides folded down to demould the soap block. To do this I drilled a hole in each of the braces through into the side pieces so that I could insert a flat head nail into each brace and it would secure the end pieces and stop them falling off. When it comes time to demould the soap just grab the nails and pull them out, pull the end pieces off and then fold the sides down, the soap block is fully exposed for easy removal. At least that is the theory.
Your mould is now ready to go so it is time to make our soap and I cover that in the next article.


