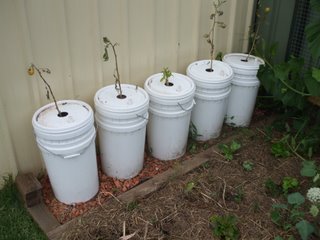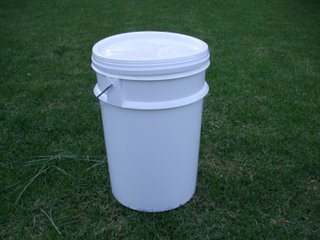
The rectangular self watering containers described in another article work very well for growing a number of veggies in the one container, but if you want to grow one larger plant like say a tomato, capsicum or eggplant then the 20 litre bucket (or buckets) may be the one for you. They are also quicker, cheaper and easier to construct and so are a good way to start out, plus you can make up as many as you want to plant the number of crops you want to grow. Needless to say recycled buckets are the way to go, cheaper and more environmentally friendly; we get ours from a local hardware that gets them from the delicatessen next door. They have been used to ship and store cheese curd so they are food grade and can also be used to store dry goods such as flour, grain, sugar or pasta etc if you want. Herbicide or pesticide buckets should not be used for this purpose (obviously).
For each container you will need –
- Two recycled plastic 20 litre buckets (complete with lids if possible, although you will only use one lid per container).
- One small plastic pot approximately 90mm (or a bit less) high by 100mm wide.
- One 500mm length of 20mm wide plastic pipe as a filler.
- Two cable ties.
- 20 litres or so of good quality potting mix, homemade if possible.
Plus the following tools –
- Hand or electric drill plus –
- One 6mm or ¼ inch twist bit (roughly, a bit bigger or smaller is OK)
- One 20mm spade bit (or at least a spade bit slightly larger than your filler tube)
- One hole saw, large as you can manage but 50mm is good.
- A jig saw with a blade designed to cut plastic
- 6mm (or so) hole punch and hammer
- Side cutters or scissors
- A black permanent marker
To make your container –
1. Take the container you intend to be the inner one and mark out where the pot is going to sit by placing it directly in the centre of the outside bottom of the container and drawing around it with your permanent marker. As luck would have it I could leave out this step because there was a raised plastic circle on the bottom of my containers that was more or less the same size as the opening of the pot I was using.
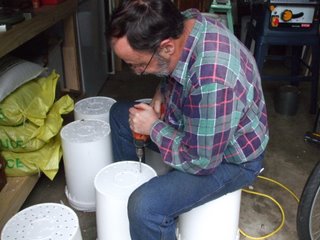
2. Then drill a whole stack of 6mm holes in the bottom to allow exchange of air and water where required and drill one hole on the inside of your marked line so that it is just touching the inside of the line or raised circle as it was in my case. Be sure to drill two holes on opposite sides of the centre circle to allow fitting of the pot. Also allow a 50mm or so area of the bottom of the container to be free of holes so you can drill the filler tube hole there.
3. Take the jig saw and poke the blade through the hole you drilled next to the centre circle and cut along the inside of the inner circle so that it is entirely removed and discard the bit you cut out, or throw it at your kids, either is good.
4. Using the hole punch, punch a few holes around the sides of the pot and two at the top, on opposite sides of the top. Using a hole punch in this case is generally easier than a drill of the pot has very thin walls like mine did.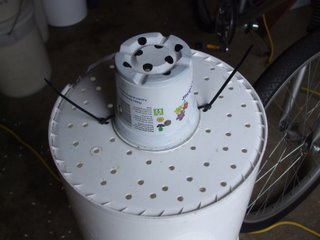
5. Fit the pot on the bottom of the inner container by placing it over the large hole and fixing it in place by running a cable tie through each of the holes at the top of the pot and then through the holes you drilled each side of the 100mm hole in the bottom of the container. Pull them up tight and cut the excess off with scissors or side cutters etc.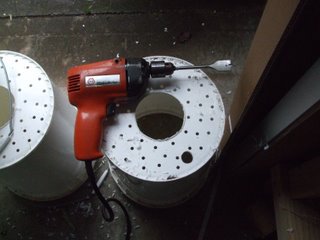
6. With the spade bit, drill a hole in the bottom of the container about 25mm in from the side in the area you left for it when you were drilling the 6mm holes. At this point you can also drill a 20mm hole in the lid for the filler tube to pass through.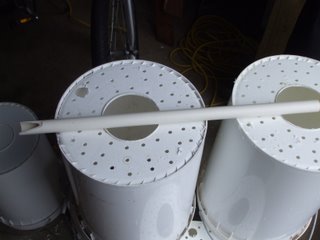
7. Take the filler tube and saw one side away at the bottom on an angle of about 30 degrees to the side so that water being run into the filler tube can get out into the reservoir quickly.
8. Insert the inner container (now full of holes and complete with fitted pot) into the outer container. Drill a 6mm overflow hole in the side of the outer container at the level where the bottom of the inner container sits. You can measure down or just take the whole assembly out in the sun and look for the shadow that the bottom of the inner container makes on the side of the outer one.
9. Fit the filler tube into the inner container. It should be long enough to travel down to the very bottom of the outside container and still stick up a centimetre or two above the lid when it is in place. In my case 500mm was perfect and allowed me to get two filler tubes from one 1 metre long section of tube.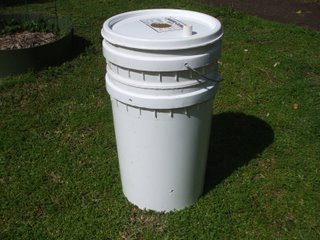
10. Drill your 50mm or so hole in the very centre of the container lid using the drill and hole saw, if you are lucky there will be a mould mark at the exact centre of the lid on either the inside or outside. If you are unlucky, draw two lines at right angles across the diameter of the lid and drill where they intersect.
11. Fill the inner 20 litre bucket with your potting mix and plant your tomato, capsicum or whatever in the centre of the container so that it will come out of the central hole drilled into the lid. And then fit the lid so that the filler tube is also protruding from the top of the lid.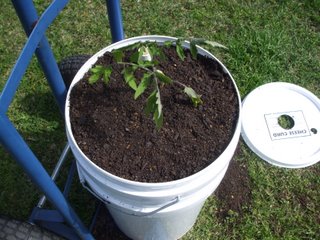
12. Fill the water reservoir in the bottom of the pot by pouring water down the filler tube until water can be seen coming out of the overflow hole – and you’re done!
This style of self watering container does not have as big a reservoir as the rectangular type so you will need to top it up a bit more often, particularly initially as the water wicks up into the potting mix, unless the potting mix was very damp to start with.
Despite the number of steps, these containers are much quicker to build than the rectangular ones and I set up a small production line and made five of the things in less than half a day. They are well worth a go, and will make veggie growing simpler and easier for you, as well as making it easy to move your crops around to catch the best sun, even with a full reservoir they are easily portable by trolley.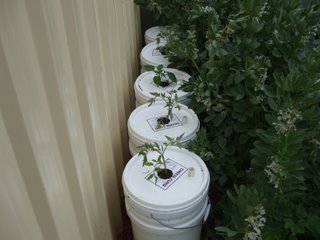
Update December 2010
You can't say I only talk about successes on this site, because here is one of the failures. The bulk potting mix that I used to fill up the 20 litre buckets seems to be somewhat deficient in nutrients and so the resulting tomato crop has been mor than a little dissapointing (insert swear words appropriate to your area here). The next trick will be to get hold of some good quality bagged potting mix and replant with new seedlings. In the words of a well known philosopher - "bugger!".