When I was a young fella I had a couple of Italian mates that I used to hang around with, the Italians of course brought a wonderful culture of frugality to Australia (not that I appreciated it at the time) not to mention the food. On the clothesline of one of these guys places more often than not was a string bag full of thick slices of Italian bread, but it took me some time to realise that it was not there to feed the birds but to be turned into homemade bread crumbs. So I thought why not do the same?
We make our own bread and sometimes in summer, when it is hot and humid the last lumps at the end of the loaf go mouldy (no preservatives) and wind up going into the composter, so rather than that happen I have taken to drying out those last end bits. The best way to do it is to cut the bread up into 25mm or so cubes before drying it, that provides more surface area to speed up the drying and make processing easier, although sometimes when I am in a hurry I cut them up after drying. Some people also cut off the crusts first but I don’t bother.

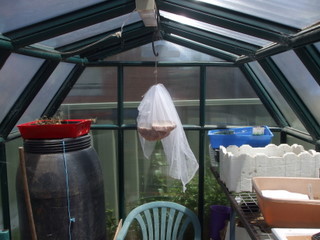
Once the bread is cut up make a bag of cheesecloth or some other open weave cloth or perhaps even a mesh onion bag and then hang it up in a warm airy spot you could even hang it up from the clothesline. I hang ours up in our greenhouse because on a hot summer day it will hit 50°C+ in there and will dry even the biggest lumps in a day or two at the most so even if you had one of the small plastic ones that could be worth a go. The big hint is to make sure that your bread crumbs are DRY before processing them i.e. the bread is hard as a rock with no squish, only crunch. If in doubt leave the bread to dry longer, breadcrumbs with added penicillin due to mould forming on inadequately dried breadcrumbs is not a good look (or taste for that matter).
Assuming your bread is now roof tile hard and dry it is time to process them into crumbs and there are a number of ways to do this –
- Using a food processor,
- Stick them in a plastic bag and liberally apply a rolling pin, or my favourite,
- Stick them in a blender.
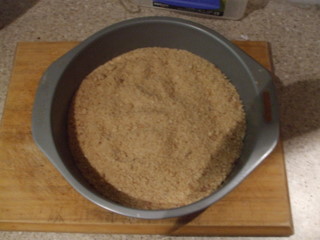
Set up your blender and remove the cover for the hole in the top, start your blender running top speed and drop in some cubes and process until you get the crumb size you are after, making sure you don’t overfill the blender. Just process a few cubes at a time. Then place the crumbs in an air tight container so they don’t reabsorb moisture from the air and go soggy. That’s it!

So you don’t need to dash out to the shops to grab hold of a packet of Krummies next time you need bread crumbs, you will have your own and the crumbs from homemade bread are tasty, cheap and healthy (you know what is in them!) – as well as reducing food miles. They are also useful and versatile for crumbing, stuffing and topping your home made dishes so why not give it a go yourself?


