OK, we are really talking about incubating fertile eggs to get replacement layers or perhaps (cue dramatic music) your own meat chooks so you need mummy chooks and daddy chooks or at least access to fertile eggs from someone else. In my case, one of the guys from our church has a rooster and so I was able to get some fertile eggs from him.
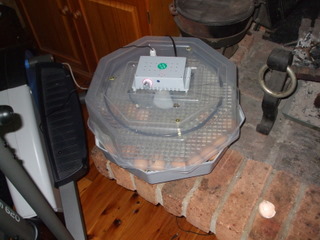
In the ‘to do” list I noted that I was going to make an incubator and there are certainly designs on the net for DIY incubators but the problem that I had was getting hold of a sufficiently sensitive thermostat to hold the 37.6°C required to hatch chook eggs. The most commonly available ones are for reptiles and only go up to 30°C. Once you have the thermostat the rest is relatively simple unless you want to build in automatic turning, so I splashed out and bought a Hexabator (that actually is octagonal rather than hexagonal.....but anyway...). It is a simple unit with heating element, digital thermometer and fan that does the trick fairly well, it is also made of robust plastic rather than the more fragile polystyrene foam and the lid is clear so you can easily keep up with what the eggs are doing.
Eggs for Hatching
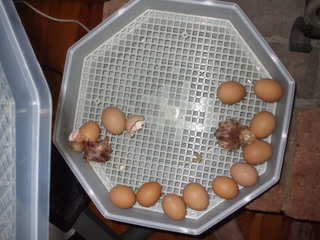
If you do have a set up that allows you access to fertile eggs make sure you get fresh ones ie less than seven days old, but realistically the fresher the better. My mate brought around two days production, about ten eggs then a day or two later another three so that all up I had 13 eggs. 
Make sure the eggs look normal, if they are odd sized, shaped or in any way dodgy looking such as having ridges in the shell or are cracked, don’t use them for incubating. Also make sure they are clean direct from the nest, don’t use dirty eggs for incubating. If there is a bit of dried material on the outside it can be wiped off with a dry cloth, cleaning dirty eggs with a wet cloth can spread bacteria and other disease causing organisms.
Storing Fertile Eggs
While they are waiting to be incubated should be stored between 15°C and 17°C and on a 35° angle and turned twice a day to get the most number of eggs hatched. This can be done by storing the eggs in an egg carton tipped to one side by placing one end on a lump of wood etc, then several times a day turning the carton around so that the opposite end is elevated.
Incubating the Eggs
Even if your incubator has a good thermostat you can’t go past a digital thermometer to make sure that you are maintaining the required temperature of 37.5°C/ 37.6°C, as a temperature too low or high can cause all sorts of problems such as overly large or small chick, hatching to early or delayed hatching.
Humidity is also important so you should keep the water pans in your incubator full. The water evaporates remarkably quickly and early on had evaporated before I noticed, which may have contributed to our low hatch rate. Our incubator has neutral coloured bottom where the water channels are and there is not much contrast so seeing whether they are full of water can be difficult. When I do it again I think I would put a bit of food dye in the water to make this easier. In any case, check the water levels at least once every day.
Another thing that must be done is to turn the eggs three times (or any uneven number) per day, every day to stop the chick sticking to the egg membrane. If you have a machine that does this automatically, good for you! If not it can prove helpful to mark off when you have turned the eggs on a sheet of paper so can tell at a glance how many times the eggs have been turned that day. Needless to say this is an investment in time required for the entire incubation period (although you don’t need to turn the eggs the first 2 days in the incubator) and we had a night out booked for months when we realised it fell in the middle of the incubation period and had to get our daughter and son-in-law to come over and turn them for us.
Where the eggs are on their side, as was the case with our incubator, they should be turned a full 180° and to facilitate this I wrote the date we received the eggs in pencil on one side of the egg. In that way it was just a case of rolling the eggs so that the date was up or the date was down, and it was immediately obvious if all eggs were correctly turned. I have also read of marking an “X” on one side and a “O” on the other, but in the end it is whatever works best for you.
It is possible to keep a check on the developing chick by shining a light up into the shell and seeing what size lump is in there, this is called candling. I must admit we did not do this; we just waited to see what we would get. The chicks should start coming out on day 21 and be all out on day 24 so it is important to note what day they go into the incubator. We got six chicks hatch out of the 13 eggs, but one had foot problems right from the start and only survived a couple of days so all up we got 5 chicks.
After They Hatch
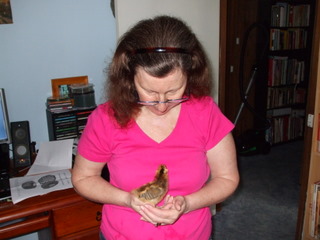
We left them in the incubator for a little while to dry out once they had hatched and then transferred them to the brooder that we had made for previous batches of day-old chicks we had bought (see the article on how to make a brooder in the chook section of this site).
We have had chooks for many years but this is the first time we have hatched our own and it is a remarkable experience, so different to reproduction in mammals. If you have any interest at all in making your own chooks from scratch I highly recommend it, and I bet your kids would love it!


