This process is based on an idea developed by Louis Lane of Geelong Victoria and published in Grass Roots Magazine No 92 August/September 1992 (Page 39). Thanks Louis!
One of the skills that we have pretty well lost is the art of home vinegar making. If you look up the old texts the way they generally tell you to do it is to get hold of an old wine barrel, turn it on its side and then drill plenty of holes in the top half, to let the air in. Fill the bottom half with wine of some description and wait. The problem is that you really, REALLY must like your vinegar because this will make a lifetime supply in one go. I wanted to be able to experiment with different types of vinegar and make small amounts for my own use, plus where was I going to put a bloody big wine barrel so that it would remain undisturbed for weeks at a time? There had to be a way that the old folks used to make their vinegar on a small scale without all this rigmarole.
One night I was leafing through some old Grass Roots magazines from my library when I came across an article by a bloke who had developed a small scale process based around Fowlers Vacola bottling jars and a wooden box. I have taken and developed his ideas and this article is the result. But first (don’t you hate it?) a bit of theory –
Vinegar is an organic acid that is formed when ethanol or ethyl alcohol (ie the stuff you drink) becomes oxidised. When an unpreserved alcohol beverage is left open to the atmosphere organisms will make their home in the alcohol and gradually turn the alcohol to acetic acid and thus the beverage into vinegar. Most alcohol beverages that are produced commercially contain sulphites which are designed expressly to prevent this wondrous transformation occurring, after all most people don’t like taking a swig of wine only to wind up with a mouthful of vinegar.
The Box

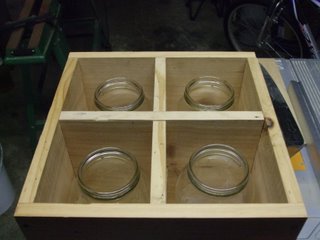
The system in the article was based on No36 Vacola bottling jars which have a volume of about a litre but when I checked my stock of such things I found that I didn’t have any no36s but I did have a number of No75 vacola jars which have a volume of about two litres. This seemingly irrelevant fact is actually significant because the size of the bottles will determine the size of the box and Vacola No75 bottles have a maximum diameter of 125mm so that will be the minimum internal dimensions for each compartment of the box that I was about to construct.
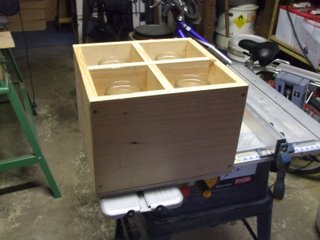
I was able to find some 12mm thick x 240mm wide pine boards left over from other projects to make the sides and internal dividers, and some 12mm thick plywood for the top and the base. The front and back are 362mm long (x 240 x 12) and the sides are 320mm long (x 240 x 12) as are the internal dividers. It was fairly easy to make the edge lap joint for the internal divider by cutting a slot in the centre of each divider board the same thickness as the board and to half the width of the board so that both dividers fit together to form an “X”.
I drilled and screwed the edges of the main boards to form a box, then drilled and screwed the plywood bottom on to provide some rigidity, then assembled the edge lap joint and slid the X into place inside the box and drilled and screwed it into place to lock it in and provide the box more rigidity. Now for the lid!
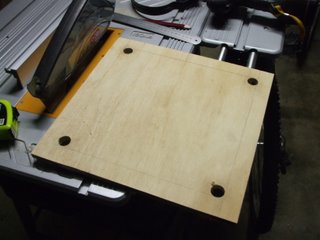
One thing that you need to make vinegar is for the wine and the bugs to have access to atmospheric oxygen so that the alcohol can be oxidised to the acid (in this case from ethanol to acetic acid) so a solid top is not what was needed. I drilled four 12mm holes in the corners of the 12mm plywood I was going to use for the lid so that I could use my jig saw to cut out the centre of the lid leaving a 30mm wide surround with nice rounded internal corners.
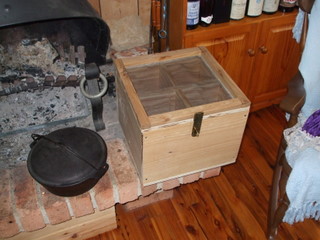
To keep out vinegar flies and other nasties but leave the tops open to the air I cut out some fly screen mesh to the same size as the lid and then place it on top of the lid. I found some timber off cuts in amongst my pile of “I can’t throw that out it’ll come in useful one day” and cut out 4 20mm x 30mm battens, 2 x 360mm long and 2 x 300mm long. I set them on the top of the lid to hold the fly screen mesh on and then drilled, countersunk and screwed them in place from underneath so that the fixing screws did not show. Almost finished!
During the acetification or vinegar making process it is quite possible there could be some acid fumes evaporate so I got hold of some decent sized brass hinges (and, OK, they looked pretty good too). I also got hold of and fitted a brass hasp and staple to keep it closed just in case I needed to, you never know when the cats might wake up one night crazy for vinegar and there goes all my hard work down the drain (or down the cat as the case may be). 
So the box is now complete and ready for phase 2 is to set up the factory to actually produce vinegar – see part 2.


