In some ways I have not been a huge fan of the no-dig garden bed; principally because most of the raw materials need to be bought in to build the bed and I have spent many years building up the soil, so I would rather use that than buy in a whole lot of new stuff. Having said that there are some situations where a no-dig style garden bed makes heaps of sense –
- The soil you have is too compacted, too rocky or too contaminated with chemicals from previous owners/tenants.
- You don’t have soil to work with, only a hard surfacing of bricks, asphalt or concrete.
- Where you need something lighter than soil so that you do not damage underlying structures such as on a roof or terrace. I am considering a no-dig garden for the top of the work/chook sheds.
- Where the owner has a bad back or other disability, the process for building the bed can be repeated until the desired height is reached so easing the need to bend down.
- Also where the owner is not fully fit, the no-dig garden is comparatively light and easy to build with no heavy digging or forking.
The no dig garden method was developed by an Aussie lady by the name of Esther Deans who lives here in Sydney, and while I haven’t heard anything about here recently if she is still alive she must be nudging up towards 100 years old by now. I was lucky enough to see Esther demonstrate her no-dig technique back in the 70s at a Henry Doubleday Research Association Meeting but her technique is discussed in her book “Esther Deans’ Gardening Book – Growing Without Digging”, if you can find it.
A number of people in our backyard veggie gardening group expressed interest in the no-dig garden so we had a workshop on how to build them one Saturday at a member’s place who has back problems. This was good in two ways, she got the no-dig gardens built without her having to kill herself doing it and the participants got some practical experience in building no dig garden beds so everyone was a winner. There were a couple of kids there who got stuck in and had a great time so this is a wonderful activity to involve and motivate children to grow food.
The Raw Materials
To build a no-dig bed you will need –
- A surround of some description (optional but makes things easier)
- Newspaper
- Lucerne hay
- Straw
- Manure (chook is good)
- Compost
The Process
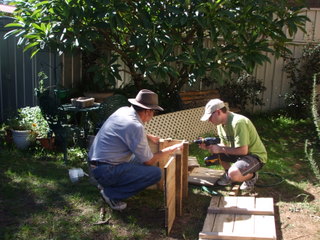
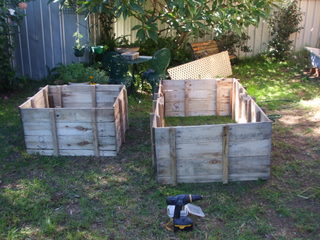
1. Put your surround together if you are going to use one. We had access to some pallets so we cut them in half and made one square bed and one rectangular one by getting hold of some 50mm square stakes and using them as corner posts to screw into, making a very strong and secure bed surround.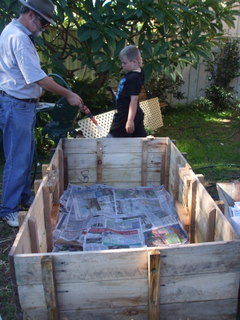
2. Once the surrounds were complete we put down a thick layer (6 – 10 cm) of newspapers. A good way to do this is to soak the newspapers in a wheelbarrow first so that they form a thick mat when laid down. The wheel barrow we had was not watertight so while the newspapers were initially wet, they were not soaked and we got over this by giving them a good soaking with the hose when they were laid down. The newspaper layer prevents weeds and grass etc from breaking into the beds from below.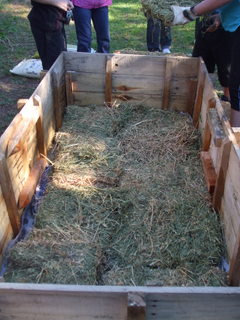
3. Next comes a layer of lucerne hay one pad or “biscuit” deep. When the lucerne is harvested and bailed it is formed into layers along the length of the bale so that when you take off the string you can peel off a pad from the end and this is then placed in a layer over the paper.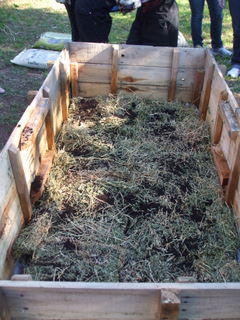
4. When the lucerne layer is complete, sprinkle a layer of the manure over the top so that most of the lucerne is covered.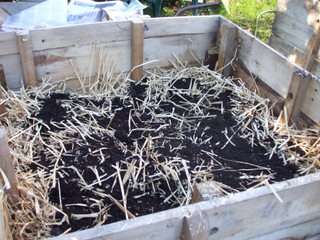
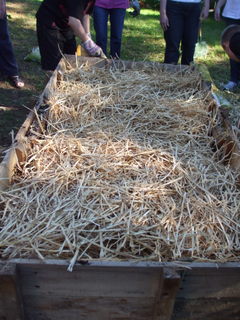
5. Now grab some of the hay and fluff it up and place it in a layer about 20cm thick on top of the lucerne/manure layer and make it even, then add another layer of manure. 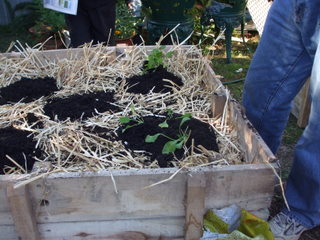
6. If this is as far as you intend to go, either put mounds of compost or a full compost layer over the top of the straw/manure layer to plant seeds or seedling into. If you want a higher bed you can repeat steps 4 to 5 until your bed is high enough. In our case we put two sets of layers in then added mounds of compost to the top of the bed, planting seedlings into some and seeds into others.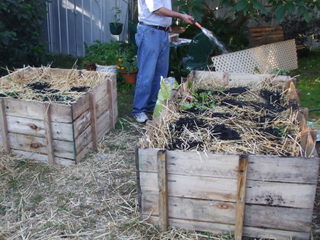
Make sure that you give the no dig beds plenty of water in the first couple of weeks so that the seeds can germinate, the seedlings can establish and the layers start to break down so that by the time little roots start to move outside the compost, the other layers will be starting to break down and release nutrients to keep the crop going.
The no dig bed should give you a great harvest for the growing season and next time you want to plant in follow the same process as steps 3 to 5 so that you build another layer on top of the original level, which will have broken down and compacted somewhat and the process starts again. Eventually you no dig bed will be filled with fertile soil that has great structure and will be very productive for years to come.


