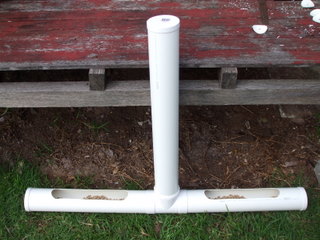
When setting up your backyard chook run it is possible to spend lots of cash but, as you know, on this site we like to focus on the low cost DIY approach and this philosophy finds its expression in the form of a low cost, low tech chook feeder. This is not my idea, it is my take on an idea I found while tooling around on the net. I hope you find it of some use.
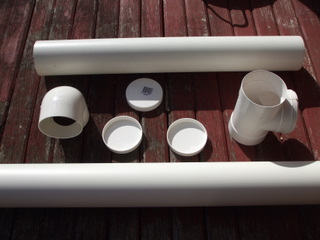
This feeder and its larger flock variant are cheap to build, even if you use all brand new components you should get out of it for less than $10. It is constructed of 90mm stormwater piping and fittings and can be thrown together with a minimum of hand/power tools most of which you probably have hanging around anyway. You will need –
Minimum feeder
- 1 x 1 to 1.5 metres of 90mm diameter PVC piping
- 1 x 90° elbow to fit 90mm diameter PVC Piping
- 2 x end caps to fit 90mm diameter PVC Piping
Larger flock feeder
- 1 x 2 to 2.5 metres of 90mm diameter PVC piping
- 1 x Tee fitting to fit 90mm diameter PVC Piping
- 3 x end caps to fit 90mm diameter PVC Piping
Tools
- 1 x electric drill (you could use hand powered one but it would take much longer)
- 1 x 3mm or 4mm twist drill (drill bit)
- 1 x 54mm (or thereabouts) hole saw
- 1 x tenon saw
- 1 x 300mm straight edge or ruler and/or tape measure
- A pencil or other marker
- Some sand paper
Making the Minimum Feeder
Cut the 500mm of the PVC pipe with the tenon saw and make two pencil marks 100mm in from each end.
Measure in half the diameter of the hole saw (in my case this was 27mm) and make another mark, then drill a pilot hole with the 3 or 4 mm drill bit to prevent the hole saw from wandering.
Place the drill part of the hole saw in the pilot hole and drill out a 54mm hole at each end of the pipe so that the outboard edge of each hole is 100mm away from the end of the pipe.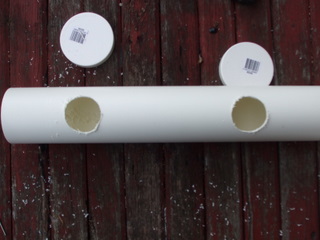
Using the straight edge, draw a line from the outside edge of one hole to the other, then repeat on the other side so that you have two lines along the length of the pipe with a 54mm hole at each end.
Secure the pipe by having someone hold it or by lightly clamping it in a vice and use the tenon saw to cut down the two horizontal lines so that the pipe now has a 54mm wide slot, rounded at each end. This is the bit the chooks will eat from. It is a good idea to get hold of some sandpaper and take off any sharp edges around the cut to prevent any nasty surprises for the chooks.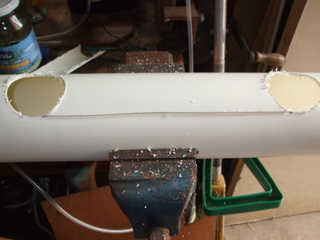
The whole thing can now be assembled by placing a pipe into each end of the 90° elbow and securing either by glue or screws, and then placing the end caps on the open ends of the pipes. The end caps should be secured with a screw (drill a hole the size of the shank first) because the top one will need to be removed to add more feed and the bottom one will need to be removable for cleaning.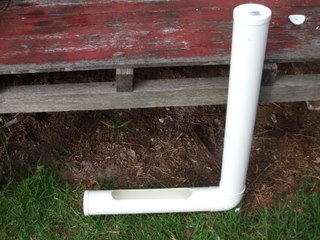
Wire the whole assembly onto the side of your chook pen and away you go!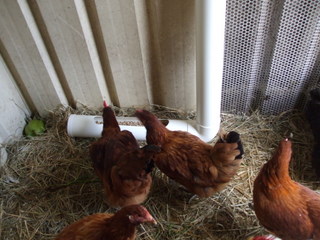
Making the Larger flock Feeder
Follow the directions for the minimum feeder up to where you have cut the slot in the bottom pipe then take a second 500mm length of pipe and cut a slot in it using the same method as the first one.
Now, rather than attaching the 90° elbow, to the pipe that is to be the upright, attach the tee section at the bottom of the vertical pipe, and then insert the two sections of pipe with the lots in the two horizontal holes, secure with glue or screws and attach the end caps to each open end of the pipe and secure with a screw.
This one has two “pecking pipes” rather than the one of the simple feeder so you will want to have a longer vertical pipe to provide more feed. Unfortunately the feed does not appear to flow as freely into the pecking pipes from the vertical pipes so initially it might be an idea to keep an eye on it to make sure all is well. 