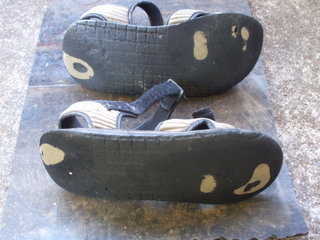
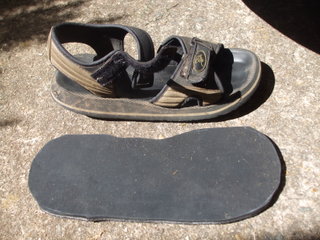
Years ago I bought myself a pair of sandals, there were light and the sole material was comparatively soft and quite comfortable to walk on, unfortunately, being soft it also wore down quite quickly, to the point where in patches it was almost like walking barefoot. The upper section was still completely OK so the obvious answer was to resole the sandals and hence this article.
Back in the day, THE thing that you resoled a sandal or shoe with if you were into recycling and the like was tyre tread, worn out tyres can be easily had for nothing and with built in tread they made a ideal choice, but...... (there’s always a “but” isn’t there?) When was the last time you saw a fabric radial? They are like hens teeth these days what with every man and his dog wanting steel belted radials, and trying to cut through the steel belting is no fun. There must be something better out there, and indeed there is.
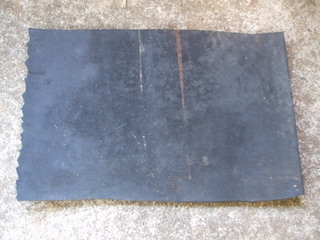
While not quite as ubiquitous as the dud tyre, there is a fair amount of worn conveyor belting out there in all sorts of sizes and thicknesses and in most cases you can pick up enough to resole a hundred shoes for nothing. If you don’t know where to look for used conveyor belting try concrete manufacturing plants, concrete tile plants, mines, power stations, food processing plants. In fact anywhere they have to transport bulk product from one place to another they will need conveyor belting and when it wears out they will need to get rid of it.
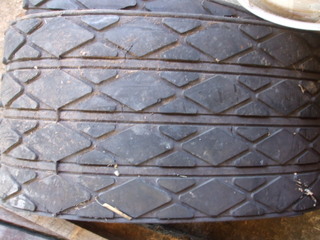
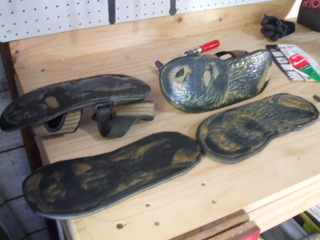
There is also a rubber layer applied to the drive pulley lengthways which provides traction, allowing the conveyor belt to be pulled along and is called lagging. It wears out and has to be replaced too, and it has a pattern on it (see the photo below) which could act as a tread, although it is quite thick and heavy and not as flexible as the belting.
I used to work for a company that made roof tiles and had gotten hold of some conveyor belting which had been replaced, so now was the time to use it! While belting comes in a number of thicknesses, the stuff I had was 10mm thick and had three layers of fabric webbing towards the bottom surface.
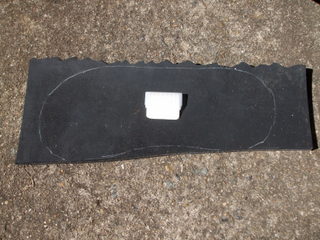
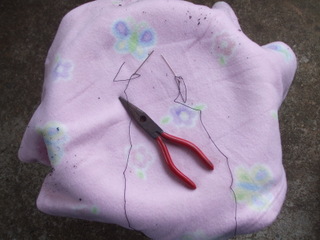
In general the two surfaces will differ in that one will be rough and abraded because it has been in contact with the product being transported and the other will be relatively unscathed, being the side that went around and against the drive rollers. To start the process I cleaned the bit of conveyor I was going to use thoroughly (it had been sitting beside the garage for some years) and then sat the sandals on the rough side of the conveyor and traced around them using tailors chalk. The tailors chalk gives a nice thin white line on the black conveyor belt which is easy to cut around.
Speaking of cutting, the next trick was to cut out the sole blanks from the belting and while it is possible to do it with a Stanley knife, it was a hell of a lot easier with my little band saw. The thick rubber is a fairly difficult cut even for the little handyman band saw and while I was tempted to put a bit of water or oil on as lubricant I figured it would either have electrocuted me or made an enormous mess. The way to do it is.......very, very slowly! Just let the saw idle its way through and as the cut proceeds, pull the sides of the open end apart so that they don’t bind on the blade and cause the motor to work any harder than it has to. Another thing is that even though the band saw has a fairly narrow blade, if you try and cut too sharp a radius it will just stop the saw and overheat the motor so it may take a couple of runs to get the profile that you want. It was a slow process and produced a fair amount of black dust, with just a hint of burning rubber, but eventually I was able to cut out the blanks.
The reason I made sure that the rough side was against the sole of the sandals was because I was going to be using glue to attach the soles and the glue would adhere much better to the rougher surface. A trip down to Woollies netted me a tube of the imaginatively named Selleys ‘Shoe Glue”, for a few dollars and I figured that it should do the job. I have heard of people making their own rubber glue by dissolving car or bike inner tubes or raw rubber in petrol, but I haven’t tried it and petrol is rough stuff to work with so I decided to go with the commercial glue.
Following the instructions I spread a goodly portion of the glue all over the sole of the sandals, then pushed them down onto the top of the conveyor belting blanks, and pullet it straight back up again, so that the glue was well distributed over both surfaces to be glued together. I let both surfaces air dry for 15 minutes or so until they were both only just tacky then pushed them together and applied a clamp to the front and back of both sandals. The instructions were not very specific on how long to leave the assembly to dry, so I left them over night, just to be sure.
Sure enough, the next morning the new soles were firmly attached to the sandals and didn’t look like coming away soon, but I have used glues of this type before and where the sandals curved up a bit at the front and the back there would be constant pressure that would eventually make the glue let go under stress. A way of preventing that is to sew through and the toe and heel using saddle stitch, a technique from traditional shoe making, to form a solid connection at the flex points between the sandal and the new sole.
The usual way this is accomplished is to get some waxed thread (the wax acts as a lubricant), two blunt sewing needles and an awl, then use the awl to make a hole through the sandal and sole and push one needle with waxed thread through the whole one way, then the other needle (threaded on the other end of the waxed thread) though same hole back the other way. Thus making a very strong stitch called saddle stitch, but as things seem to happen, the practice turned out a bit different to the theory!
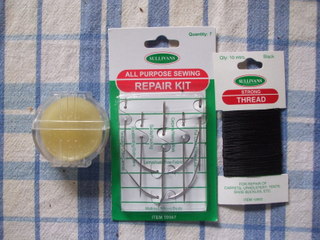
I found the waxed thread difficult to get hold of and so I bought some “strong” thread and using a little beeswax applicator waxed the thread myself, I could also have run it a couple of times around a candle but the bees wax was easier. The needles were easy to get hold of by buying a couple of repair kits and although I had a bradawl to use I bought a proper tailors awl which is sharper and pointier, just in case.
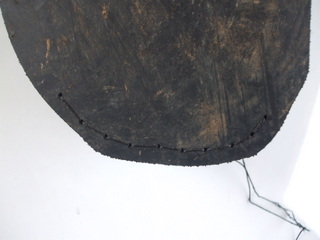
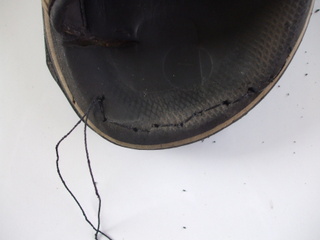
Unfortunately neither of the awls would look at the conveyor belting, man that stuff is tough! So I wound up finding a small 1/8 inch drill and drilling through the sandal and into the conveyor belting with no trouble at all. A series of holes about 6 or 7 mm apart around the toe and the heel seemed to do the trick. The big hint is to drill through from the top to ensure that the holes are in a nice line when seen from the top, drilling from the bottom makes the line a bit ratty. Once the holes are drilled it is a good idea to take a very sharp knife and make a shallow cut between the holes into the conveyor belting so that when you tighten up the stitch, the thread is pulled into the hole and won’t wear on the ground as you walk.
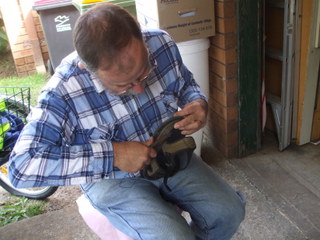
Even though the holes were big enough to let the needles through it was still a bit of a tight squeeze so I grabbed a pair of long nose pliers to grip the needles with and pull them through the sole. One thing I did find out the hard way was that you must not grab the needle with the pliers anywhere around the eye or you can snap the eye off and whammo..... new needle required. To do the stitching I found it easiest to sit on an upturned 20 litre container and hold the sandal between my knees or in my lap with the area being stitched uppermost. When you are cutting the thread to length ready to put the needles on, allow plenty of slack so that you can manoeuvre both needles around, work out what you need and add another half!
To start, thread a needle on each end of you piece of thread, push one needle through the sole and pull it along until you have half the thread on each side of the sandal and sole. Then it is just a case of feeding the needle through from the top of the sandal, grabbing it with the pliers and pulling it through, doing the same on the other side then pull both sides of the thread taut and repeat. To finish off, once all stitches were in place I went back one hole and pushed the needle through so that both needles were on the same side of the sandal then tied the threads off to each other with a reef not and clipped off the excess thread.
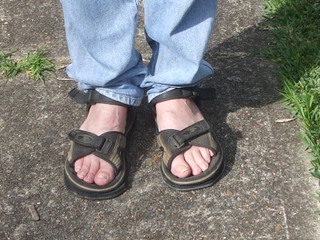
That finished the project, and I got to wear my sandals around for a while. They are a bit heavier and less flexible but generally have been given a new lease on life and will hopefully continue to be wearable for many more years to come.


