It has been said by those who know that it is best if your aquaponics system is under cover of some description so that in the event of heavy rain you don’t flood the system and so lose valuable nutrients which will cause deficiencies for the plants until levels build up again. This resulted in a bit of a log-jam-of-the-mind for me because there must be at least 10 million ways of providing the cover and I admit that I did procrastinate for some time about which one would be best for our situation. On thinking it through I realised that I had some criteria which the potential covers would have to comply with –
• It needed to be cheap
• It should be easy to build (even for me!)
• It should be light and easy to relocate
• It should use readily available materials, preferably recycled.
To cover off all of these criteria I developed a design based around electrical conduit, which is quite often available second hand or recycled. Conduit comes in various diameters but I chose 20mm because it is both cheap and very flexible.
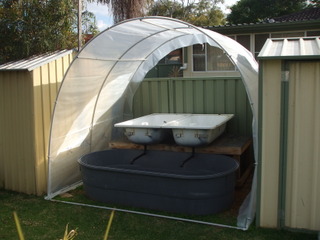
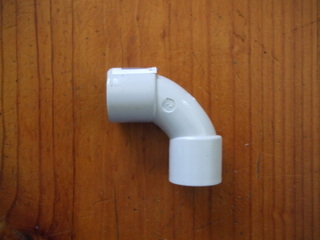
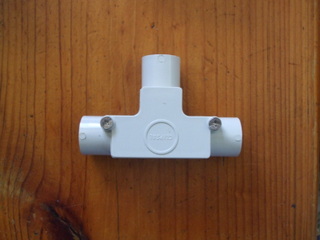
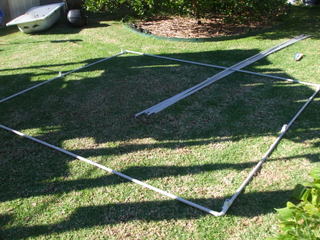
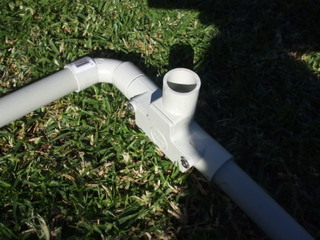
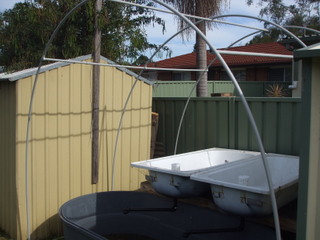
I measured up the footprint of my system; it is not very big only 2400mm x 2800mm and the conduit I could get was 4000mm long so that worked out well. The idea was to put together a rectangle of conduit then attach 3 semicircles of conduit to support the covering, making it look similar to the old Quonset huts. To make the base I got hold of four x 4000mm long pieces of conduit, four 90° solid elbows and six inspection tees (tee shaped fittings with an inspection port because I couldn’t find solid ones). When cutting the conduit to make the base, don’t forget to allow for the elbows and tees otherwise the rectangle will be too big, if your system is in the open that might not be a problem but mine is between two sheds and the back fence so the measurements were critical.
Due to the lightness of the conduit, I was able to put the framework together in the backyard where I had plenty of room to work all around it, then pick it up and slot it into place once it was finished. Also, because of the outward pressure on the base of the hoops that will support the cover, I had to glue the base components together using the blue type N PVC conduit adhesive. The way conduit works is that it has one end that has been expanded out so that you can push a smaller and of another length of conduit up there to make a longer overall length. This means that to fit both ends of conduit into an elbow or tee section that little expanded bit of 25mm long or so has to be cut off first.
The PVC is easily cut with a hack saw so it was just a case of measuring up and then cutting the conduit so that it came out to 2400mm x 2800mm with an elbow at each corner and one tee (facing up) at each end of the short side and one in the middle. However, due to the fact that the tee and the elbow were next to each other I had to cut a 50mm length of conduit and glue it into the socket of both the tee and the elbow so that the hoop would be as close to the edge of the rectangle as possible. So simple even I could do it! Surprisingly enough I was able to put it together and then glue everything in place in about an hour and even I couldn’t find anything to stuff up.......well with the exception of getting the blue glue all over my hands.... did you know that stuff won’t wash off, it has to WEAR off. Yup, I had blue fingers for the rest of the week. Anyway....
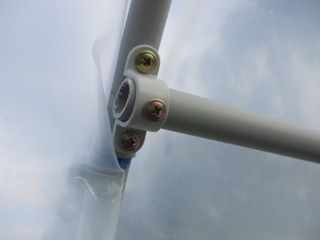
To make the hoops I found that one 4000mm length was not high enough so I cut several other 4000m lengths in half and then pushed them into the expanded bit of the original conduit lengths and glued them in place (yup, more blue fingers) to give me a total length of 6000mm which for me gave a height at the centre of the arch of 2250mm. I didn’t glue the hoops in place to make disassembly easier. To support the covering I put in cross braces at the apex of the arch and at 1000mm down each side, these were attached by drilling and screwing plastic full saddles over the brace onto the hoops. To stop the brace sliding through the hoops I also put a screw through the saddle into the brace.
With some assistance from my son-in-law (very handy for construction, I highly recommend having one!) I was able to get the frame in place, so now it was time for the cover. To cover it I was able to get hold of some commercial greenhouse or polytunnel cover, which is translucent rather than transparent. I know what you are saying, more plastic! But this stuff does last quite a few years and is very light and strong, and sometimes you can get hold of off cuts, although if you can hold of some recycled or repurposed clear film, so much the better.
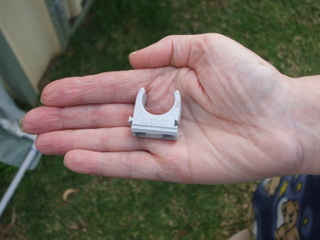
I installed it, again with assistance from my son-in-law by dragging it up over the frame so that there was about 100mm overhang on each side then wrapped it around each outer hoop and held it in place with the clips that are designed to hold the conduit onto the wall. They have a hole in the bottom so I could screw them onto the hoops to keep them in place but in the event they clipped on so tightly I didn’t need to. The only thing left to do then was trim back the overhang and fold it back between the hoop and the surface of the cover to make a neat edge.
This method of construction lend itself to all manner of greenhouses so if you can’t afford a proper glass house (who can?) then this is a cheap and easy way to get one, built to your own specifications. To be fair, this is LIGHT construction and mine is protected on three sides by sheds and a fence, even so I have put in four tent pegs just to make sure it stays in our yard and doesn’t go visiting the neighbours when the next windstorm sets in. It does flex a bit in the wind but seems stable enough to do the job.


