Why on earth would you want to make your own apple sauce? After some consideration there are a number of reasons why you might want give it a go –
- If you have access to them, you can use local apples and reduce food miles; if you have your own apples, so much the better.
- You can make it very energy efficiently by using the techniques in this article.
- You can make it to YOUR taste, exactly the way you like it.
- If made using local apples in season you can save money, particularly if you go through quite a bit.
- You know exactly what goes in because you control exactly what goes in.
- Apple sauce is handy to have around as a healthy alternative to sugar as a sweetener.
- It is ridiculously easy and fun to do.........well I had fun doing it anyway (and I suppose that says something about me....)
Have I converted you yet? If the answer is “yes” read on, but if not I’m sure you’ll find something else on this site to interest you so please, have a wander!
Anyway, for those of you still with me, this is how we did it.....
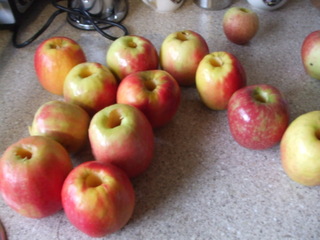
We are lucky enough to have an apple producing area within an hour or so drive from our place so we set off to see what they had on offer. It seems that apple sauce benefits from having different types of apples blended together to construct it and as a result we picked up 4 kg of Pink Lady apples and 2kg of Gala apples. The pink lady’s were particularly sweet so guaranteed good flavour and the total cost was less than $3 per kilo of apples, bargain!
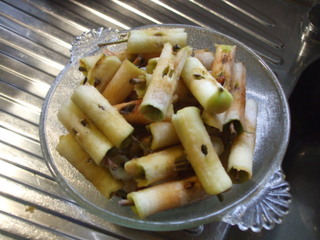
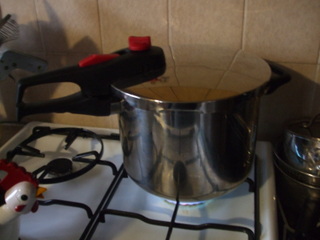
To maximise fuel efficiency we used our 8 litre pressure cooker to cook the apples so that there was no need to boil the living daylights out them for hours and hours to mulch them down. The process was a very simple one; we cored the apples and then fed the cores to the chooks, although I must admit I am unsure if even coring them was necessary, then cut them in quarters. It is important for even cooking, especially for the short times required by pressure cookers, to cut the apples into roughly the same size pieces. Then I tossed them in to the pressure cooker with about 20mm of water in the bottom. When making apple sauce in the pressure cooker the apples can foam up and clag the steam vent so don’t pack them above the “maximum” line on your pressure cooker. If there is no “maximum” line allow at least 50mm freeboard just to be sure.
Once there are enough apples in the pressure cooker seal it up and place it on high heat to get it cooking quickly, but once the temperature is reached and you get some steam blowing off turn the heat down to minimum and start your cooking timer. The apples will only take four minutes to cook so keep an eye on them and once the timer goes off, remove them from the heat and allow the pressure cooker to cool down naturally to the point where the contents is still hot, but not under pressure.
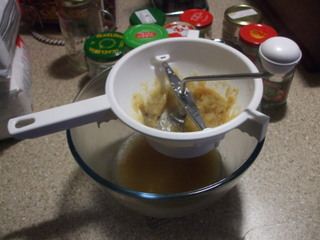
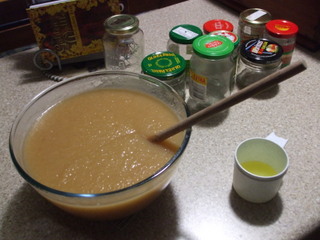
While all this is going on you can sterilise your jars by boiling them up or putting them in the oven at 100°C for a while, then remove them and line them up ready to fill. To remove the skin and any residual bits of core I passed the resulting apple mulch through a rotary food mill, with the output neatly filling a 3 litre glass bowl. To the three litres of apple sauce we put in half a cup of our own freshly squeezed lemon juice, this added a bit of tang as well as more acid to help with preserving the sauce. With the apples we had it took two full runs of the pressure cooker and we still had a few eating apples left over.
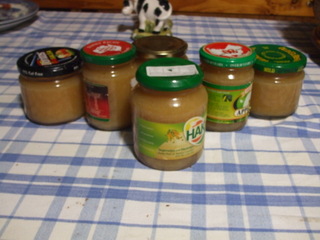
All that was required then was to ladle the sauce into the pre-warmed jars, a wide mouth jam funnel makes this easier, wipe the top of the jar and threads put the lids on loosely and process in a boiling water bath for an hour, remove from the water, tighten up the lids and let them cool. You should only use pop-top lids so that you know when they pull a vacuum (and suck down with a POP!). If any of the lids don’t suck down try removing and wiping the inside of the lid and then reprocess as before or just put them in the fridge and use immediately. Alternatively you could place the apple sauce in a plastic, freezer safe container and freeze it.
Store them in a cool, dark, dry area and you should get 2-3 years from them. The apple sauce is a great natural sweetener; on porridge for breakfast, roast pork sandwiches for lunch or on ice cream after tea for dessert, I’ve also heard it can be substituted as part of the fat when baking, so get cooking!


