


We spend a lot of time, effort and (dare I say it) money on heating our homes in winter to keep them comfortable, even here in mild Sydney the winters still get below freezing at night, well at least where we are it does! The thing is though, if you FEEL comfortable, it doesn’t matter what temperature the room is, so if you can keep yourself warm you don’t need to waste all that energy heating the space around you. The classic thing is to dress up warmly even if you are inside, but we have found that by making a few small modifications to a blanket, you can carry the heat with you wherever you go.
We have been using a commercial wearable blanket for several years and it is great, particularly when you are sitting still for any length of time whether it be in front of a computer, the TV, a sewing machine or just while you read. I say we have been using a commercial wearable blanket because we only had the one, and rather than fight over it, we have made ourselves a homemade one. We made some mistakes but we’ll cover those so hopefully you won’t make any, or at least you can pick some new ones!
The Blanket
Which blanket you use is obviously pretty critical to the whole enterprise, the commercial one is acrylic and while that doesn’t sound too promising, it is wonderfully warm and has just enough stiffness to make it hold its shape well. The one we modified is a double layer polyester blanket and while it is softer to the touch it doesn’t hold its shape well, and required an extra press stud on the neck to keep it on. It also takes longer to warm up, but once it is warm it is just as comfortable as the commercial acrylic one. It would be worth trying out a wool blanket to see how well that works.
 and Male (R)")
The blanket needs to be a maximum width of 1600mm or about the width of a single blanket, any wider than this and the front tends to hang down and trip you up when you try to walk. For the length, it needs to be as long as the height of the person who is going to wear it, this makes sure you get good coverage but are still able to walk while wearing it. It is unlikely that you will find a blanket exactly the right size, so get the width right then trim the length to size and sew on bias binding to the cut edge to keep it from fraying.
The Tools & Fittings
To make a wearable blanket you don’t need much, but you do need a few specialised tools and bits and pieces –
- A set of press studs – a pack of 20 should do the trick
- A punch and anvil to set the press studs in the blanket (you can get a set with the press studs but you get less studs in the packet)
- A hunk of steel to set the anvil on to absorb the shock when setting the press studs.
- A hammer, just about any kind will do, but I used a small ball pein hammer.
- Some chalk to mark where the holes will be in the fabric (we couldn’t find the tailor’s chalk so I used regular blackboard chalk ant it worked fine. Needless to say once the job was finished I found the tailor’s chalk)
- Tape measure
- Something to make small holes in the blanket with and therein lies a tale!
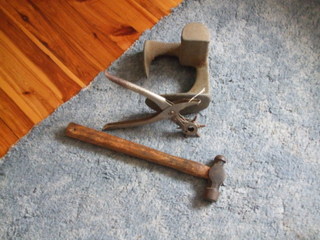
It was my intention to use a leather maker’s rotary punch to make the holes in the blanket, which makes sense in theory but soft cloth is not firm leather and it just did not work. That wasn’t a problem though because I had a plan “B”, a series of small hollow (AKA belt) punches and one of these would do the job. So much for plan “B”...I beat the living daylights out of the punch and it just wouldn’t cut through the spongy material. Fortunately, my older daughter was helping me and she has considerable sewing experience, she said to use a sharp pair of scissors and push them through to make the hole. It worked like a charm so ignore plans “A” and “B” and just head straight for the scissors.
The Process
1. Assuming you have your blanket, it has been cut to size and hemmed or bias binding attached to the bottom of it, lay the blanket out on the floor so it is flat and grab your tape measure. Then...
- Make chalk marks along both edges of the blanket about 100mm to 150mm apart, starting at the bottom corner, for about half the length of the blanket, then
- Make one more chalk mark on each side about 25mm towards the top
- Make three chalk marks along the top edge starting at the top left corner and spaced 150mm apart, then
- Make three more chalk marks along the top edge starting at the top right corner and spaced 150mm apart.
2. Using a pair of very pointy, very sharp scissors make a hole at each chalk mark 15mm in from the edge of the blanket.
")
3. To make sure the press studs go in the right way around (some of ours didn’t) try setting them out next to each chalk mark so that the studs are the right type (male or female) and orientation (face up or face down). This reduces the work and thought later on when you are madly installing the studs.
4. Set the press studs in the blanket in accordance with the diagram (downloadable here) using the accompanying tool and putting a lump of something heavy and flat (such as the cobblers last that I used) underneath it to act as an anvil and setting the studs with a couple of sharp hits.
5. When the studs are all in, hold a test fitting for the person who will be wearing it and see if there is any adjustment needed. As previously mentioned ours was a bit floppy and needed an extra stud higher up on the neck to keep the blanked from slipping off Linda’s shoulders.
Note – The commercial ones make use of long zippers, particularly on the lower part of the blanket around the legs. We didn’t use a zipper for a number of reasons –
- They are much more complicated to fit and require sewing expertise that I did not possess.
- A long chunky zipper of the type required would have added considerably to the cost.
- If the zipper stuff up (and they eventually do) they are almost impossible to fix and in most cases require replacement.
- If the zipper goes the blanket is buggered until you fix it, if one stud lets loose you are still good to go.
- If you catch your feet the studs may let go in time for you to stop a fall, if you catch your feet in a blanket with a zipper, you are going face first into the floor.
We love our wearable blankets, we wore them recently to a Permaculture meeting held in a (coolish) school hall and they kept us toasty, even if one of the ladies did christen us “Mr & Mrs Blanket”!![]()
The wearable blanket plan can be downloaded here
