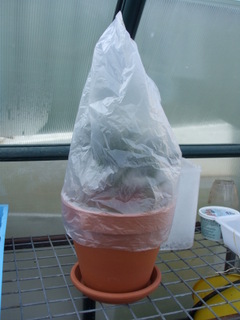
For the annual veggies and herbs you don’t need to know too much about plant propagation apart from how to grow from seed, but for the more long lived woody herbs like rosemary or bay and for fruits, nuts and berries a little propagation knowledge goes a long way. One way of propagating perennials is through cuttings and there is an art to keeping cuttings alive but this device ( the pot-in-pot propagator ) will give you the edge and make your chances for successful cuttings much better.
If you can acquire the skills to propagate plants well, you can increase the productivity of your land considerably for very little cost. You can expand the number of plants you have growing from your own stock or you can get plant material from friends, acquaintances or even complete strangers gardens if you are polite enough, thereby increasing the variety of plants you can grow. It could even form the basis of a business by keeping other urban food growers supplied with fresh plants, the possibilities are endless.
To make your pot-in pot-propagator you will need –
- 1 large outer pot, say about 200mm in diameter – this pot can be of any material but the standard terracotta looks nice.
- A pot saucer to fit the larger pot.
- 1 smaller inner pot, say about 100mm in diameter which must be terracotta.
- Propagating medium like coarse river sand or even a 50:50 mix of coarse sand and cocopeat.
- Some silicone sealant (remember, silicone is my friend!) and a bit of gaffer tape.
- A translucent (not transparent) plastic bag to fit over the top (I used a recycled fruit bag from the fruit and veggie shop) if you don’t have a greenhouse.
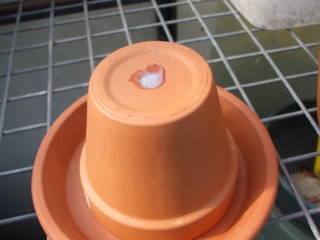
To make the propagator first grab the smaller pot and plug up its drain hole by potting gaffer tape over it on the inside and then filling the hole with silicone sealer. Leave the silicone sealer overnight to set. To save time later you can also put the larger pot (if it is terracotta) into a bucket of water overnight to soak. Pull it out and let it drain the next morning.
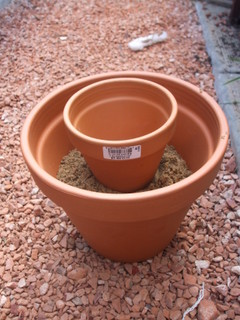
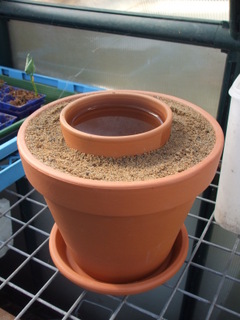
Once the silicone sealer has set, place some pebbles or the classic broken terracotta pot in the bottom of the big pot to prevent the propagating mix from draining out while still allowing any excess water to drain out into the pot saucer. Half fill the pot with propagating mix and gently seat the smaller pot in the centre of the larger pot so that the top of the smaller pot is roughly 12mm taller than the outer large pot. Fill the area between the inner and outer pot with propagating mix and tamp down so it is firm, it helps if the propagating mix is pretty damp before it goes in.
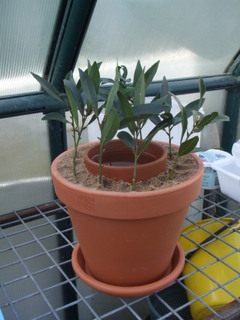
Fill the inner pot with water, then give the whole set up a spray with water and you are pretty much ready to start. Use a stick to poke 8 or 10 holes equidistant from each other in the propagating mix and insert your cuttings, making sure to firm them in with your fingers to ensure good contact with your propagating mix. Cover the whole shebang with your plastic bag.
Check the propagator every two days, topping up the inner pot as required and removing any cuttings that have wilted. After a month or so check your cuttings by pulling on them gently to see if roots are developing, resulting in slight resistance. If not, leave them there but if there is resistant use a fork to get under them and lift them out and pot on with a good quality potting mix.
Once all of the cuttings are potted on or discarded, pull your set up apart and discard the propagating mix. Leave the whole set up in the hot sun for a few days to kill any nasties or wash over with disinfectant, re-assemble and you are ready to go again!


