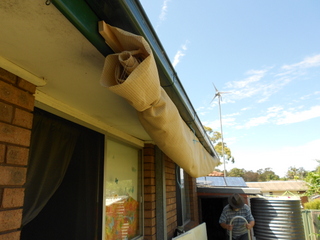
Last summer I wanted to put in something to keep the heat off the back of the house. The back of our house faces west and on a 40°C+ western Sydney day we have our own house sized solar oven! The polystyrene sheets in the windows cut down heat transmission, but I wanted something to shield the bricks and keep the heat out that way. We installed some matchstick bamboo blinds on the basis that they were biodegradable but last year was unseasonably wet and the damn things biodegraded right there on the side of the house and we wound up having to remove and compost them after only one season!
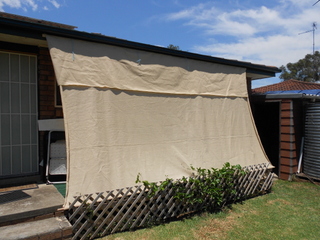
So here we are again, it is 42°C outside as I write this and we have a new protective curtain up over the kitchen/ dining room area to break the sun down a bit and keep it from hitting the bricks. It seems to work pretty well and looks alright too; this is what we did...
I wanted the fabric to be synthetic this time so we would get some better wear out of it, but after measuring up the size we needed, we found that it was unavailable as usual. We had to go bigger or smaller so we elected to go bigger and cut it down rather than smaller and then try and add a bit on.
We needed a piece 4500mm long by 3000mm wide and the nearest was a piece 6000mm by 3660mm so that’s what we bought. The fabric we got was “Coolaroo” Extreme Exterior Fabric which keeps out 84% – 90% of the UV radiation and presumably heat as well and has a 15 year warranty. This should do the trick. We also got a light sandy colour working on the idea that it would reflect rather than absorb the heat, and while it works pretty well I do wonder how a darker fabric would go.
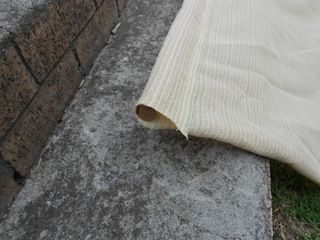
The sides of the fabric were selvedged so that they did not unravel but the ends were not so I cut 1500mm off the length and put it away for later use. The sides were a bit more difficult: I needed to get rid of a bit less than a metre but not lose the selvedge. In the end after finding out that the fabric was folded into quarters I decided to only use three quarters of the width and leave one quarter folded over the top to provide extra protection.
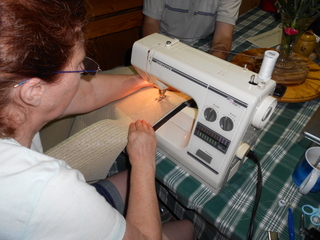
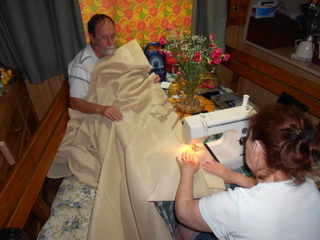
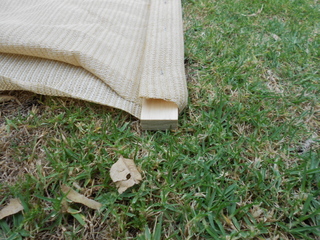
On the top edge, to secure the fabric to the eaves I planned to wrap it around some 45mm x 19mm DAR pine (two pieces because the longest single piece I could get was 2400mm). To weigh the bottom down and make it easier to handle I put in two pieces of 2400mm x 25mm dowel. To fit the dowel Linda sewed a pocket in the bottom of the fabric big enough to accommodate it with her sewing machine and synthetic (polyester) thread. This proved somewhat easier than expected but still meant that towards the end of this operation I was sitting there covered in fabric while I helped pull it through the machine.
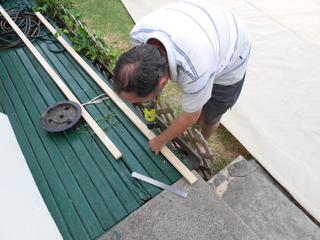
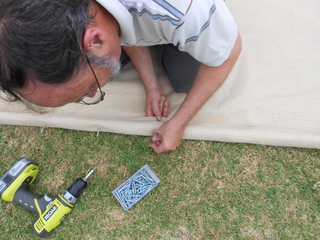
Prior to fitting the pine I drilled a series of holes along both pieces about 200mm apart to accommodate the fixing screws. I wanted plenty of screws to spread the wind load that the fabric would be subjected to, and with that done we went outside and laid the fabric out on the ground. I placed the pine down along the top edge, folded the fabric over and stapled it to the pine. Unfortunately, once the fabric was folded over the pine I could no longer see the holes (Yeah, I know, I know you’re yelling “well duh!” at your computer screen but some of us are smarter than others....). Anyway, using a bradawl I pushed through the hole from the other side, then through the fabric, placed the tip of the screw on the tip of the bradawl and then removed the bradawl from the hole feeding the screw in at the same time. I then used the battery drill to partially screw each of the screws into the holes so that they were secured in the pine. Fitting the screws meant spending some time on my knees working my way along the fabric, which turned out to remarkably abrasive on bare skin – note to self: wear jeans not shorts next time.
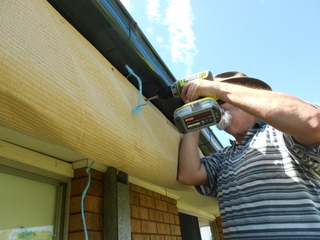
Once the screws were in I got my brother to help me roll the whole shebang up then secure it with straw bale twine into a long sausage....or blind; either description is good! With each of us on step ladders it was just a case of holding the blind in place on the fascia about a finger span below the gutter and drive the screws home into the fascia. Our fascia is fairly soft timber so I did not pre drill first but if it was MDF or hardwood then I probably would.
Once it was in place it was just a case of untying the bailer twine, leaving it in place and letting the fabric uncurl, which all happened fairly easily. The weight of the dowel helps keep the blind down. In the future I may put some spring clips or something in to hold it more firmly but even without them it did not flap about much in the wind. You could still see a bit into the backyard through the blind but it did cut down the blaze of the sun hitting the bricks and warming up inside.
I’ll see how it goes with the double flap up the top and if I find it irritating I may cut it off, because it does tend to blow about a bit although it also increases the protection for the house too. I may also make a second one for the other side of the back of the house, to keep the heat out of the bathroom and office but if I do it will be a dark colour to test out which is better at keeping out the heat – watch this space!


