


Thirty years ago and old friend of mine by the name of Bill Tarplee was operating a magazine out of Canberra and he wrote a series of articles on buying, doing up and looking after hand tools. Bill was a manual arts teacher at one stage, very skilful with his hands and knows all that there is to know about hand tools (among other things). I have been lucky enough to secure his permission to republish some of his original articles (this one was originally published in July 1983) and is the fourth in this series.
Please note: I have done my best to reporduce the "cuts" that Bill used as his illustrations but I am dependant upon the quality of the original printing, which was somewhat variable.
In recent issues we have looked at a number of tools that may be found in second hand stores and markets. Continuing with the series, I would like to look at hole making tools. While such tools can readily be found as second hand items, many are not a good buy. It has been my experience that many old tools are just that – old, but not necessarily much good. Many of the holes making tools fall into this class.
To begin with, we shall look at the driving end of the business. Broadly we can divide these into two classes:
Braces
Braces are mechanical devices that grip a boring tool, usually referred to as a “bit”. They work on the principle of leverage, defined as “sweep”. Sweep is the amount of coverage of the handle, from one side of the circle it describes, to the other. Sweep usually ranged from 8” to 14” (200mm to 350mm) though this was back in the days before they got onto this metric rubbish.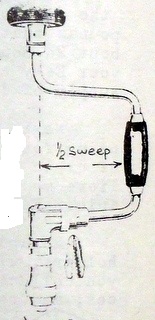
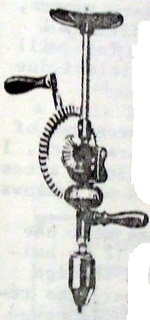
The most common kind of brace found these days is the ratchet type. By turning a ring on the crank, one can either engage, or disengage the ratchet pawls. This enables the quick boring of holes in confined spaces, makes driving screws easier and generally makes the brace more useful. Technically a ratchet brace would be weaker in construction that a non-ratchet version, but I’ve never known one to break so it would be a moot point.
When buying second hand braces, check how much wear there is between the Head (the wooden button top) and the crank. Frequently the head becomes very floppy. It would be possible to re-sleeve the head, but it may be easier just to look for a better buy. Also, check the wear in the ratchet and inspect the condition of the jaws. (the chuck will screw off anticlockwise and the jaws drop free).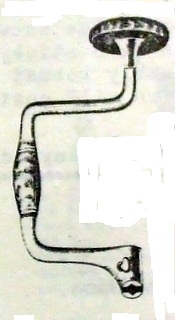
Ratchet braces have remained unchanged for about 100 years so i wouldn’t go looking for an old one – just a good one.
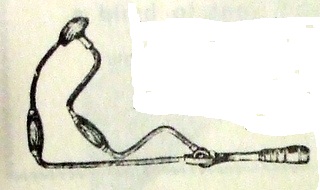
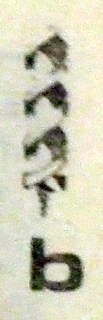
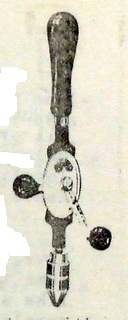
On occasion one may find other and more unusual forms of braces eg the “Spoffords Pattern” shown above. While they are not so frequently seen, they are not rare and would not be worth spending much on, other than as novelty value. I have bought several, but only as examples of older tools.
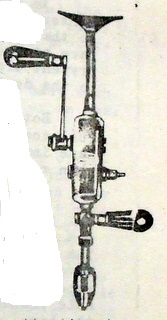
In the past, great minds sometimes spent years developing useless devices (have times changed?). The cut above shows a corner brace and one below is a combination drill and brace. I’ve never seen either, they came from a catalogue over 100 years old.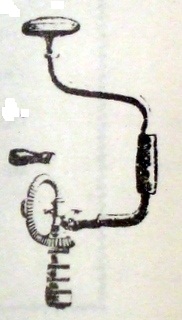
Bits
While one may only need just one brace, you will find a need for a number of bits. Luckily, the flea markets usually abound with them. Again, age is not as important as condition. While you can clean up rusty bits it is usually easier just to look for good ones.
Cut ”A” shows the ordinary softwood auger, these will be found in two versions. A is the softwood and cut "B" shows the cutting end of the hardwood, the difference being that a softwood bit comes with a pair of “spurs” that scribe a circle in the wood , thus eliminating splintering and chipping at the start of the hole.

In hardwood, I like to start out using a “softwood” bit and then switch to the “hardwood” version. The spurs add to the load and you can break a softwood bit if boring into very hard, dense timber.
Cut “C” shows the wood drill, they bore a clean hole of moderate depth, without fear of splitting the timber. They are not quite so common and really don’t do anything the auger can’t do. Worth buying if they are going cheap. Note that they are sharpened to a different angle to the ordinary twist drill, and should never be used to drill holes in metal.


Cut “D” shows a nail or cobra bit. They were primarily used for quick cutting of small holes suitable for bolts or nails. They can tend to wander in the timber and may split the wood if used near the ends. The shape has a tendency to wedge the wood fibres apart. Useful – if you can find them in reasonable condition.
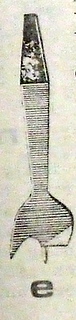
Cut “E“ shows a centre bit. These were useful for boring holes in thinner timber. The action of cutting is similar to the auger, but there are no guiding flutes to keep the bit drilling true. Holes will tend to wander off course. Still, they are easy to sharpen and quick to use so worth buying at the right price.
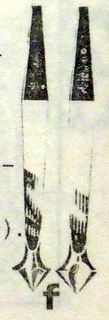
Cut “F” shows two countersink bits. These are used to open out the top of a hole to take a countersunk screw. For my money, the rose pattern (the one on the left) is better than the snail. It has more cutting edges and is easier to sharpen.
Cut “I” shows a long handled augur. These are used to bore deep holes, sometimes more than a metre in depth. Instead of a brace, a crossbar is fitted through the eye. There are plenty of new ones on the market, at good prices – so don’t pay much for an old one.

Cut “J” shows one version of a screwdriver bit. They can break and the metal may not be as it should be so buy several if you can. They are very useful for running in a large number of screws in a short time. BUT. They have a nasty habit of jumping out of the screw slot, which can put deep indentations in the timber. It is important to select a correct fit for the screw slot.
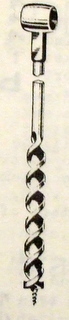
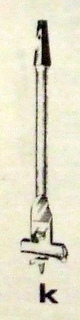
Cut “K” shows an expansion bit. With one of these you virtually have a toolbox worth of bits. The adjustable cutter can be set to the radius required. These bits should come with several adjustable cutters. Unfortunately they are not particularly strong, can wander off course in moderately deep holes and the screw point has fine threads. This means that it clogs easily and may require frequent cleaning. Again, well worth buying at the right price.
Cut ”L” shows a gimlet. While it is not a true bit, it has a variety of uses, mainly for boreing small holes for nails and screws. Can cause splitting if used near the ends of timber.
The last cut, “M” shows a dowel sharpener bit. It is used for forming a taper on the ends of wood dowels prior to inserting them into dowel holes. Probably very useful if you use dowels to any degree. I’ve included it more for recognition purposes than anything else. I’ve never seen one second hand, but you never know your luck.

The box below shows the sharpening sequence for putting an edge on bits. Wood bits are not particularly hard steel, and usually need frequent sharpening. This is done with a fine file although you could always finish the edge with an oil stone if you wished. Note that the spurs on the softwood augur and centre bit are sharpened on the inner side. To do otherwise will lead to a decrease in the diameter of the scribed hole; this in turn will lead to binding of the bit against the wall of the hole.
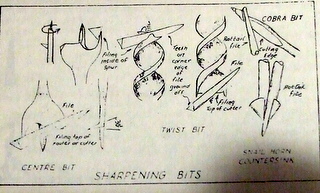
Also, clean the swarf from the hole as you go. Bits – especially the augur – should not be turned in reverse. They will tend to unravel and break in the hole if you do. If they do jam, carefully reverse one to two turns and pull up while turning in a clockwise direction.
Drills
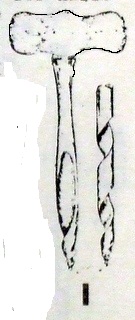
Hand drills may take many forms and shapes. While they may have more specific trade uses, basically they are no more than a method of holding and turning a twist drill.
If you have the opportunity I would suggest that you buy several sizes. The two cuts show drills that can be found in almost miniature form - What one might term a “jewellers’ drill”. I have one that cannot hold drills over 1/8”. It is invaluable when drilling rally fine holes – say 1/32” or less.
My advice would be to look for the “jewellers’ version” with a chuck capacity of 1/8”, plus a GP (general purpose) version with a chuck ¼”, plus one large drill that can chuck 3/8” – ½”. It is with the large drill that you will have several choices.
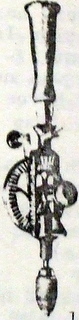
To turn a large twist drill (especially in steel) takes considerable leverage. Thus the larger forms generally come with some form of variable gearing. In the cut on the left one can alter the driving gear to gain about a 1 – 4 step-down. While this is the sort of ratio that you want, I do not like the exposed gear system. From choice I prefer to go to a covered system as shown on the right. I have found that the closed units can shear the driving pin, which is a nuisance but not a disaster.
Incidentally, both of these drills are known as breast drills – “breast” being the upper chest – for leaning upon the plate at the top, not the centrefold variety, which would be somewhat out of place here – unless you are decidedly “kinky”!
If buying second hand drills, pay particular attention to the jaws in the chuck (there should be three, unworn and unchipped), and to the driving lever. Particularly on the exposed gear type, the lever can loosen or become very distorted. While such wear can be repaired, the price should reflect the condition, not your hopes.
My last two cuts illustrate a form of drill that is not common. They were known as “post” drills and were still being sold into the ‘60s, yet I have only seen two for sale and both were priced at more than new prices for bench drills.
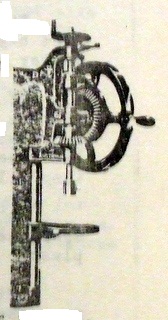
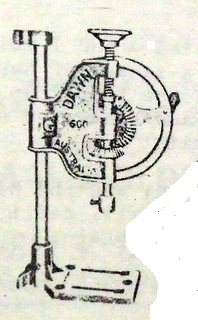
As the name suggests, they should be bolted to a post – which may be a problem in a modern workshop. I think they would be a good buy, especially for those in the bush. Check the gears for wear though.
