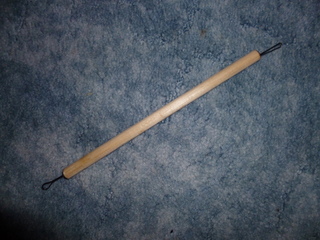
That is to say, a tool made for carving clay not a carving tool made out of clay!
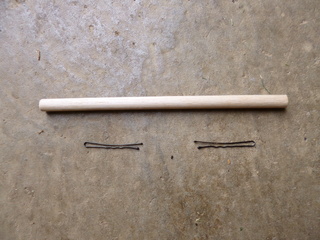
If you have a spare few moments and a couple of readily available bits and pieces it is easy to make a really versatile clay carving tool that can be used to create intricate designs on your home made pots. I have found it very useful in this regard on some slab pots I’ve been making as well as cleaning up larger designs on other pots. All you need is a couple of bobby pins, some dowel and a bit of PVA glue.
I have seen these made with various bits of recycled timber but I prefer a round tool handle and I had some 10mm diameter dowel left over from a previous project so I used that. I wouldn’t go much thinner than 10mm so you still have enough “meat” to support the bobby pin after the hole is drilled, but if you wanted to go thicker, that would work so long as it is comfortable in your hand. Linda has bobby pins around for when she ties her hair back so I snuck a pair of those and I was ready to go.
First job is to cut the timber, or in my case dowel to size. I don’t think the length matters much; it is more personal taste, so I cut the dowel 180mm long which suits me. To make the holes in the ends of the dowel which hold the bobby pins I drew a cross on each end in pencil to find the centre of the dowel then drilled a hole using a 3mm drill. This left a bit over 3mm of “meat” left in the dowel to support the bobby pins. The bobby pins are about 50mm long so I drilled the holes 25mm deep.
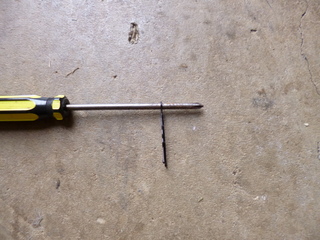
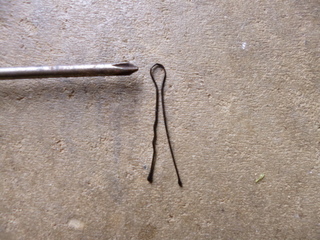
So that you have two different profiles to carve with each bobby pin is treated differently. The first one is left almost as it is, just the ends pulled apart a bit so that the loop is opened up a small amount. The second one however, has the end formed into a wider circle by pushing the bobby pin down over a mandrel of some type, in my case a Philips head screw driver. The end then gets crushed in with a pair of pliers so that the end of the bobby pin forms a circle around the screw driver, after which the bobby pin is slid off.
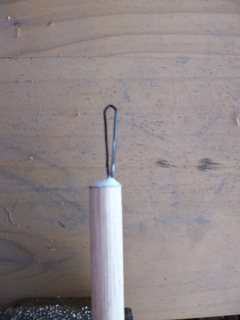
To fix the bobby pins in the ends of the dowel it is a simple matter applying some glue, I used PVA but an epoxy would work just as well, then poking the glue into the hole with the open ends of the bobby pin. To allow gravity to help the glue run into the hole I did this one end at a time then put the dowel into a vice with the glued end pointing up. Once the glue in the original end was set I did the other end the same way. The PVA glue does shrink as it dries so I put on a second layer after the first was fully dried to help keep the bobby pin stable.
After the last layer of glue has dried, a light, fine sand to remove any rough edges and make the handle smoother to hold is a good idea too.
So there you have it, a simple tool to help you be more creative with your home made pots at very low, or no cost if you have the materials to hand.


