It is not often you will hear me say this: but this little gem is actually one of my ideas!
In summer the water level in my productive water garden tends to drop fairly quickly, even in cooler weather due to the transpiration from the mass of herbage growing in it. Also, even good rains only go part way to filling it up because it has relatively small catchment (the pond surface only) which is the size of a bath tub. So I decided the answer was to divert some rainwater from the closest downpipe directly into the water garden to increase the virtual catchment area of the water garden. I also realised that I would have to be able to re-jig the water flow in heavy rainfall times back into the stormwater system so that I didn’t flood the back yard.
I have seen some commercial systems that allow you to do this and I was even able to pick up one for a couple of dollars in a “no longer stocked” pile in our local hardware. However, it was designed for round pipes and to get the connectors for my rectangular ones cost over $20 for a couple of flimsy bits of plastic. I decided I could do better!
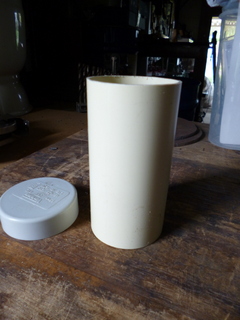
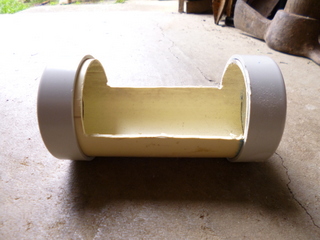
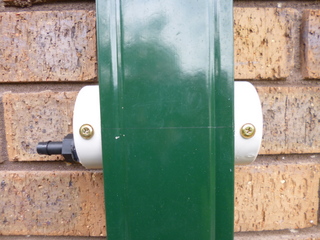
All of the storm water downpipes at the choko farm house are rectangular around the 100mm x 65mm mark, and this got me thinking. The lump of 65mm downpipe I cut off the carport when I was installing the wheelie bin water cistern could all of a sudden become handy. My thought was to drill an appropriate sized hole on either side of the downpipe and put in a piece of the 65mm downpipe horizontally with a cut-out in the centre and a cap on either end. A spout on one of the ends would allow water to be drawn off when the cut out was facing up. To return the rainwater to the stormwater system it would then just be a case of turning the tube through 90° to allow the water to flow through the cut out.
Anyway, that was the theory.....here is the practice.
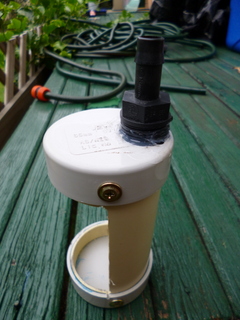
I grabbed the 65mm pipe left over from the wheelie bin and after carefully measuring the width of the downpipe and the depth of the caps I cut off a piece of the pipe at 135mm long. I then fitted the end caps to the pipe (push on only, not secured) and tried it up against the downpipe, low and behold, it seemed to fit OK. I glued one end cap in place and drilled and screwed it in place for extra security, there would be a fair bit of pressure from the water coming down the downpipe and splashing onto the ends and I didn’t want an end being blown off! The other end I only drilled and screwed in place so I could fit and remove the pipe when I wanted to.
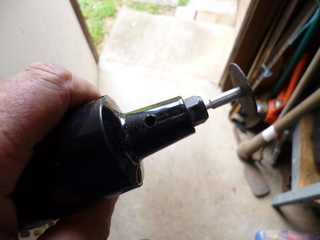
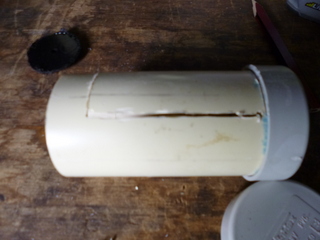
With the end caps in place I then drew a pencil line on the central cylinder beside each cap and then along the pipe about half way along to mark out the area of pipe I wished to remove. To make the cuts across the pipe it was easiest to use my little band saw but a hand saw would have worked just as well albeit a bit more slowly. The cuts along the pipe were a bit more difficult to work out due to reduced access. In the end I used my 12 volt “Dremel” style tool with a very small cut off wheel on a miniature arbour. It did a reasonable job even if it did get away from me at one stage and put an unintended nick in one of the end caps.
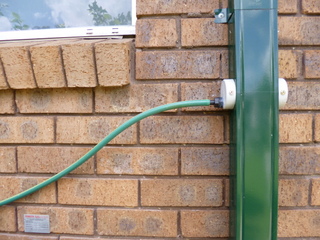
Now I needed a way to channel the water from the cylinder to where I wanted it to go, in this case the water garden. I decided to use the always handy ¾ inch BSP to 13mm barb poly fitting (I had a couple floating around) in a similar manner as I did in the back yard irrigator. Using a 25mm spade bit I drilled a hole at the bottom of the end cap which would be facing the direction I wanted the water to run. I then screwed it in tightly but to ensure a seal, slathered the join in silicon sealant (repeat after me – “silicon is my friend!”). After leaving the silicone to go off overnight, it was ready to go into the downpipe.
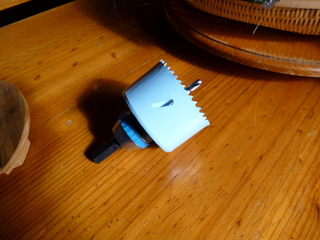
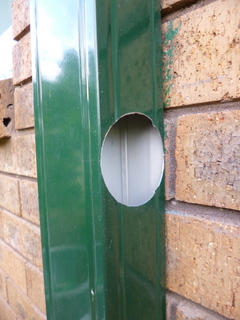
The easiest way to make the holes in the downpipe is to use a 70mm hole saw and a drill, which is what I did. I measured up where I wanted the holes to go; about half way down the downpipe so that there would be some “head” to push the rainwater into the water garden a couple of metres away. I then marked the centre with a pencil mark and with a small drill (2-3mm) drilled a pilot hole to prevent the main drill going off centre. It was then a simple matter to drill out the 70mm holes in the downpipe although I did have to move the drill around a bit to make sure it cut through the stiffening ribs. All told the holes took less than 10 minutes to sort out.
What did surprise me was the cost of the 70mm hole saw and the arbour to fit it. If you don’t already have one (and let’s face it who has a 70mm hole saw just hanging around?) a cheaper way would be to scribe a line the size of the hole you want through the downpipe paint with a pair of dividers. Using the scribed line as a guide, drill a series holes (6mm or ¼ inch) around the inside of the line so that there is very little metal between the holes. Then with a pair of side cutters, cut through the remaining metal. This will leave a hole like a many pointed star (sort of) and you can then file away the extra metal up to the scribed line with a half round fine file. This method takes more time and effort but is quite accurate and will use tools that you hopefully will have handing around, hence it will be cheaper.
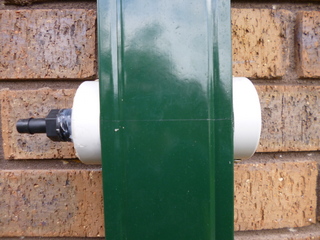
With holes now in place I was able to fit the cylinder by removing one end cap, sliding the cylinder in and then refitting and screwing the other end cap to secure it. It seems to seal OK and while not being sloppy it is still reasonably easy to turn. When the 13mm barb fitting is at the bottom of the end cap all of the water is diverted down the hose, when it is rotated through 90° the water is able to bypass through the cut out part of the cylinder.
Once you have one of these bad boys in place you can use it to divert rainwater to a tank, garden bed, tree or water garden so that you are increasing the catchment area for the item that the rainwater is going to feed. It is cheap to make, effective and a handy way to get rainwater to where you want it without spending a fortune.
Update: We have had some pretty big rainstorms lately and the rainwater harvester works pretty well, allowing much more catchment than with the pond alone, but there is some problem with sealing and we get some water splashing outside the harvester. Some more development needs to be trialled, perhaps with O-rings to act as seals between the end caps and the downpipe.


