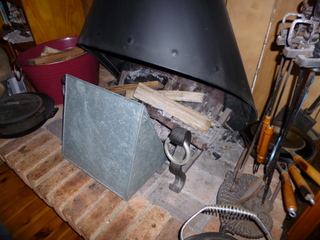
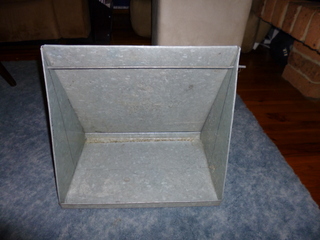
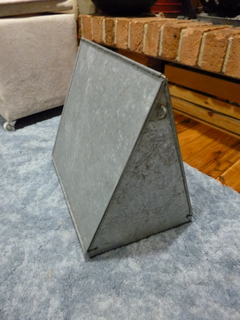
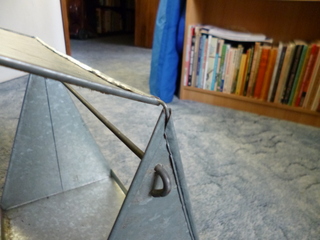
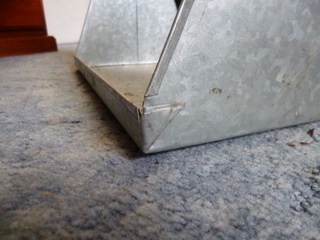
I put this together with assistance from my brother a few years ago, you don’t have to have a sheetmetal worker in the family but it sure helped me. The plans for this little gem can be downloaded here.
Using a thin felt tipped marker, I transferred the lines from the plans onto some galvanised 0.5mm thick sheet steel that I had floating around, and then using some offset tin snips (Wiss brand if you must know) I cut the shapes out for the oven body and the oven reflector. While it doesn’t take a lot of words to say that, to cut the shapes out of sheet metal with any pair of tinsnips is a crap-load of work. The straight kind of tinsnips are OK but for any large work an offset pair is much easier to work with, although these days I would be much more likely to connect up my nibbler to the battery drill and use that. The nibbler is much easier and quicker to work although if you are good with the tinsnips you may find them to be more accurate, it is easy (or at least easy for me) to get off line with the nibbler.
Anyway that was then (well before I had bought my nibbler) so tinsnips were my only real option. If you are using tinsnips too, it makes sense to have a pair of sturdy gloves handy because the cut edges are SHARP and sheet metal running with blood is not easier to work with, especially if the blood is yours.
Once both shapes are cut out, we can get into the real work! At this point it is probably worth mentioning that there will be a requirement to fold the metal to make the body of the oven and then fold the edges of the reflector over so they can be wired. This can be done in a number of ways and if you don’t have a press brake hidden away in your garage somewhere you may wish to consider making a simple sheet metal bender first. They are comparatively easy to build and handy if you intend to do almost any sheet metal work because you will no doubt need to bend or fold it at some stage.
The body of the oven
OK, so you have either built the folder and/or have some wide jaw vice grips (often called flat jaw welders vice grips, both will come in handy!) to help bend the metal, cut the profile of the body out of sheet metal and scribe all fold lines. Mark the hole near the apex of the side, centre punch it to prevent the drill wandering and then drill out a hole the appropriate size of the wire you intend to support the food, the thicker the better. You could use fencing wire, I used 5mm rod salvaged from an old pram, with the ends bent straight.
With the hole drilled insert one end piece of the oven body into the bender down to the scribe line and bend up at than 90°, then repeat with the other end. Using the welders vice grips bend the sides of the bottom tray up to 90° to form the bottom tray and the corners back so they will fold around the outside of the bottom tray and form a leak proof edge. Bend all edges of the sheet which are to be wired out using a pair of welders vice grips to start the wiring process. Wiring the edges increases strength and stiffness of the finished product as well as removing any sharp edges on the metal which could result in cuts.
Complete the assembly of the oven body by placing a piece of hardwood on the inside of the bottom tray and hammer the corners around the end of the tray to lock them in place.
To wire the edges, cut a 740mm length of wire (I used 2mm galvanised wire) and make a 90° bend 180mm in from each end leaving a 380mm length in the centre, this is important so check the measurements! Support the oven body on a hardwood block and place a 180mm section of the wire into the fold along the edge of the oven upright. Using a cross-pein hammer, fold the bent edge of the oven upright over the wire such that the wire is held snugly. Take the wire around to the other side so that the 380mm section acts a bridge between the apexes of the two uprights and do the same on the other side. The result should be a wire running down each side of the oven and across the top, holding the two apexes steady and reinforcing the top of the oven. All of the other edges can be wired using a similar process.
Making the reflector
Assuming your reflector is cut out in accordance with the plan, scribe all fold lines and using the welders vice grips, bend all the edges over to about 90° in accordance with the plan. Using the cross pein hammer, bend the two 380mm sides and the 386mm edge with the 13mm corner cut off over so that they are sitting flat against the reflector. Place the remaining edge of the reflector over the top wire of the oven such that the side of the reflector without the folds faces in. Using the cross pein again, hammer the last remaining fold down over the top wire of the oven, securing the reflector and the oven together.
Using the Oven
The food to be cooked is hung from the main (5mm thick) support wire and then the whole oven is place facing the oven, about 30cm away from where the flames are, we had to get a couple of bricks to get the oven up high enough to cook properly. We found that this oven roasts chooks pretty well if you wire them, feet first, to the support wire.
If you missed part 1 it can be found here.


