


Back when I was in high school a mates' father made him a laboratory stand to go with some chemical apparatus he had bought to do chemical stuff at home with, the stand was a rod which screwed into a steel base. The fact that his father had threaded the end of the rod and the inside of the plate were a revelation to me, up until then I thought it was an industrial process that you couldn’t replicate at home. That was the start of my interest in metal working!
To increase the types of dishes which I could cook in my fireless cooker I had some steel heating plates made up the right size to fit into the bottom, underneath the pots. The question was how to fit them into the cooker once it was heated? The answer which I came up with was to drill a hole in the centre and tap it, then thread the end of some steel rod the right size so I could screw it in and pick up the heated plate, lift it into the hole and then unscrew it, leaving it in place.
Equipment

To make your own threads on metal rods and in metal plates, you need a certain amount of equipment –
Die – the metal cutter used to apply a thread to a metal bar. Generally dies are split and have a screw which allows them to be adjusted slightly (C), but some of the cheaper sets have dies without the split (D).
Stock – the tool which holds the die and allows it to be turned while threading the end of the bar (A).
Tap – the tool used to cut an internal thread on a predrilled hole. Taps bought separately come in sets of three for each size of hole:
• The taper tap which has a long taper ground onto 7-9 threads to allow easier starting, and can be used to completely thread a through hole (The tap shown at (E) above is a taper tap),
• The intermediate tap which is used in a blind hole once the threading process has been commenced with the taper tap to carry on the process, it has 3 – 5 threads ground to a taper. The intermediate tap allows a deeper through hole to be tapped and prepare the bling hole for a plug tap and
• The bottoming or plug tap which is used to finish the process of threading a blind hole and is only tapered for the first 1 – 1.5 threads.
Tap Wrench – The bar type tap wrench (B) has central jaws to hold the tap and side bars which allow the tap to be turned during threading operations. There is also a smaller tee type wrench (G) which has an adjustable chuck on the end of step and a tee handle.
Screw Pitch Gauge – where there is a requirement to match existing threads on, say a bolt is to be screwed into the newly threaded hole, the pitch of the existing thread must be measured using this tool (F) so the tap can be matched to the bolt.
")
Decisions, decisions! (What thread to use)
If there is no need to match an existing bolt or other thread then the choice of thread will be comparatively simple and so long as the thread on the tap and the die match things will pretty much work. Having said that there are couple of thoughts to bear in mind when selecting a thread –
• The finer the thread the more contact between the thread faces resulting in a stronger grip without reducing the diameter of the bolt unduly.
• The coarser the thread the easier to tap, keep clean and get the bolt to screw in and out. It is best for thick materials. Due to the heating and cooling of the steel I selected a coarser thread to reduce the likelihood of binding.
In general terms, the English have a system for fine and coarse threads (Whitworth and BSF), the Americans have a similar system of fine and coarse threads (UNF and UNC) but here in Australia our current standard is metric.
The process – threading the rod
1. Grind a lead-in onto the end of the rod to be threaded, at about a 45° angle and to a depth of at least one thread.

2. Secure the rod in an upright position using an engineer’s vice such that it cannot turn when pressure from the die is applied.
3. Insert the die into the stock and secure with the retaining screw. Ensure that the die has the face which is stamped with its size etc. towards the job as this is there the lead-in is always ground i.e. the blank face of the die goes against the stock.

4. Position the face of the die onto the rod, apply lubrication and ensuring the stock and die are at 90° to the rod, apply a moderate amount of pressure and turn clockwise until the die starts to grip and cut a thread.

5. Check to ensure the stock and die are still at 90° once approximately ¾ of a thread is cut.
6. Back the stock and die off slightly to break the first chips, then continue turning, backing off about 3/8 of a turn after each quarter turn of the stock and die. If you fail to do this the chips will curl up inside the die, ruining the thread.

7. Continue this process until the desired length has been tapped then remove the die and careful wipe the threads clean.
The Process – Drilling the hole
1. Where possible, a tapping drill the right size should be used. Note, a clearance drill is the outside diameter of the thread which allows a bolt to be inserted through the hole without catching the thread. A tapping drill more or less the inside diameter of the nut. If the tapping drill is too small for the tap the tap will bind and break, if it is too large the threads will be too week and may strip out. The appropriate size is usually stamped on the tap, otherwise consult the manufacturer’s tables for the correct drill size.

2. Also where possible, to ensure the drill is maintained at 90° to the work, it is best to use a bench or pedestal drill.
3. Centre punch a mark using a centre punch and hammer over the spot where the tapping hole is to be drilled.
4. Secure the job to the drill table where this is possible and apply some lubrication.
5. Drill the hole to the depth required using a firm and even pressure, preferably with a sharp drill. Using a blunt drill may cause the surface of the hole to work harden and result in the tap being difficult to turn or even breaking off.
6. Drilling the hole out will leave a raised edge on the underside of the hole which can cause cuts. It can be removed by turning an oversize drill in the entrance of the hole by hand.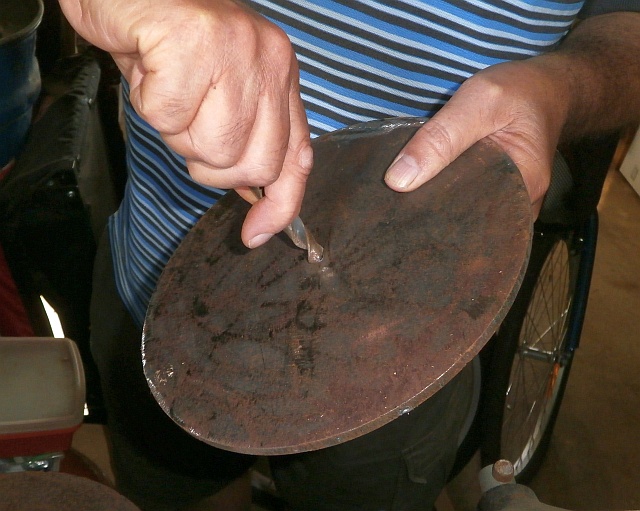
The process – Tapping the hole
1. Secure the job so it cannot rotate during tapping. Ie clamp to the bench or in a vice where appropriate.
2. Insert a taper tap into the tap wrench and tighten.
")
3. Place the tap into the hole, lubricate freely and ensure that the tap is at 90° to the job. Commence turning in a clockwise direction while maintaining a 90° angle up to ¾ of a turn or 1 turn. Once the tap becomes tight to turn, back off half a turn to break the chips.
4. Continue on cutting the thread, backing off each eighth or quarter of a turn, lubricate if the tap is getting tight. If you are tapping metal greater than double the thickness of the tap, remove the tap regularly and wipe the threads free of swarf.

5. On a through hole keep tapping until the tap turns free within the hole ie the tapered section has passed fully through the hole.
6. Remove and clean the tap. Then conduct a test fitting of the threaded rod into the the newly tapped hole.
Broken Taps
I f too much pressure is applied the tap will easily break. There are proprietary tap removers available but if you have access to the back side of the job it is best to pick a pin punch just below the size of the hole, support the job firmly and knock the tap straight back out of the hole with the punch and an engineer’s hammer. Part of the threads will be damaged but the job will re-tap surprisingly well.
If you should break off a tap in a blind hole, please accept our sympathies, you are on your own! You could try a tap extractor and we wish you the best of luck.
Lubricants
To avoid broken taps and crappy threads it is important to use a lubricant on all tapping and threading operations. In most cases a light machine oil (eg sewing machine oil) will do the trick or even a vegetable oil or motor oil if that is what is available.
