The physical aspects of a soil consist of how its parts work together to form the soil structure, dictating how well or otherwise a given plant will thrive on that soil. Soil is generally broken down into three physical components;
Sand; silt and clay but you can also add a fourth – organic matter
Sand – a sandy soils, like those found around Perth (Aus) have very coarse structure with good drainage but a sandy soil lacks clay and loam and so will not hold water and will tend to lack nutrients. Sandy soils are easy to dig into and plant roots can penetrate them easily but dry out quickly after rain. Too much sand can be as bad as not enough.
Clay – on the other hand, clay soils have very fine particle size, they generally can provide the plant with good nutrition but drainage is poor and they tend to waterlog easily. There is nothing like planting into good old Sydney clay! Unfortunately when the clay soil does dry out it can go hard as a rock and be very difficult for plant roots to penetrate and a bugger to have to dig.
Silt (often referred to as “Loam”) – silt is weathered rock and in particle size sits between sand and clay. It feels like flour when dry but has a silky feel when wet. It provides some nutrients to plants and allows for some soil water retention.
There is a complicated little phase diagram which, once you know the percentages of each of these three components, will allow you to work out what type of soil you have. It might be clay, clay loam, sandy loam etc. To me the name is fairly meaningless because I am a back yarder not a soil scientist, but the components of my soil will let me know how well I will be able to grow the plants I want but also give me some hints on what I can do to improve my soil.
Organic matter – This is the part of the soil contributed by the plants and animals which live in, under and on top of the soil. It is comprised of humus, particulate matter like mulched up sticks and leaves or partially decomposed animal dung and, especially where bushfires are a feature of the landscape, charcoal. Strangely enough soil organic matter not only improves drainage but also improves soil moisture retention, as well as providing nutrients for plants and other soil life.
Conducting the Test
It would seem a good thing to have a rough idea about the sort of soil you are blessed (cursed?) with and what you can do about improving it, so what follows is a simple test anyone can carry out once you have correctly sampled your soil.
-
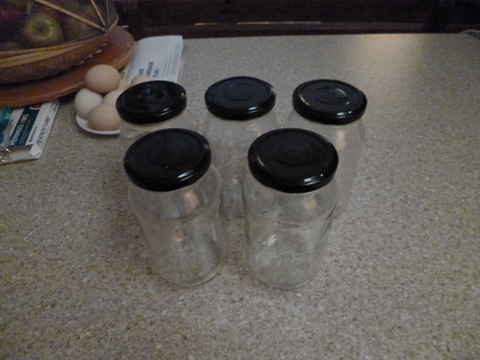
Get hold of some glass jars, somewhere between 500ml and 1 litres (I use recycled 500ml jars because it is what I have). You will need to have one jar per soil sample (see soil sampling). If you use recycled jars remove the labels, you will need to be able to look through the side of the jar and it is easiest to compare relative amounts of the soil components if the jar has parallel sides.
-
Label each jar so you know which sample is in it, I just use a simple number to denote which is which but it is a good idea to write down somewhere what each number means. A good place to do that is the soil test results sheet.
-
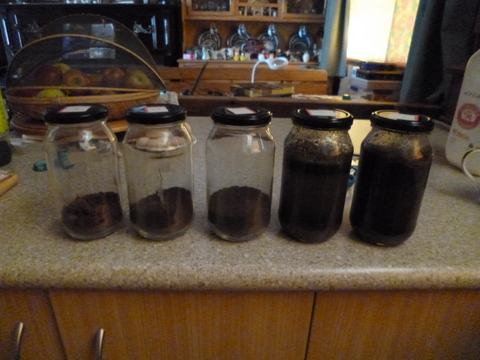
Add a soil sample of approximately a quarter of the volume of the jar, I use 500ml jars so to put the sample in I used a half-cup sized measuring cup (1/2 cup = 125mls).
-
Add water up to approximately 80% of the volume and then place on the lid (firmly!) and then give the whole apparatus a good shake. A loose lid lets it gush out all over the place and if you happen to be doing it in the kitchen and the lid comes off your popularity score with your significant other could take a considerable dive. (not that that happened to me of course!)
-
Let the samples stand unmolested overnight and they will be ready to read the next morning.
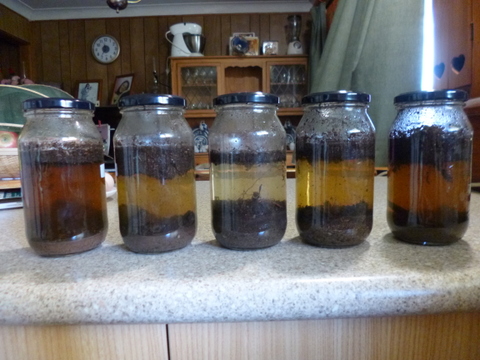
This process works by stratification, the heaviest materials sink quickest, while the finer materials can take much longer to settle. So over time a series of layers are laid down and these can be read through the side of the glass jar. The bottom layers will consist of any rocks, followed by coarse sand, fine sand, silt and then progressively finer particles until the clay layer deposits, although the really fine clay may take days or weeks to come out of suspension.
Another indicator of the type of soil you have to work with is the layer of floating material on top of the water. This layer is formed by the soil organic matter, so the thicker the layer the more organic matter in the soil.
The relative thickness of each layer will give you an idea of how your soil is made up. A quickly sinking thick layer of coarse material indicates a very sandy soil whereas rough equal amounts of all components indicates a good loamy soil that won’t take much effort to grow plants well.
“Feel” Test
There is an even quicker and lower tech soil test which requires no equipment and can be carried out in the field. Dig down with your fingers into the soil and make a ball of soil and squash it between your fingers, smear it about a bit. How does it feel?
If the texture has a “silky” feel to it your soil will have a high clay content but on the other hand if it has a “gritty” feel it will be a predominantly sand containing soil.
Altering Your Soil
Regardless of the soil you are working with you can improve it, or you can make it worse. To improve a sandy soil, add organic matter in the form of compost and mulch it well. This will both provide nutrients for the plants and improve the soil’s capacity to hold water.
If you already have a silty/loamy soil you probably won’t need to do much, but every soil is improved by adding organic matter so you may want to add some to ensure nutrient levels remain high. Depending on your climate, mulching usually improves things too although in a very wet climate it can cause too much water retention.
If you have a clay soil there are additions which you can make that will directly improve drainage and soil structure. Fine clays are sodium clays and while they are nutritionally good for the plants they tend to get waterlogged very easily. To overcome this adding a source of calcium will cause a chemical reaction which changes the clay from being a sodium clay to being calcium clay which has a much more open texture and much better drainage. To achieve this either add powdered gypsum (a mineral) which is neutral and will not affect soil pH or, if the soils are acid add either agricultural lime (calcium carbonate) or dolomite (a mix of calcium and magnesium carbonates) which will raise the pH, making the soil less acid.
Unfortunately it is also possible to alter your soil for the worse and this will occur if it is cultivated too much. Cultivating the soil by digging, double digging or rotary hoeing breaks down the soil structure reducing drainage and air penetration into the soil. It also has other undesirable effects such as reducing the amount of living things in the soil and exposing organic matter to the air and sun where it can be oxidised or “burned out” of the soil. The more often the soil is cultivated and the more aggressively it is cultivated eg by a rotary hoe rather than a spade, the more marked this effect will be.


