Years ago I became interested in hydroponics but I still wanted to grow things organically. Hydroponics usually uses a specifically formulated mix of chemical fertilisers designed and maximised for each individual crop, dissolved in water and delivered directly to the roots by one of a number of techniques. But the thought occurred to me that you could use organic materials to achieve the same result……….maybe!
It was clearly worth having a go and I decided a bit of study and experimentation was in order. Unfortunately this was pre-internet and there was precious little in my books about the organic side so what little I did find had to form the basis for my experimentation. First I needed to make something to support the plants and distribute the nutrient solution.
The Nutrient Solution Container
As previously mentioned there are a number of possible techniques used to get the nutrients to the plant roots, the one I was going to use consisted of a length of pipe on its side with holes cut in the top and pots placed in the holes. Simple! This is how I made it –
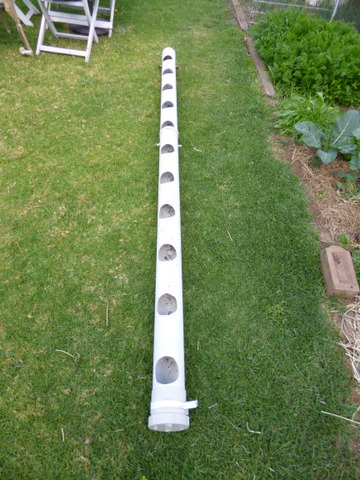
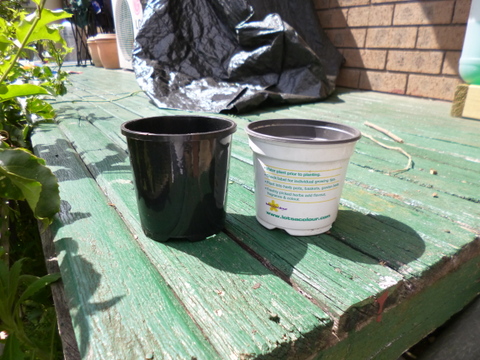
- I got hold of a 2 metre length of 100mm diameter of PVC pipe, which I designed to take the ubiquitous 100mm pot. These pots can be bought new but are also fairly readily available second hand from other people’ ”throw out” piles because they often are used for ornamentals from plant nurseries and once the ornamentals have been planted out in the garden the plastic pots are thrown away.
- To start the process of rendering the pipe suitable for my hydroponic activities I drew a straight pencil line down the length of the pipe and then measured out 100mm diameter circles with 150mm between them along the length of the pipe using the line as the centre. That turned out to be holes sufficient for 11 pots. I could have spaced them closer together but I wanted plenty of space for the luxurious growth I was sure I would see.
- With the pipe marked out I got hold of one of the 100mm pots and then placed it over the line and drew around it with a pencil to transfer the circle shape to the pipe. I then drilled a hole (about 6mm diameter) on one edge of the circle and inserted my jigsaw and used it to cut out the circle.
- The way the geometry of the round pipe surface works out, the holes are a bit over 80mm wide when measured across the hole, but the pots fit snugly anyway. If there are any jagged bits or the holes aren’t quite right, a half round file will fix up any problems quickly and easily.
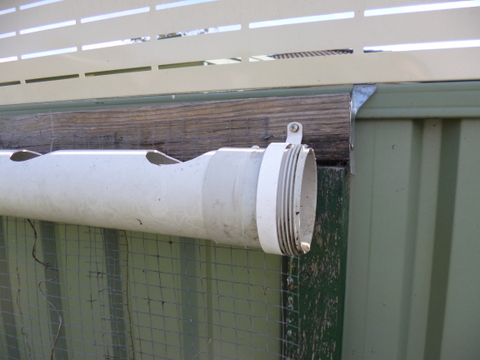
- Now I needed ends! One end was just a simple pipe cap, glued in place but I wanted to be able to drain out my hydroponic nutrient solution and replace it regularly so the other end needed to be removable. Fortunately they do make a glue-on screw on/screw off fitting for these size pipes so I got hold of one and glued it on, the pipe was now finished.
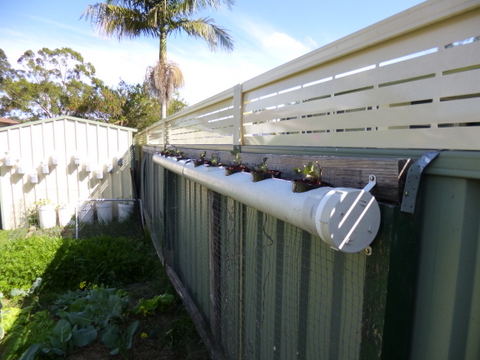
To mount the pipe I originally got hold of some circular pipe supports the right diameter, clipped them over the pipe and screwed them onto a bit of timber, then screwed the timber down onto some shelf brackets mounted on the fence. I used three supports, one on each end and one in the middle. For my most recent foray I just screwed the supports sideways, directly onto the supports I use for the trellis behind the veggie patches against the western fence.
The Nutrient Solution
The nutrient solution I tried first was pretty simple:
- 1 part by volume worm castings
- 1 part by volume chook poo
- 1 part by volume wood ash
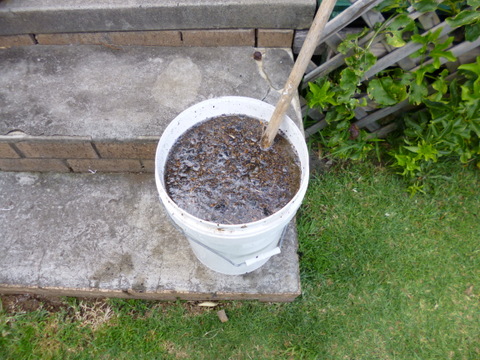
The container I used to measure out the ingredients was a cup about 100ml in volume. This all went into a 20 litre bucket full of water, vigorously stirred for 5 minutes then left to settle overnight. Once the nutrient solution was ready I tipped it into a watering can and poured it into the pipe nutrient container until it was half full.
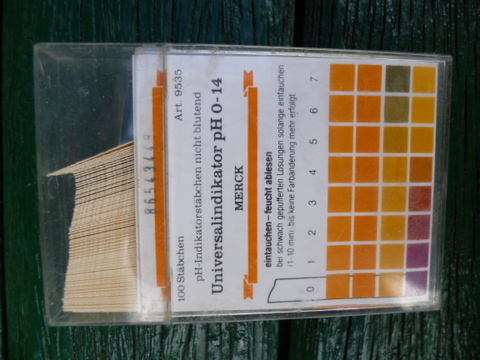
The neat nutrient solution seemed to work to a certain extent with the veggies but then it came to the strawberry plants I checked the pH using universal pH papers, and it appeared to be somewhat alkaline so, knowing strawberries prefer more acid conditions I used some vinegar to lower the pH to about 6.
The Plants
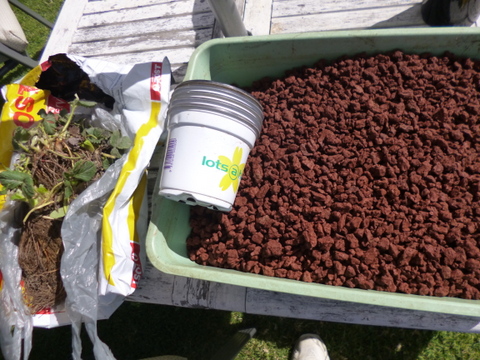
Initially, I used veggie seedlings, the same ones I would be planting in the beds at that time. I would wash off the soil from around the roots, grab a 100mm pot and half fill it with 10mm-12mm gravel, pebbles or scoria, place the seedling in the centre and then fill around it with more gravel etc. Once the seedlings were in place the pot went into the tube and nutrient solution to grow! (hopefully).
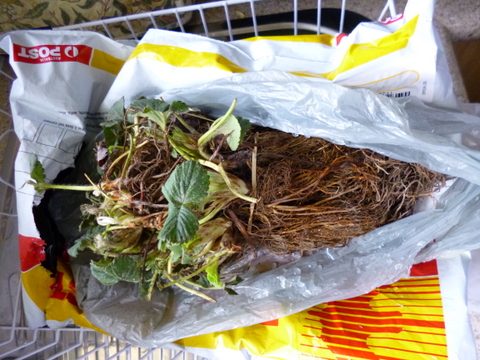
During my more recent efforts to grow strawberries, I got hold of some bare rooted strawberries over the net and when they arrived I placed them into the pots using the technique related above. The only difference was that originally I used gravel in the pots and this time I had some scoria the right size hanging around so I used that.
Operating the System
This part was pretty easy. On the weekend I filled up the pipe to half full with the prepared nutrient solution. During the week I kept an eye on the nutrient solution level and the condition of the plants topping up with water if too much evaporated. The following weekend I unscrewed the cap on then end and drained the spent nutrient solution into a bucket and chucked it on the lawn then flushed the pipe out with clean water. I then re-screwed on the cap and refilled the pipe with fresh nutrient solution.
How did it Work?
Veggies
I originally tried various veggies and while I always got growth, they did not grow as quickly or produce as well as I had been lead to believe they would. The best response seemed to be from the leaf veggies like lettuce so there was obviously enough nitrogen, but this raised another problem.
The nutrient solution became anaerobic pretty quickly and gave off a bit of a pong. This was unnerving enough being close to veggies that were due to be cooked, but if they were to be eaten raw (like lettuce) I became concerned that bacterial contamination would make people sick. In the end this was why the experiment ended.
Strawberries
I chose strawberries because the berries would be borne away from the nutrient solution containing pots and they would eventually grow down the side of the pipe and onto the trellis behind. The strawberries initially grew well but one of the problems was that they went in a bit late in the year and the hot weather was upon us before they had a chance to get some good growth on. The hot weather kind of cooked them, we did have some quite hot weather (40⁰C+) this spring, but also I don’t think the nutrient balance was right. As well as that I used a different capacity cup to mix up the nutrient solution and I think it was probably not dilute enough. The pH of the solution may have been a factor also.
Where to from here?
For organic hydroponics to work I think it needs a far more scientific approach than I have taken up to now. I have been using the techniques of “gut instinct” and “best guess” and it ain’t good enough! There needs to be better monitoring of the nutrient solution, testing for pH, NPK and conductivity so there is some understanding of nutrient ratios and overall concentration levels. Planting the stuff at the right time helps too!
So there is more work to do and all I can say is “watch this space, but if you are doing stuff with organic hydroponics, drop me a line and let me know what you are doing, and how well it works!


