


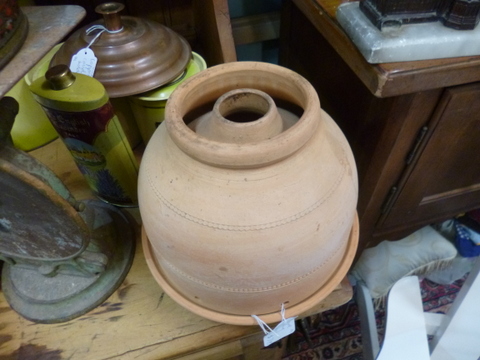
A few months ago we were going for a drive to pick up some local apples to make applesauce with and wound up driving through the Blue Mountains. We found a decent sized antique type shop and while looking around there found a terracotta butter cooler, or at least that is what the label said it was. It was basically one terracotta cone made inside another with a terracotta saucer on the bottom.
The idea was to fill the space between the two cones with water and as the water seeped out through the unglazed terracotta and evaporated it would keep the butter stored inside cool. It looked nice but they were asking more than I was prepared to pay for it so I took some photos and decided to make my own, as if you hadn’t already guessed that from the title of this article.
I had not seen one of these before and we do hang around antique shops on the odd occasion, so they must be fairly rare. The only information I was able to turn up from searching on the internet was that they were made by Bendigo Pottery years ago and that was about it. Anyway, I got some good photos of it –
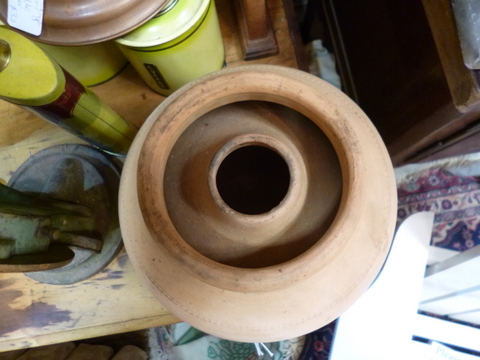
The dimensions of the whole thing are a bit problematic as I didn’t take any measurements except to note that the open end of the top dome was about one hand span in diameter or around 200mm across. While I don’t think the dimensions are critical, I did scale everything up to allow for shrinkage during drying and firing of the clay. It didn’t shrink as much as I expected it to and the diameter across the open end of the top dome of my one is still about 280mm after firing.
Making the top
The top, bell shaped construction is composed of an inner cone and an outer dome which are joined together at the bottom to form a reservoir between them. I decided to start by making the outer dome first. I got hold of a disk of plastic covered particleboard about the diameter I was looking for to make the dome on, the plastic being to prevent the particleboard from absorbing water out of the clay and making it dry out too soon.

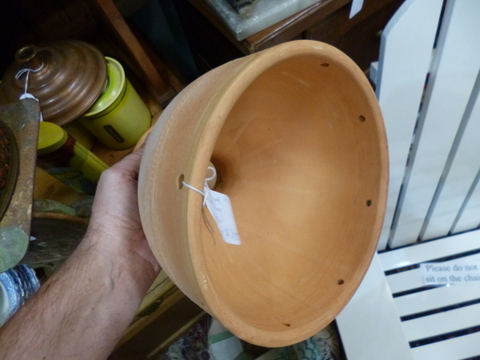
I made the outer dome using the coiling technique in the same way I made the ollas but in this case there was no bottom and I started the coiling around the outside edge of the particleboard disk. I built the walls up and then curved the top in so that it formed the bell shape about 200mm high and leaving the top open, curving it over to form a lip with the hole in the centre being about 140mm wide. I wrapped it up in a couple of garbage bags for a week, then removed it (very gently) from the particleboard base using the wire clay cutter. It looked pretty good but still quite rustic (rough) so I put it on one of the pottery wheels and finished off the outside so that it looked a bit more professional.

The inner cone I made using the same process but laid the first layer of clay a bit inside the circumference of the disk, probably 10mm or less inside the rim. I also brought it in a bit more quickly as it went up so it was sort of like an inverted funnel, and carried it on up slightly higher so that when the top was assembled the lip of the inner cone would sit up a bit higher than the edge of the outer cone. This was to reduce the likelihood of spilling water into the centre butter compartment when topping up the reservior. The inner cone sits 20mm above the rim of the outer dome and the hole in the centre is 80mm in diameter.

To finish off the inner cone I stuck it on the wheel and smoothed off the rim to a bit better standard, Once the inner cone and outer dome were complete I gently slid the dome over the cone and massaged the dome down until both sat together. This process did expand the bottom of the dome out a bit but ensured that they both joined together firmly. I turned the entire assembly upside down, resting it on a flower pot, then using a wet finger I ensured the join between the inner and outer structures was well sealed to prevent leakage of water from the reservoir once it was fired.

In between working on the clay I kept it wrapped in several garbage bags to prevent it drying out. This is important if you want to keep working on it but it is also important once it is finished if you have other parts to make. You need to make sure they fit while at the same state of dampness otherwise as they dry they will shrink different amounts and may not fit together when fully dry.


Making the bottom saucer
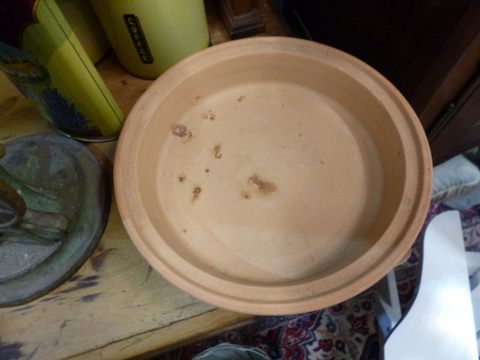
This was somewhat easier and to make it I got hold of a larger disk of particleboard, then rolled out some clay to about 10mm in thickness. Using the particleboard disk as a template I cut out a disk of clay and placed it on top of the particleboard. I placed some coils of clay around the edge and formed them like a plant pot saucer, with a lip which sat just outside the edge of the top dome and prevented it slipping off the saucer. It was a bit rough around the edges, being hand built so I removed t from the particleboard, turned it upside down and then set it on the wheel and finished it off. It the end it worked pretty well but I left it upside down to dry out with newspaper underneath it to support it but the centre dropped a bit meaning the centre of the saucer is now raised a bit rather than being perfectly flat. It still works though!
Making the Lid
As previously mentioned, I have not been able to find out a lot about the original design of the butter cooler. The one I saw did not have a lid on the inner hole at the top, this could have been because it was lost or because it did not exist in the first place. Anyway, the lady who teaches pottery thought it needed a lid, if for nothing else than to stop flies getting into the hole and onto the butter so I made one.
To make the lid I rolled out some clay about 10mm thick and then using a template (plastic lid off a takeaway coffee cup to be precise) I cut around it to form a disk. I cut a slice about 1cm wide from the remaining clay and attached it to the bottom of the lid to form a lip to prevent it being knocked off using the same technique as for the olla lids. This lid was made to be removed every-so-often so I added a ball on the top, formed in with the lid and then polished it all off on the wheel to make it look less rough.
That was it!
All bits were now allowed to dry for several weeks before being kilned to bisque temperatures. Contrary to my expectations, it came out of the firing quite OK, I had spent so much time and effort on the damn thing I was sure it would come out the end of the firing as a series of terracotta shards but all was well.

We have it set up on our dining room table and it seems to work quite well but the weather has been cool. The reservoir takes about 2 litres to fill and lasts a couple of days at the moment before a refill is needed.
The whole thing was a bit of time and effort, but I’m glad I made it!
