Generally we start seedlings in punnets (unless they go straight into the ground like peas, beans etc) and then transplant the seedlings when they come up into newspaper pots and let them grow on a bit before planting out. This is not the only way to start plants off however and lately I have been fooling around with a doohickey (technical term) which makes round soil blocks. The idea is that this will take out a step. You just sow directly into the soil block and when the seedling has grown big enough you can plant it directly into the veggie patch. Thus you don’t have to make the newspaper pots but can still plant the veggies without them suffering transplant shock.
The single block soil blocker can work for us because of the number of blocks we need is fairly small, 20-30 every 2 weeks. There are commercial soil blockers which can produce upwards of 20 at a time and if you were planting out large areas of land, that would be what you need.
Anyway, if you are interested in making one from scavenged bits and pieces, this is how I made mine –
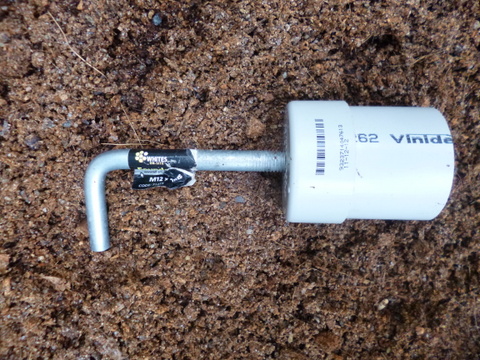
I got hold of some 50mm ID PVC pipe which I had lying around from previous projects and cut off a length of it using my small band saw, although a hand saw would had done just as well (I’m lazy, OK?). You can buy caps to fit most pipes and I also had a 50mm pipe cap floating about so I slipped it over one end of the pipe.
I also had an M12 x 170mm foundation bolt which I bought previously for a project but never used. It is ridiculously outsized for the job in terms of strength requirements, but when fitted with a nut it leaves a 15mm wide depression in the top of the soil block. This allows you to plant most seeds and then cover with a bit of soil mix, so that is what I used. You could do the same thing with a 6mm or similar ring bolt and it would do as good a job and be much lighter.
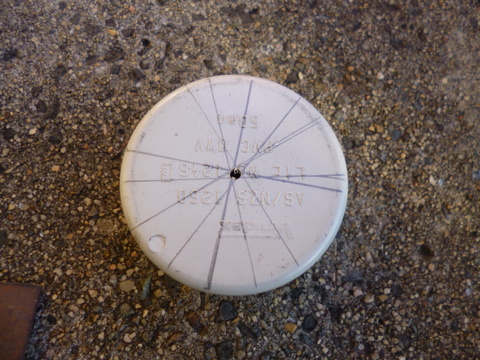
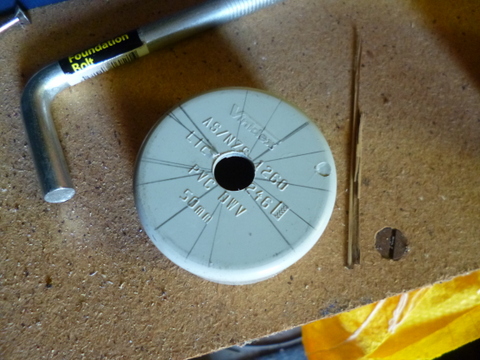
To fit the foundation bolt into the cap, I needed to drill a hole through the top of the cap the correct (12mm) size and in the very centre of the cap. Some plastic bits have a mould mark in the centre but just to be ornery, the one I had didn’t so I needed to find the centre of the cap somehow.
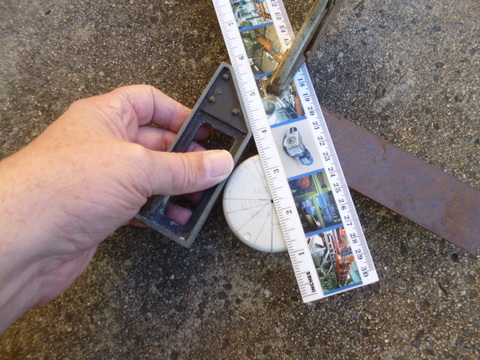
To do this I grabbed my tri-square, a ruler and a pencil. I placed the cap in the angle of the tri-square and then slid the ruler along the 45⁰ angle where the blade of the tri-square meets the handle. I drew a line on the cap along the line of the ruler, turned the cap through 45⁰ and drew another line, turned the cap and drew again – I think you get the picture. After drawing several lines it was clear that they were not in the exact centre of the cap but together they marked out a spot which was, and that was where I drilled the pilot hole.
The pilot hole is a smaller hole than the one required which helps centre the larger drill. If you don’t drill a pilot hole the chance is that the larger drill may wander off centre and screw up the hole. The diameter of the foundation bolt was 12mm so that is the size of the hole I drilled. It was a tight fit but freed up with use.
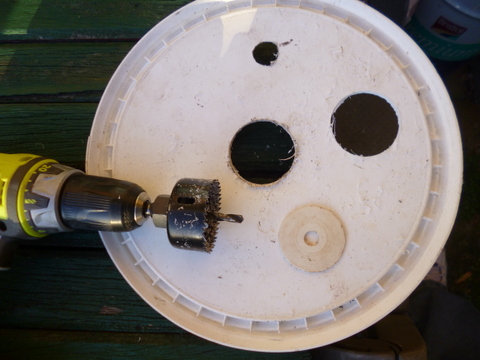
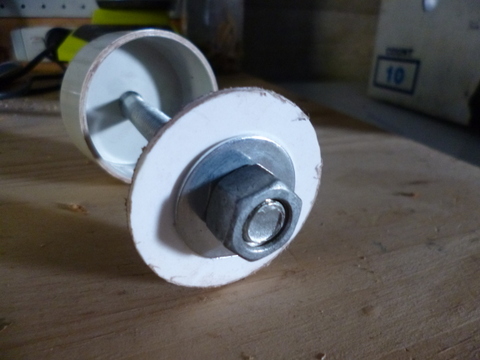
With the casing completed it was time to put the plunger together. The end of the foundation bolt is threaded so it was just a case of putting a nut and washer on it then slipping on a 50mm washer and then securing it with another nut and washer on the other side. Simple! Well I found out that 50mm washers weren’t just falling off the local trees! The plunger needs to fit fairly tight to the inside of the casing bore so you get all of the soil mix in your soil block. Seeing as a 50mm washers were thin on the ground I fished out a 50mm hole saw and cut a plastic washer from the lid of a recycled 20 litre bucket, which did the trick admirably well. With the plastic washer in place it just remained to fit the outer nut and washer to secure it. As well as holding the washer in place this nut makes a depression in the top of the soil block for the seed to be placed in.
Using the Soil Blocker
The mixture I use in the soil blocker is the same as I use generally as my seed raising mixture (ie 1 part coarse sand: 2 parts worm castings: 3 parts cocopeat, by volume). The water level is a bit hit and miss, too wet and blocks collapse, too dry and they collapse as well; it is a bit of a trial and error thing. Throwing in a bit of clayey soil with the mix may also help it hold together.
To use the soil blocker, pull the plunger all the way back, fill the casing with soil and then press the soil down onto a tray. When the soil mix is compacted pull the casing up the plunger so the soil block is left on the tray and start again. Place the seed into the depression in the top of the block and cover with loose soil mix to a depth of about 2-3 times the diameter of the seed. Water by running water into the tray which will then move up the soil blocks by capillary action, keeping them moist.
The types of seeds which do best in the soil blocker include leaf vegetables like kale, spinach, silver beet, lettuce etc. and fruiting veggies like tomatoes, capsicums and eggplants. Larger seeds and root veggies are usually planted directly in place.
When it comes time to plant, you just plant the block, seedling and all.
Making Tongs
It is possible to make a set of tongs to help you pick up the block without crushing it. To do this I got hold of some more of the 50mm pipe and cut off a 70-80mm length, then bought a cheap pair of metal kitchen tongs. The ends of the tongs did not fit the pipe very well so I used a hammer and pounded them lightly against a form, which in this case was my star picket driver. There was still a central stiffening rib which caused a problem with the fit so I just turned the tongs over and flattened it with the ball pein side of the hammer.
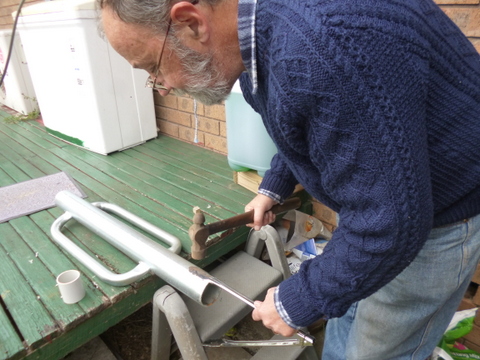
Once the tube fitted flush in the end of the tongs I pop riveted the tube on, then used my small band saw to cut the tube into two halves longitudinally. This gave me a pair of tongs I could use to gently pick up the soil blocks when it came time for planting.


