


This article was written by Elaine Seaman and she has given me permission to reproduce it here. It is a novel way to make self watering containers completely from discarded/recycled materials.
Basic Elements of the Wicking System
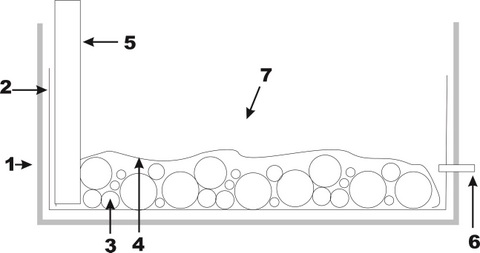
- A container—large or small, anything from a large pot or half barrel, to a polystyrene box, to a raised garden bed. For small containers a depth of about 30-40cm is perfect, 6-8cm for water and 20-30cm for soil.
- A plastic liner, unless your container is already watertight. A large carrier bag, a piece of polythene packaging, etc. If necessary, buy some of the thickest builders’ plastic from Bunnings. This should come up at least 6-8cm in the box, though if it comes all the way to the top that’s fine too.
- Something to put in the water reservoir that leaves plenty of space for water, and will hold up the soil above. Gravel, empty plant pots, old milk cartons—you get the idea, be inventive here.
- Something to stop the soil above from falling into the reservoir below. A piece of geotextile is ideal, but an old T shirt would work for a couple of years, until it starts to break down.
- A tube so you can fill the reservoir with water without disturbing your plants. A scrap piece of drainpipe, a juice bottle with slits near the base, you’re beginning to understand where I’m coming from, aren’t you? With drainpipe cut an uneven bottom edge so it doesn’t form a seal against the polystyrene. You want water to flow out of it easily.
- Possibly the most important part of the design, an overflow. This can be as simple as a hole about 1cm across melted in your poly box, and a corresponding hole in the liner. You can pretty it up with a piece of tubing but it’s not necessary.
- Fill up with good quality potting soil, or a mix of compost and soil, and then add your plants or seeds. Only plant seeds if you are sure you can keep the surface moist until they can get their roots down a few centimetres.
Water will wick up from the reservoir into the soil above, keeping the plant roots moist. The top layer of soil can get quite dry, but below that will always be damp.
What can I Plant in my Box?
- 6 or 8 lettuces from a punnet.
- 1 tomato or cucumber in the middle of one edge, and a few basil plants. To stake the tomato/cue, put a stick right down the inside edge of the box, but be careful not to disturb the reservoir or pierce the liner/base of the box.
- A selection of herbs—and keep the box close to your kitchen door for easy picking.
- 1 small variety pumpkin, or zucchini—allow it to trail over the edge and you can fit a few herbs or lettuces in as well.
- A dozen pea plants or climbing beans, make a stick wigwam for them to climb, but be careful with the sticks as above.
Don’t forget your box will need plenty of feeding to keep your plants growing well. Liquid feeds like worm juice can be added straight into the reservoir via the fill tube. When you harvest some of your plants, just pop new ones in to take their place.
Keep an eye on the water level in the reservoir. Bigger plants will use more water and need watering more often.
It’s good to mulch your box with about 2cm depth of sugar cane waste or chopped straw or similar, which helps prevent evaporation—it breaks down and feeds the plants, too.
How to make a planter that waters itself, from a polystyrene box
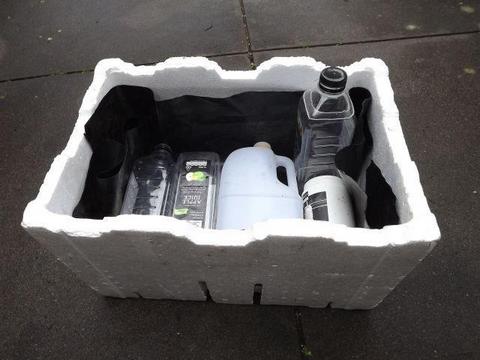
Poly box with plastic liner, and bottles to form the reservoir. I have poked/melted holes in the bottles to allow the water level to rise and fall easily.
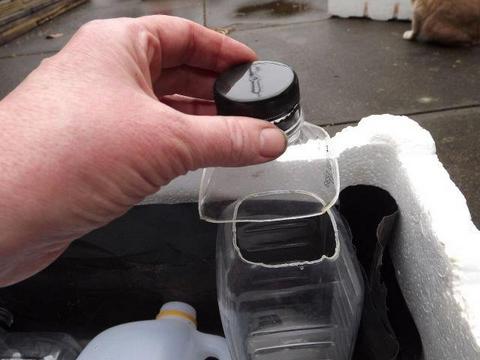
Close up of fill tube—this gives a larger hole than the bottle neck to make it easy to fill, and the top of another similar bottle, cut slightly larger, sits over it to keep the mozzies out. The rest of that bottle is in the reservoir.

Close up of the overflow—a piece of the liner cut out to coincide with a hole already in the poly box, at about the height of the top of the infill. If you have a water-tight box, just melt a 1cm hole, 6-8cm above the base.
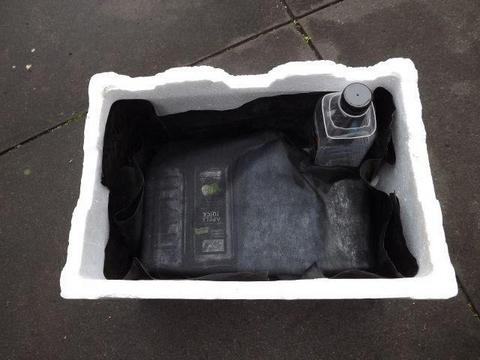
A piece of weed mat or ideally geotextile is tucked down around the bottles. This box is ready to fill with compost.
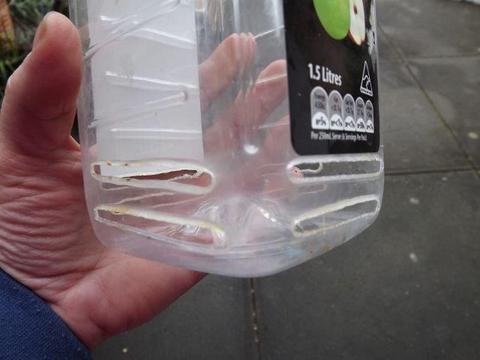
The base of the fill tube. I have melted several slots to let the water flow out easily into the reservoir.
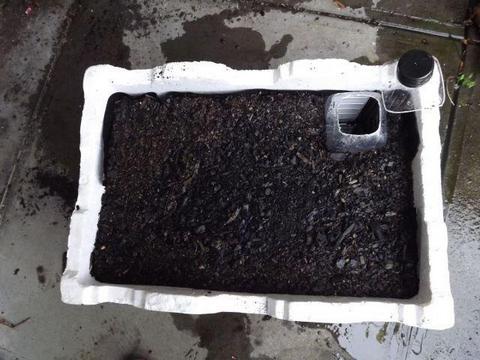
The compost is in and the reservoir filled with water until it started to overflow (at the overflow!). Here you can see the water level just by looking; with a narrower tube you can use a dipstick to check it. Ready for planting!
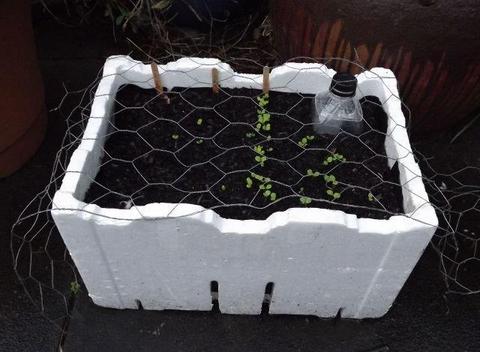
The finished product!
© Elaine Seaman, further copies may be printed off from the family website www.nicnak.com.au under the Articles menu.
