

A few weeks ago, Angela and Deniz approached me about assisting with the manufacture of some snack trays (four – one for each of the family including baby Zoe) which they had seen on the ‘net, but there were photos only, no plans. I was touched to be able to be involved with the creation of a new family tradition: movie night, with snacks!
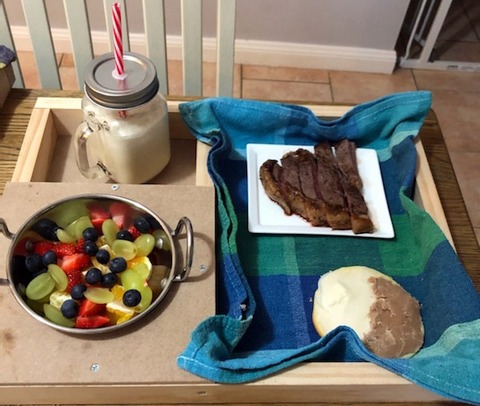
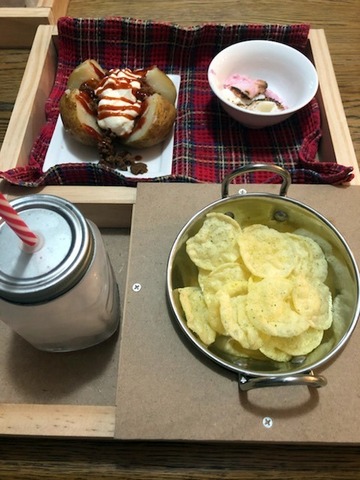
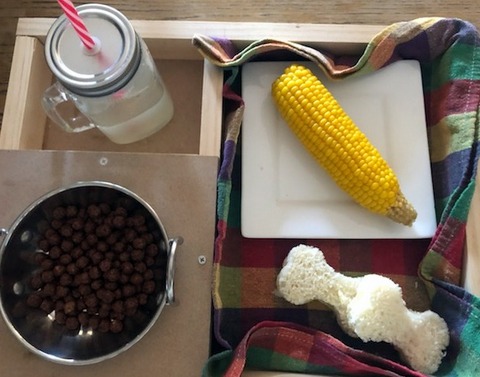
The idea is that the tray has 3, for want of a better term, compartments. There is a compartment on the lower left hand side which has a cover with a hole set into it to support a snack bowl, there is a compartment immediately above it which holds one or two glass mugs for drinks, with screw on lids which hold a straw. The mugs are used because they have a flat bottom and so are stable, but the lid and straw combo minimises the risk of spillage if they get tipped over, important for the kids! The largest compartment is designed to hold plates or whatever with the main snack load on them.
The main compartment is usually dressed with fabric (tea towel or whatever) to make things a bit more fancy and to reduce the plates slipping around if the tray gets tilted.
From what we could glean from the net, the lady who originated the idea dresses the trays up, and includes appropriate snacks, that fit in with the movies they are going to watch.

Deniz and I laboured for an afternoon and were able to build all four and I decided that it would be nice if we had our own. I have a weakness for 1950’s and 1960s scifi/monster movies which we watch on a Friday night and a tray for Linda and I to hold our snacks would be great! As previously mentioned, there were no measurements so we had to work out what made sense from scratch and this is what we came up with.
Components
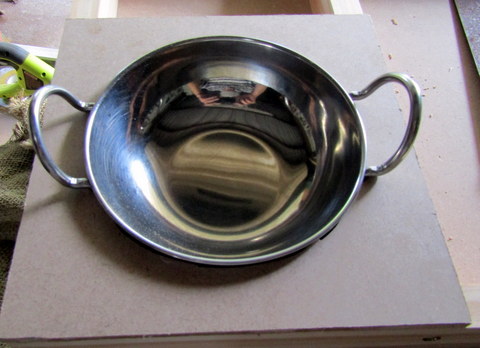
The trays are constructed from 3mm MDF board for the base, 6mm MDF board to support the snack bowl, and the compartments constructed from 42mm x 19mm DAR pine. We decided to use these components because they were easily available, cheap, strong enough to do the job but light enough for the kids to handle without too much difficulty (at least, when Zoe got a bit older!) The last component is the snack bowl, which in this case is a 145mm diameter stainless steel shallow bowl with handles on each side similar to the type I have seen used in Indian restaurants, mainly because that’s what they had, and that’s what we had.
Making the trays
1. First thing was to cut the base out from the 3mm MDF sheet. We estimated that 350mm x 450mm would be a good size. We used my battery powered circular saw to do this after marking out with a pencil and a length of the pine as a ruler.
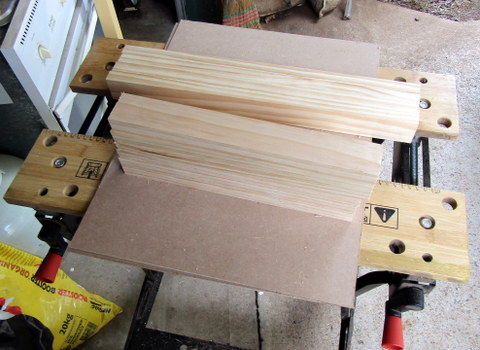
2. The second thing was to cut out the framework from the 42mm 19mm pine. This required us to cut two pieces 450mm long, three pieces 310mm long and one piece 160mm long. When I was at Angie and Deniz’s place we used the portable circular saw and a makeshift bench constructed from a multi-folding ladder, which is nowhere near as clumsy and dangerous as it sounds! When I made our at home I just used my drop saw (boooring!).
3. With the base and framework cut out it was just a case of putting it together. We did this by gluing and screwing the long (450mm) sides on first. We applied PVA glue to the edge of the timber and set it up on the bench such that the base was on top of the sides. With everything lined up I screwed in an 8 gauge 25mm chipboard screw in the middle of each side to secure them, and then one on either end.


4. With the long sides secured, we started on the short (310mm) sides which fit inside the long sides to form the outer rim of the tray. With the tray right side up we applied clue to the edge of the timbers and placed them between the long sides. To secure them first we predrilled one 2.5mm (7/64”) hole in each end of the long side to prevent the timber splitting and installed the screws. We then turned the tray over and put two screws through the base into the short side timbers. This resulted in a light but strong tray frame.
5. The dividers were next. We did this with the tray right side up, and placed the third 310mm piece of pine into the tray and located it 160mm from what would be the left hand side of the tray. We put the pine into place and marked where it fit with a pencil, applied the glue to the edge and replaced is as marked it then secured it with a screw (pre-drilled) into each end.
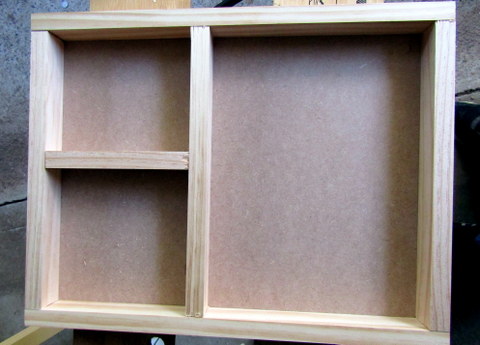
6. With the first divider in place is was a simple task to put the 160mm support in so that it formed a square in the bottom left hand corner of the tray, secured it with glue and a predrilled screw in each end through the tray framework to support it until the glue dried.
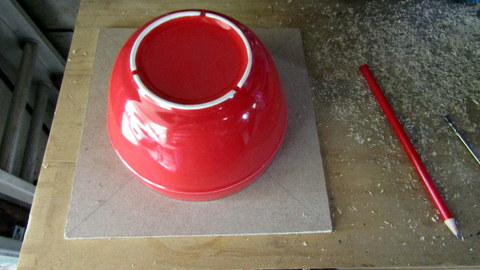
7. The most techo part of the whole build was to make the support for the shallow bowl out of the 6mm MDF. I originally got 6mm because I thought that it would maintain its rigidity while supporting the bowl, but having now made the trays I suspect the 3mm MDF would have been fine.
To set out the bowl support we found a bowl slightly smaller in diameter than the ‘official’ bowl to use to mark things out. (They did not have a compass in the house to allow me to draw a circle in pencil). WE drew cross lines diagonally from corner to corner with a pencil, then use the cross to locate the upturned bowl in the centre of the support board by eye, then traced a line around the outside of the bowl to form out cut line. We used a jigsaw to cut out the central hole by drilling a 10mm hole close to the traced line, inserting the jigsaw blade, then cutting around the line to remove a circle from the centre of the MDF.
For our trays, I test fit the shallow tray and found the handles sat out a bit, reducing its stability so I used a round file to make a place for the sides where the handles fitted onto the bowl to sit down inside the circle cut from the centre of the MDF. It was then just a case of screwing the MDF bowl support down onto the tray with one screw in the centre of each side.

The trays are completed and we have used ours a couple of times for our Friday night sci fi and monster movies and they are great. We are happy with how they work, but I think a coat of paint or two would be a good thing to finish them off.
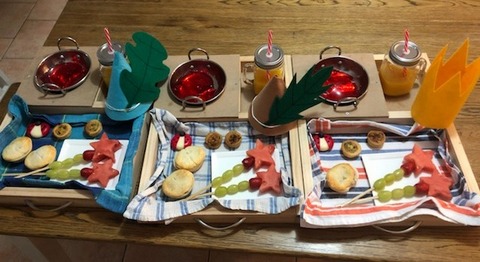
In use!
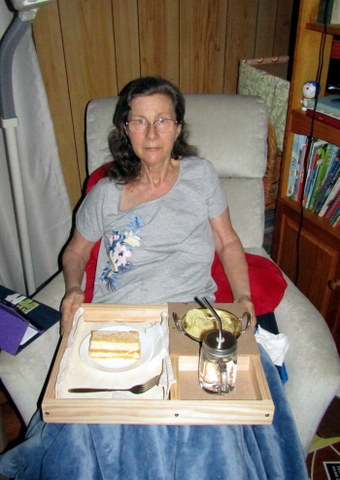
As set up by Angela for various movies.
Movie: "Ben and Holly's Little Kingdom" (two part episode entitled 'Planet Bong')
(trays included a hat, Gaston Babybel cheese ladybugs, mini pies and quiche, fruit wands, orange juice and magic jelly)
Movie: "Madagascar 1"
Movie: "Frozen 2"
Movie: "Paw Patrol: Ready Race Rescue"
