


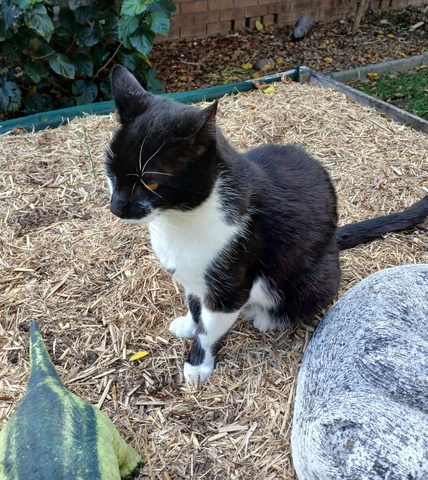
On completion of the original construction, and approval by the furry engineer
A bit over fourteen years ago, I installed a wicking bed to grow asparagus in the front yard. It was composed of two 1200mm x 1200mm x 310mm commercially available ACQ treated timber raised beds, one sat on top of the other. The mechanics of how that was done can be found here.
Back in the day it was a very productive space providing us with lots of asparagus for several months every spring, but in recent years it was not very productive and the bottom bed had started to come apart. The problems as I saw it were –
- The original material in the bottom of the bed that supported the growing medium and acted as the water reservoir were wood chips, which I had on hand, rather than gravel or coarse river sand I would have had to buy in. These worked well for quite a few years but eventually broke down, allowing the growing medium to sink into the reservoir area.
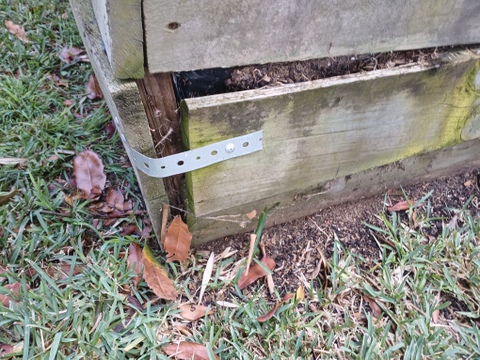
- The raised beds were composed of a treated timber that allowed them to do their job for many years, but eventually the bottom part of the raised bed had started to come apart and while I had applied some reinforcing, it was not good enough.
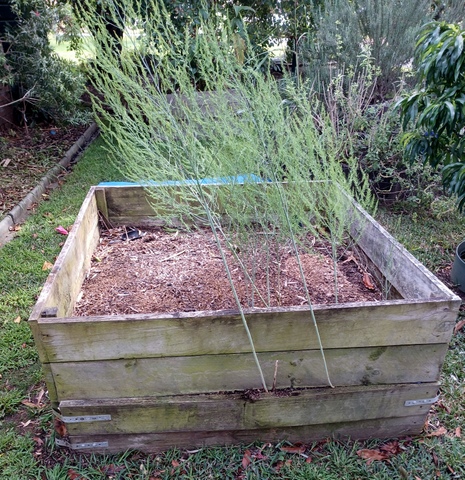
Fourteen years later!
Slow decay!
There were also other problems that I was not aware of until we started to re-do the bed.
We started to remove the soil inside, being careful to look for asparagus crowns, and dumping the soil on a tarp. It was interesting that the southeastern corner of the wicking bed had lots of asparagus crowns that looked in reasonable condition (some actually looked like the facehuggers out of alien!) whereas the rest of the bed had a couple of really sad looking ones. That may mean something but I’m not sure what!
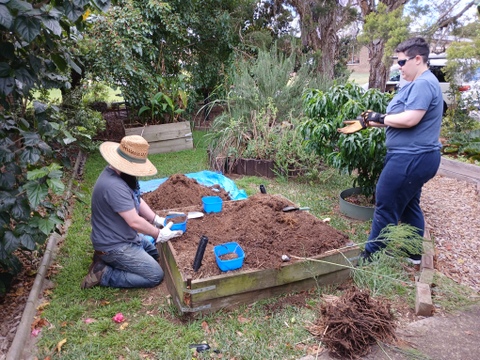
Removing the growing medium carefully and removing the asparagus crowns
As the soil continued to be removed, it became clear that the bottom section of the raised bed was in somewhat worse condition than I thought, so I figured it would be better to replace it with a new one. With all the soil removed another problem became clear – The builder’s plastic that I had used to form the water reservoir had been ripped in various areas, apparently by tree roots looking to share the water, and perhaps nutrients as well.
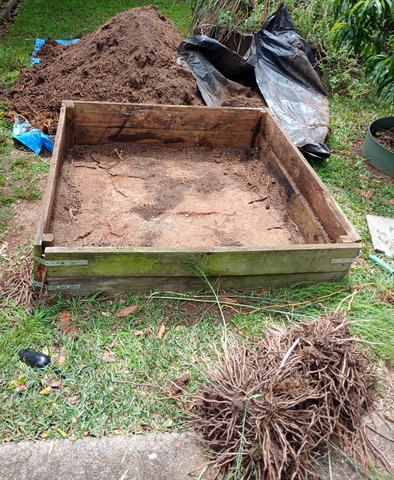
Soil, plastic membrane and asparagus crowns removed!
The rebuild
I acquired a new raised bed to replace the bottom one and some builders plastic to replace the shredded stuff. I actually wanted pond liner, but was not able to get hold of any so would do with two layers of builder’s plastic. A friend on Facebook suggested that she had lined her wicking beds with carpet and pond liner, resulting in no problems with tree roots. If I had known about the carpet, and had some, I would have definitely done that!
Before we put the bottom raised bed in place we made sure to dig out all the roots that we could find, hopefully that will slow things down a bit. We the put to bottom bed in place and fitted in the two layers of builder’s plastic. Rather than using wood chips this time in the bottom to act as the reservoir we used 10mm blue metal gravel…. And thereby hangs a tale!
I calculated that I needed about 750kg of gravel or a bit less, and rang up to order it from a local supplier. They had what I wanted but informed me that because I wanted less than a tonne, I would have to pay more for delivery. In the end it turned out that if I ordered a tonne instead of 750kg the overall cost would be about $20 less! Needless to say I went with the tonne and have used the excess in other areas. That made no sense to me at all!
Back, to the bed
We started putting in the gravel (then remembered to insert ag pipe watering point) and filled it up until it was mostly level with the top of the bed and the black plastic had been folded over the top of the bed. The gravel was formed so that there was a well in the centre, and a piece of 50% shade cloth was placed on top of the gravel before the growing medium was added. The idea was that the well in the centre would allow the bottom of the growing medium to sit below the water level, allowing water to wick up into the rest of the bed, and the shade cloth would prevent the growing medium from working its way down into the spaces between the gravel.
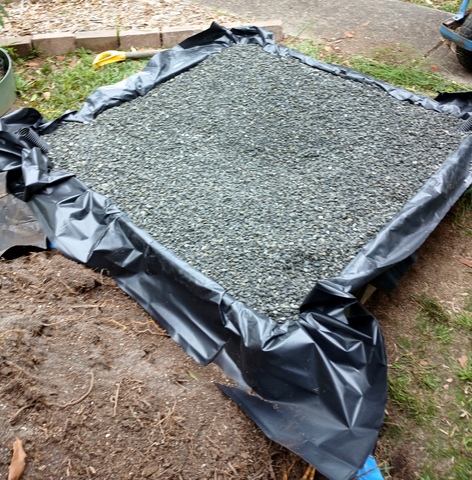
New plastic membrane, 10mm gravel and ag pipe watering point installed
With all of this done, it was then time to replace the top bed (still in reasonable condition) on top of the new lower bed and fill the top bed with growing medium. That was the theory, but when we placed the old top bed on top of the new lower bed we found that in the intervening years the manufacturer had decreased the size of the beds by a couple of centimetres. (Insert colourful language).
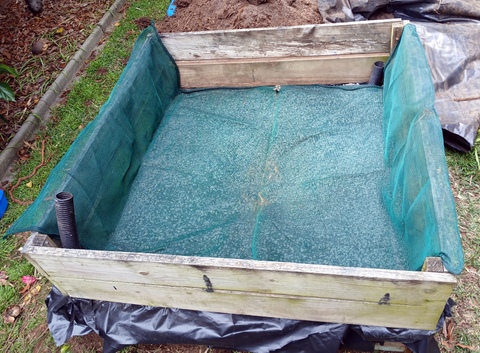
Extra boards and shade cloth installed
To get around this we removed four boards from the old bottom bed cut them down by a few centimetres and screwed them on the inside of the old top bed. This meant that the top bed could sit on the bottom bed without there being a gap that the growing medium could escape through, and the whole set up would be secure. With this done we could place the growing medium in the top bed.
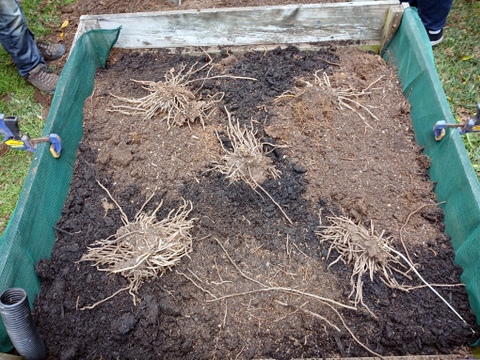
Installing the growing medium and five of the removed asparagus crowns
The growing medium we used was a combination of the rotted down woodchip, growing medium from the previous bed and some added compost and potting mix. We filled it up about half full, then placed five asparagus crowns on the bed and covered them with the remaining growing medium.
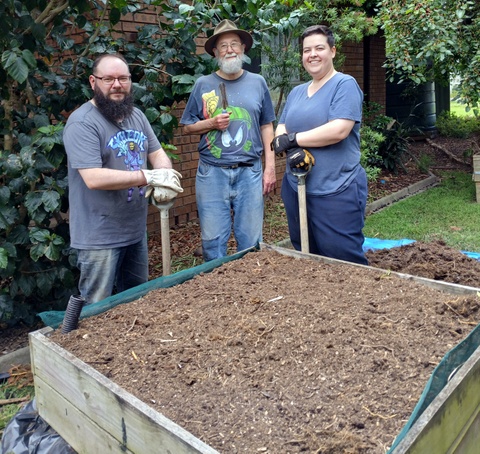
Mostly complete (and meet your construction team!)

Complete (and with the departure of out furry engineer, we had to make do with approval from the engineering brontosaurus!)
It was then just a case of trimming off the excess black plastic, adding a layer of sugar cane mulch and filling the water reservoir with tank water. The job is now complete, and I am waiting to see if the asparagus crowns will sprout this year!
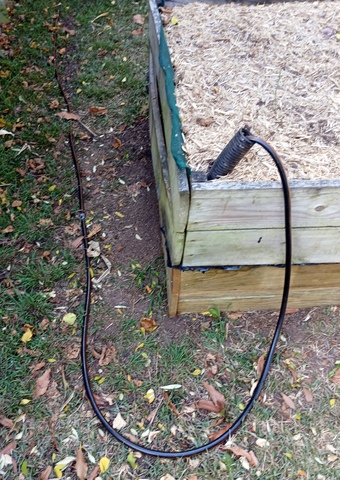
Filling with tank water
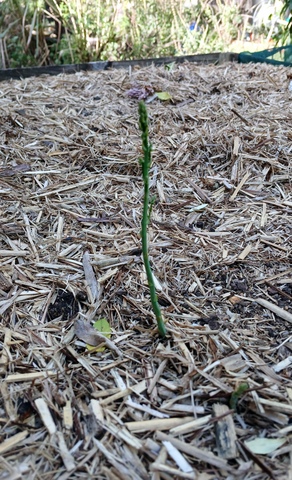
Two weeks later and three of the five crowns are sending up shoots, and
The next-door-neighbour's furry engineer has expressed interest in coming on board as a consultant!
