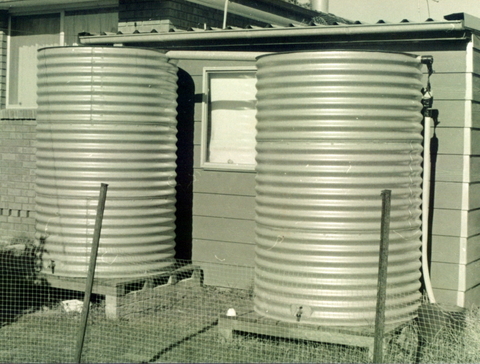
The original tank setup on the back of the garage
We put the original 500 gallon galvanised steel tank on the back of the garage over 40 years ago, and that was the start of our water tank journey. About six months later I decided we needed a second 500 gallon tank on the back of the garage and we bought and installed that. The original tank lasted about 15 years and when it got too many rust holes to be serviceable, it needed to be replaced. Things had moved on since the original tank and the replacement was a galvanised tank, but made with ‘Aquaplate’ and has a plastic liner so that it looks as good as it did the day we bought it!
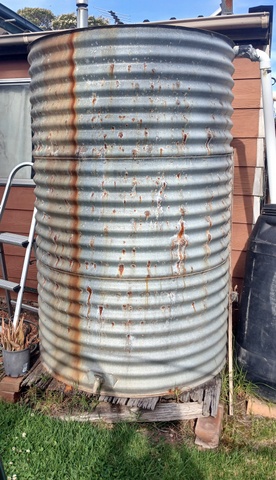
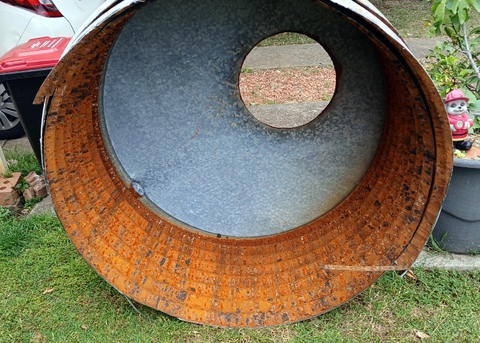
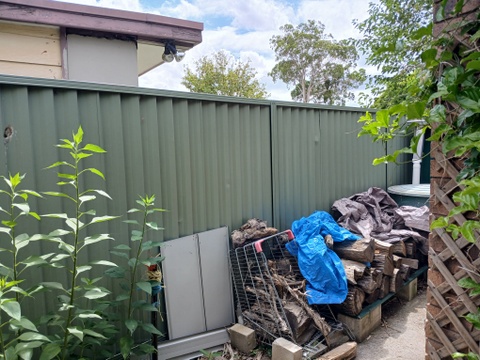
The tank (or should that be sieve?) as it was in 2024
When we installed the second tank, they gave us a sachet of some phosphate based chemical to dissolve into the water and form a protective coating on the inside of the tank. It must have worked because instead of a 15 year lifespan, it has been over 40 years. Unfortunately all good things come to an end and last year (2024) I got tired of trying to patch it up and committed to draining the tank slowly by using its water to water the veggie patches. (This became problematic).
It took some time for the tank to be whittled down slowly and by the time it was about a third full, that area of the yard had started to develop a rather rank smell and I became concerned that the water left inside had gone stagnant. How wrong I was!
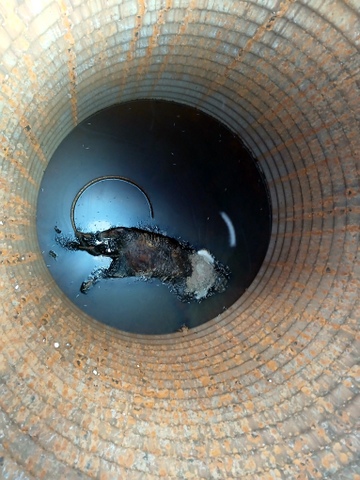
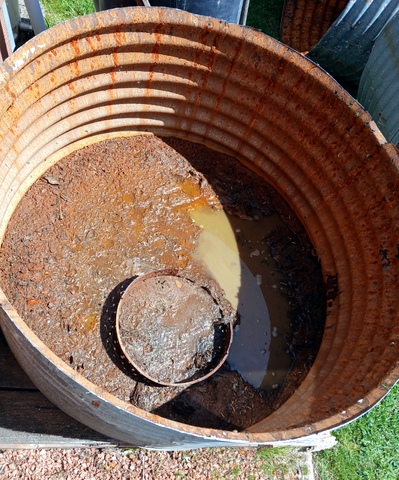
Tank c/w corpse (what appears to be along round tail is the rim of the galvanised disk sitting on the bottom of the tank)
I decided to get a ladder and see what I could see from the top of the tank. The place where the rainwater gets into the tank was a circular galvanised disk pressed into the top, solid on the bottom, with holes around the sides for the water to get in. The first thing I noticed was that this was missing, which I guess was handy because it allowed me to see down into the inside of the tank. I did so and noticed, disconcertingly, that there was a corpse floating in the bottom of the tank, a corpse beloved of the blow flies.
It seems that an animal (it was a bit big for a domestic cat and none of the locals had gone missing) was walking across the top of the tank when galvanised disk (which was pretty rusty) collapsed, precipitating the animal down into sufficient water to drown it. It had been fulminating in there ever since. Trying to ignore my gag reflex I had to work out what to do, especially since the stink had gotten worse, and when the wind was from the south, it took the stink to all corners of the rest of the yard, not to mention some of the neighbours!
I turned the tank tap on slowly so the water could dribble out over several days, which it did. As tanks do, though, there was a few centimetres between the bottom of the tap and the bottom of the tank, so, once there was no more water coming out of the tap, I drilled and 10mm hole as close to the bottom as I could get, and the wait began again. Once the water was gone (but the corpse was still there) the only way to move the tanks and get it off the stand was to cut it up.
Top and middle of the tank cut off and removed to the front yard
Bottom of the tank still in place, sans corpse, and slowly drying out (and no less smelly!)
Using my angle grinder, I cut off the top third and rolled it out the front, then cut the middle third and cut it into halves to make removal easier and they both went out the front also. That just left the bottom third, complete with corpse. There was also a 15 to 20mm of water still in the bottom, but with the top two thirds removed the sun could get at it and evaporate it, as well disseminating the smell!
Once the water was mostly gone, I tricked my son-in-law into helping me manhandle to corpse into a double garbage bag and from there into the garbage bin. It seems he also has a gag reflex!
I could then remove the bottom part of the tank and inspect the timbers on top of the brick base that supported the tank. While I was hoping to get the tank to a recycler, the next-door-neigbours’ daughter (who lives on a property) was able to take them and turn them into raised garden beds. I would like to have used them in this way but didn’t have room.
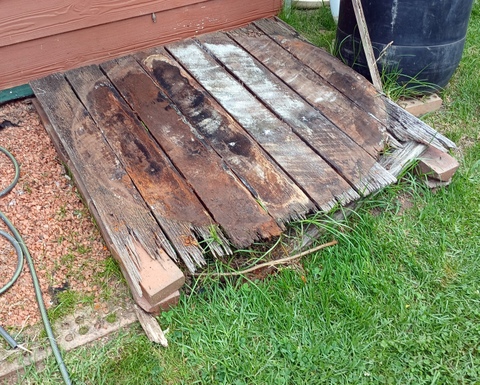
The original timber base. Not too bad, but not good enought to support a new tank!
Having inspected the tank support timbers and found that they were in not great condition from being 40+ years in the weather, I removed them and started work on replacements. The original timbers were bought from a timber yard that was long gone, but after a few enquiries I was able to find a place in Blacktown that could provide me with what I wanted.
The original timbers were 90mm x 70mm hardwood timber joists covered by 150mm x 25mm hardwood timber decking, these were unavailable or prohibitively expensive, so they were replaced with 90mm x 70mm treated pine joists, covered by 150mm x 50mm treated pine decking. With these in place I just had to order the tank.
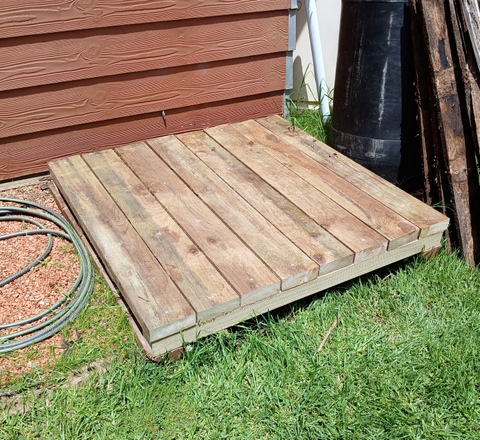
New timber base in place
I wanted to get a tank with a similar look to the original one, but instead got a galvanised steel/Aquaplate square tank because it would hold a bit more water than a round one. It took about a month for the supplier to make and it arrived a few days ago.
A lot has happened to the place in the intervening 40 years since the original tank was bought in. Sheds, more tanks, higher fences and other stuff has gone up on our place, they proved to be possible barriers to tank installation. My original thought was to get them to drop off the tank in the front yard and I would harass family members into assisting to get it over the fence and set up. Fortunately (for me) there were four fit young guys who came to deliver the tank, and after some discussion between them, they agreed that they could do it.
This is the fence they had to get it over
This was a very good idea because the effort that they went to, to install it, showed me just what a stupid thought my original idea was! Anyway, thanks guys, I will be eternally grateful for your help. (The company was Kingspan tanks for those who are interested).
With the tank sitting on the platform I just needed to get hold of an outlet valve and connect up the drain between the gutter and the tank. Seems so simple to say!
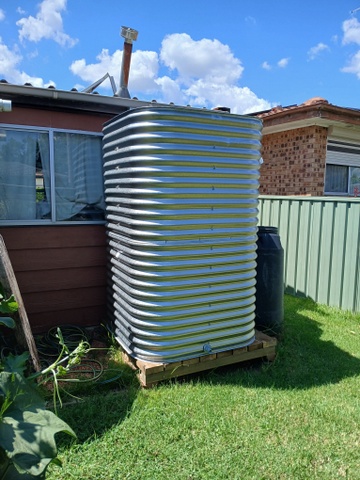
The new tank is in!!!!
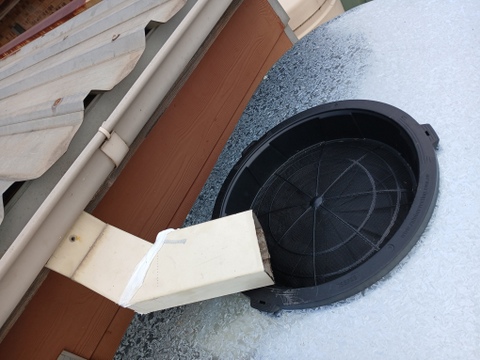
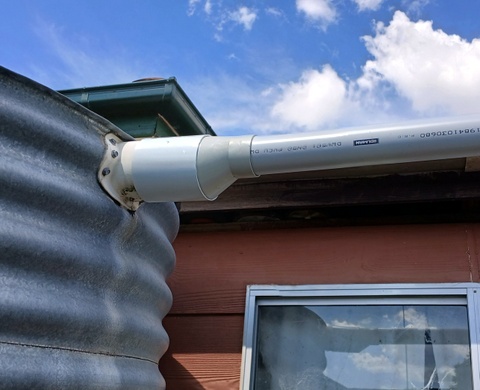
The outlet valve was not the type that I wanted (ball valve) because I couldn’t get the right size so I got a 25mm gate valve and fitted it with a 25mm galvanised elbow to act as a spout. With that fitted, I grabbed the downpipe that had connected the gutter to the original tank and…….oops! The downpipe no longer pointed at the inlet to the tank. Moderate miscalculation here, and I had to do some cut and shut to make it point in the right direction.
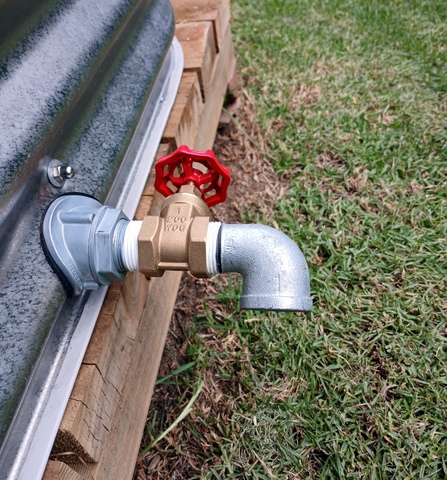
New outlet valve
When I installed the second tank of the original pair, I wanted the overflow of the first tank to feed into the inlet of the second tank, because there was only one downspout from the gutter. This meant the inflow of the second tank was closer to the first tank, rather than the gutter. Many years later, when a roofer mate helped me replace the gutter, he put in a second downspout and we put in a downpipe pointing it to the second tanks’ inflow. I still had the outflow from the first tank piped into the inflow of the second just in case.
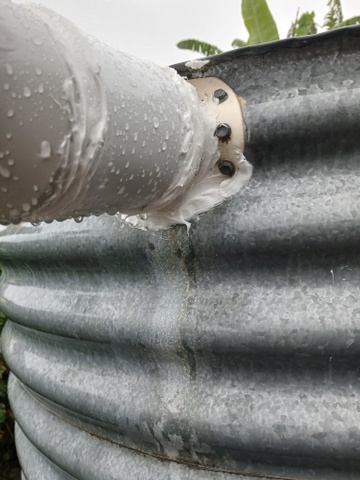
So now with the tank being a bit taller and the new inflow being closer to the gutter, the gutter outflow was in the wrong place. After some metal work and application of the wonder product (silicone) it was all set up.
Not quite lined up.......
But it works!
It seemed that once the tank was all set up it would be a week or two before we got any rain, but that night we got a steady but light rain for most of the night! Woo Hoo! Needless to say I was out early the next morning to check out how much water was in the tank – and it was almost nothing!
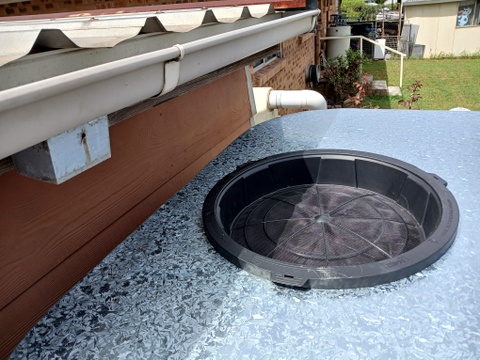
With the new tank being mounted 25mm higher than the original tank (due to the thicker decking) I wasn’t sure I could run the water from the outflow of the older tank to the inlet of the new one, so that had not been done. After considerable looking, prodding and thinking, it turns out that most of the water from the roof of the garage went into the older tank first, and then overflowed into the newer one, very little went into the new tank directly from the gutter! Who’d a thunk it!
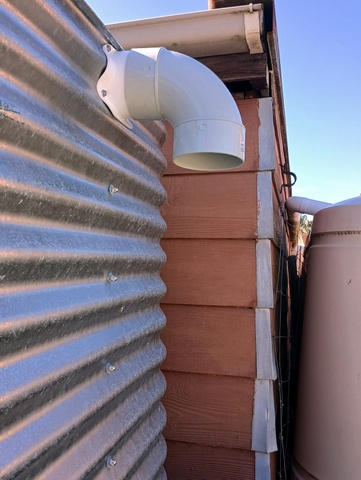
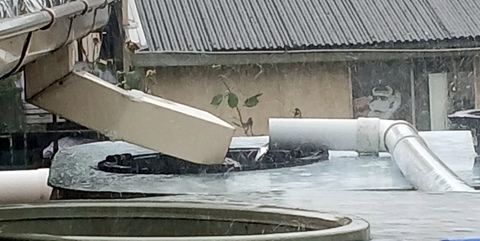
90mm down to 50mm
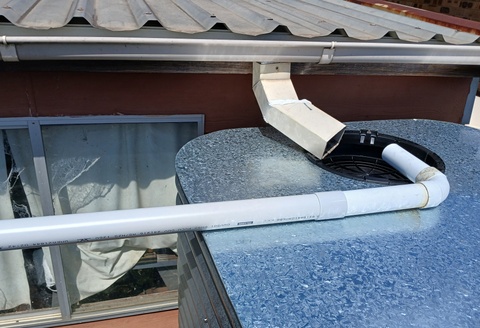
Overflow from the old tank goes into the new tank (hopefully)
As a result of that I spent some time in the morning working out a way to connect the two tanks. The outflow from the older tank was 90mm, so what I did was to get hold of a greywater adapter to take it down from 90mm to 50mm, and then run a 50mm tube, through a 90° elbow into the inflow of the new tank. I checked and the 50mm tube is nice and level so the water should flow easily from one tank to the other.
That was the Saturday, and again, on the Sunday night, we got unscheduled rain! There was not enough to top up the old tank to the point where it would overflow into the new tank, but I was able to check and indeed there was much greater flow into the older tank compared to the new one.
As usual, things didn’t turn out to be that simple! When we did get more rain and the older tank filled up to the point where it could overflow into the newer tanks, I noticed that water was escaping from the fittings leading from the outflow of the older tank rather than flowing into the new tank.
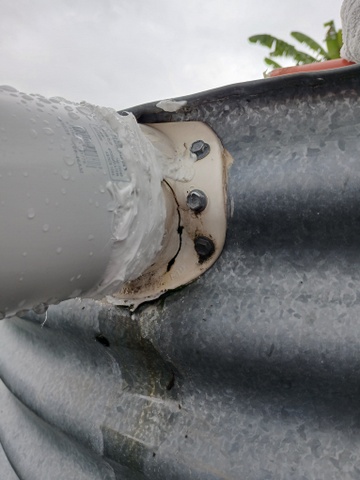
After some investigation it appeared that water was escaping from the bottom of the greywater 90mm to 50mm adapter and the seal at the bottom of the outflow fitting on the older tank wasn’t great, allowing water to escape. After using silicon to seal both leaks there was still water running down the side of the tank when it rained! It turns out that this was because there was a whacking great crack in the side of the plastic fitting which was hidden by the piping! Once that was sealed, we started to get water flowing into the new tank from the older tank.
It took a while, but with some good rain and the system finally working as it was intended the tank is now full, and I have installed a 90 elbow on the outflow of the new tank to help manage the overflow.