I first put in the constructed wetland to take the output of greywater from the washing machine and the dishwasher almost ten years ago. Originally, I ran some flexible hose from the valve under the laundry sink to the input of the constructed wetland. To keep it in a more-or-less gentle slope from valve to the wetland, I ran it through a plastic pipe, then rested pipe and all on top of a couple of buckets to try and get the water to flow downhill. (see below).
While it worked reasonably well there were a couple of problems -
- The set up was not particularly stable, and this could result in the outside section of the hose and tube falling out of the wetland onto the ground sending grey water everywhere!
- The hose, being flexible, had a habit of sagging down where it came out of the valve, around and out the door. This tended to cause an airlock in the system, which could be remedied by lifting up the hose, allowing the water to start flowing through. The downside of that was it would then gush out in a hurry rather than flowing slowly thought the constructed wetland as I had originally designed.
I decided that I needed to sort out these problems so the system would not just be OK but work well.
Problem one
I wanted to put something together that would support the hose/tube, keep it in place and be adjustable so that I could set it to the best height to do the job. I had an old tripod or ‘rain tower’ sprinkler, which we no longer used because we have more efficient irrigation systems in place. It was height adjustable and no longer in use so would be a perfect base for my fix.
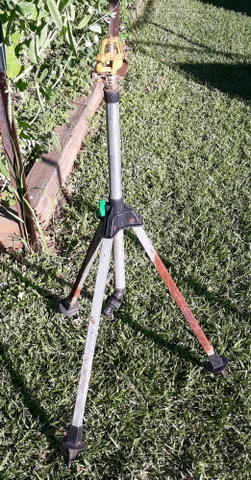
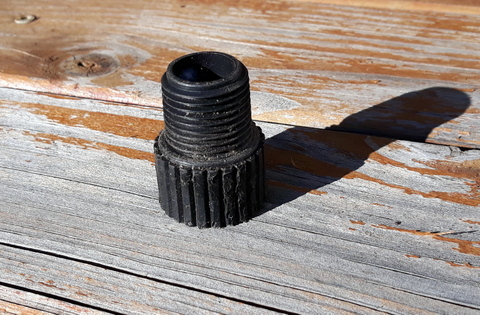
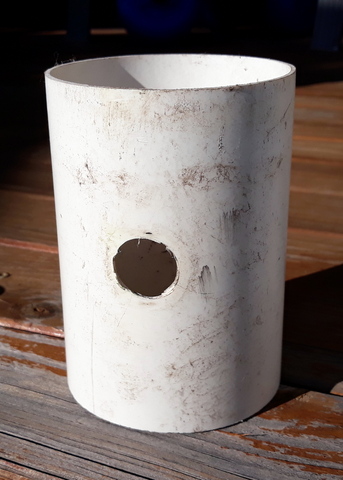
I removed the sprinkler head, and then looked around to see what I could find to secure the 90mm PVC pipe to the space where the sprinkler head was so that could attach it solidly. After trying various fittings, I found a 15mm poly irrigation male to female adapter while rummaging through my ‘Bits & Pieces’ containers. As luck would have it, this was a perfect fit for the hole where the sprinkler head was screwed it. I grabbed a 120mm length of 90mm PVC tube, drilled the appropriately sized hole in it about half way down, screwed in using the adapter and bingo! It worked.
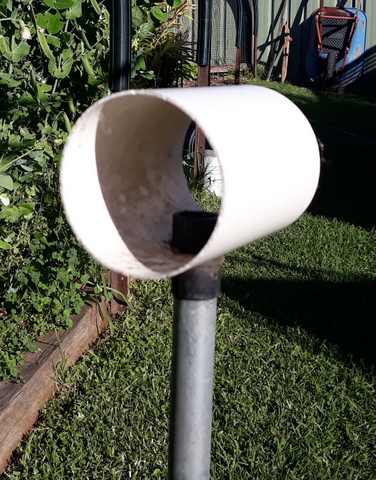
In less time than it takes to tell I was able to put the hose/tube set up through the 90mm tubing and set it to the appropriate height.
Things were now working much better, but I was still stymied by problem number two!
Problem two
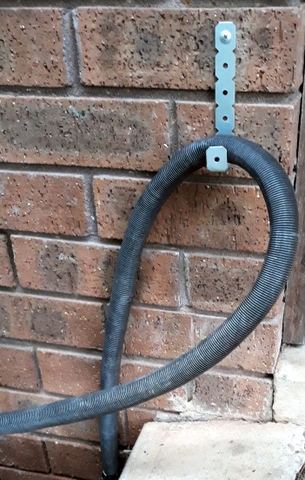
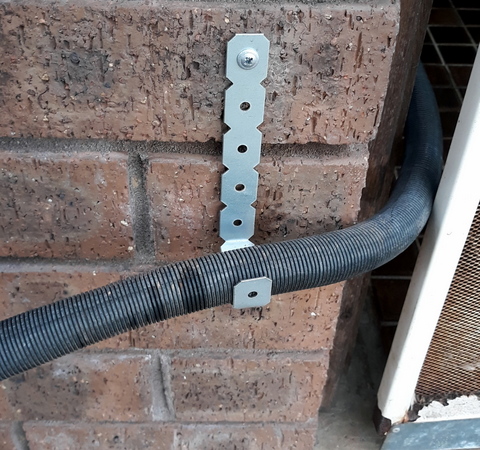
The ideal solution to problem two would be to drill a hole through the brick wall of the laundry and run some pipe at the appropriate height which I could put the tube through. Unfortunately, the lack of room to allow the tube to turn and the fact that the laundry walls were fibro (asbestos) put me off that fix. I couldn’t really find anything that filled the bill in my stash so I picked up two ‘Carinya’ 20mm x 200m x 1mm flat ‘make a bracket’s.
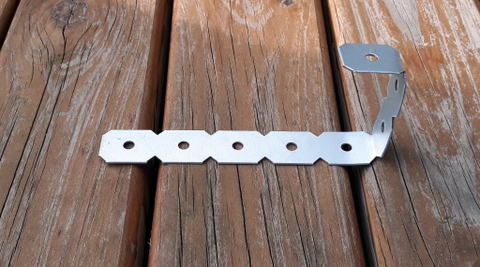
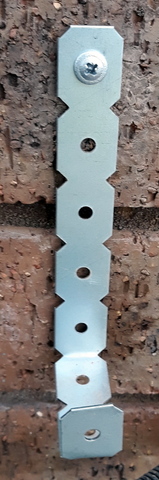
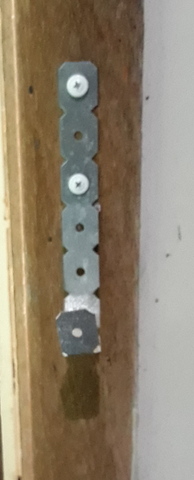
I bent the ‘make a brackets’ into a ‘U’ shape (sort of) with a long side of 125mm, 50mm along the bottom and then 25mm up the other side. By screwing one on the inside of the door jamb and one into the bricks on the outside wall of the laundry near the door, I was able to run the tube around the door jamb with sufficient support that it could maintain a small but steady fall from the laundry valve to the entrance to the constructed wetland.
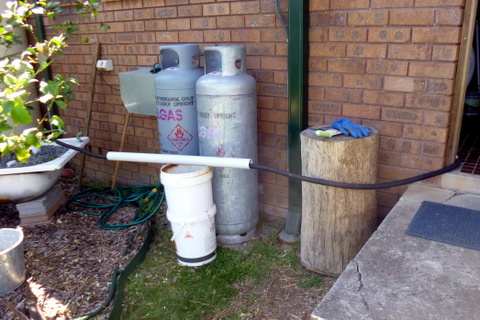
With all of this now in place, the system functions as it was designed, with the laundry sink acting as a surge tank, accepting the outflow from the washing machine and/or dish washer, but allowing the greywater to flow out into the constructed wetland at a much slower rate.
There has also been an unlooked-for benefit from installing the outdoor bracket.
When we have finished washing or using the dishwasher, so we can shut the back door, we remove the flexible tube from the valve and put it on a lump of wood near the back door. What tends to happen though is that the tubing slips off and drops down beside the steps, so we have to climb down, bend over and pick it up to set the system up for the next wash. (If you are laughing about this, wait till you get old!) With the outdoor bracket now in place we can loop the tubing over it, securing it so that it is easily accessible when we need it for the next time.